Followers

Total Pageviews

Showing posts with label AquaTints. Show all posts

Saturday, 24 September 2016

AMOR ETERNO

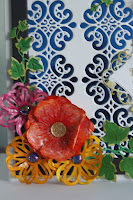
Morning my crafting friends, hope this finds you all safe and well. I had a request from my daughter last week to make a DOTD wedding card as her friends were having a Mexican themed wedding so here is what I made, it was originally A4 size as we wanted the skeletons on the side but it seemed to big for a wedding card so made it into an Gatefold card. My apologies got to Ang lol! ...


This was the front, I did not want it too fussy so kept to the corner and edge stamps with sentiments and just added a few flowers.


For the inside I chose Creative Expressions Foundation card Rich Plum and Silver Miri card for the layering, although the main colours had to be Pink & Blue I chose these as contrasts.


So I got my Rich Plum card and embossed it with the Sheena Douglass Indian Lattice Embossing Folder so it had some texture. 

I made each skeleton from Sheena Douglass day of the Dead Range of Perfect Partners up in a certain pose, the man with his top hat and cane the woman with her veil and flowers. I even coloured their boots to go with the colour scheme lol!


For the main feature inside I chose the Sheena Douglass DOTD Union of Souls stamp, I got a piece of White card and stamped the couple on then painted Pebeo Drawing Gum over the top, let it dry before I coloured the background with Aquatints Pastels to get the light Blue & Pink then I removed the Drawing Gum.


Using Aquablend pencils I coloured in the couple keeping to the colour theme but adding a little Purple in certain places. Once coloured I ran it through the Sheena Douglass DOTD Frame Embossing Folder, this just fitted round the couple perfectly, I decided not to colour over the embossed area as I did not want the focus lost from the couple and the beautiful deep embossing you get from these folders made it stand out anyway. I matted this onto some Silver Miri card. 

For the inside I matted with the Silver Miri card and Rich Plum  Embossed card but before I stuck down the Rich Plum card I wrapped some Vintage Lace Ribbon round the bottom, not only did this give it a slight vintage look and filled up the empty space but I think the pattern of the lace went well with the DOTD theme. I glued this down in place then added the couple so the bottom of the card just covered the top edge of the Lace.

There you have the finished card. I am happy to say the recipients absolutely loved it and are getting it framed.

If you have any questions please do not hesitate to contact me.

Thank you for looking, Jacquie xxx

Monday, 15 August 2016

Christmas Canvas

Hello crafters, cannot believe how long it has been since I last posted, my apologies but I have been a very busy bee lol!

Today I have something a little different for you in the way of a Christmas Canvas. I made this with all Sheena Douglass goodies along with some Pebeo Prism Fantasy paints, these were recently aired on Hochanda in the mixed media shows, they really are beautiful and create these wonderful patterns when dry.


I started with a plain canvas, painted it with White Gesso then added a couple of sheets of kitchen towel for texture and a few beads here and there and painting over this again with White Gesso to stick it down then left to dry. Don't forget to paint the sides too!

Whilst waiting for the canvas to dry I die cut some Holly leaves, Ivy and Poinsettias and coloured them in with Aquatints and Aquablend pencils. When dry I stamped over the Poinsettias with the matching stamps using Tim Holtz Distress Inks. I also die cut some Christmas Baubles. With the baubles I spread out some of the Pebeo Prism Fantasy paints in each one, the Red & Turquoise I added a bit of Gold into the colours but left the Purple as it was, I put these aside and left to dry overnight. You have to leave this paint to dry at least 6 hours so it is better to leave it overnight but its amazing to watch it dry and see the patterns form, who said time is like watching paint dry? Or something like that lol! You can see more of the wonderful pattern in the Red one.

Once the canvas was dry I painted it with Aquatints Bright & Beautiful but decided it was far to bright with what I wanted so I painted over that with watered down White Acrylic paint to diffuse the colours. When this was dry I took the Pebeo relief gilding paste and drew some small circles and trails of dots over the board, and glued down some string to attach the baubles to. I also added a few small drops in the center of the Poinsettias and once dry rubbed Gold foil over them. When the Pebeo paste was dry I filled in the circles with Pebeo Prism Fantasy paints Gold & Turquoise and rubbed Gold foils over the dots, edges of the circles, string and edges of the kitchen towel, anywhere you want it to go really to add a bit of shine.

I placed the holly leaves, Ivy and Poinsettias on the board deciding the best place to put them before attaching them with glue. The next day I added some gilding wax to the edge of the baubles before gluing them into their positions. I added more gilding wax around the canvas and on the edges and corners.

There you have the finished canvas. Quite pretty I think and very colourful, just great for Christmas.

Items Used:

Pebeo Prism Fantasy paint (various colours)
Pebeo Relief Gilding Paste
Pebeo Foils Gold
Sheena Douglass Perfect Partners Festive Fancies Festive Ivy & Christmas Ivy
Sheena Douglass Perfect Partners Festive Fancies Hollies & Berries & Holly Jolly Christmas
Sheena Douglass Perfect Partners Festive Fancies Pionsettia & Perfect Poinsttia
Sheena Douglass Perfect Partners Festive Fancies Festive Baubles &Deck the Halls
Tim Holtz Distress Inks Abandoned Coral & Victorian Velvet
Spectrum Noir Aquatints
Spectrum Noir Aquablend Pencils
Small Canvas Board & Easel
Kitchen Towel

Thank you for looking, Jacquie xxx

Tuesday, 5 July 2016

Sheenas Book Lovers Christmas Stamps

Hello my crafting friends, well its been another busy week or two, don't know where the time goes lol!
As you may have guessed our Sheena has some new stamps coming out this week they are her Book Lovers Christmas Stamps. You can view them all on Hochanda on Thursday at 8pm or Friday at 9am 12 noon, 4 and 7 pm. 

Here are a couple of my samples to show you.

This Bow card  shows the head of the lady & Gentleman stamps, the Girl and the Christmas Rose

I used two Aquatint pastel colours, Blue & Purple to colour the background then on the first Bow I used one of the sentiment stamps and stamped all over the bow. I added some die cuts and Lace between the layers to give it a pretty vintage look.


This shows the lady stamp in full along with the Postcard and Roses stamps
The background was done using Aquatints and the smaller background was Distress Inks with the Christmas rose coloured in with Aqua Blend pencils. I added a bit of Spectrum Noir clear sparkle to the lady's coat.

Do look in on any of the shows the design team have made some stunning creations.

Thank you for looking, Jacquie xxx


Thursday, 26 May 2016

Rock & Roll!

Hello my fellow crafters, good to have you with me today, only one more day till our lovely Sheena is back on our screens with her wonderful Rock n Roll stamps, her first show is tomorrow (Friday) at 10 am.

Here is another of my samples...


This cards shows the Guitar and Amplifier from Sheena's Sketchy Stamps Rock n Roll. For the background I painted over Black Card with Aquatints Bright & Beautiful set using the Yellow, Orange and Blue colours working from the center out then covered round the edge with salt and left to dry overnight. This gives the little crackle effects you can see, each time is different you never get the same look twice but make sure the paint is really wet, this is why Aquatints are ideal for this technique. I then mixed some White Gesso and water and dabbed it over the center with an ink pad using first, second & third prints each time to get the different shades.

I then stamped the Amplifier off center with my Versamark Ink Pad and heat embossed it with Cosmic Shimmer Embossing Powder Black. On a piece of card I stamped and heat embossed the guitar in the same way, coloured it with Aquablend Pencils then cut it out by hand and placed it against the Amplifier as seen. I stamped the sentiment straight onto the card using Stazon Jet Black Ink. I matted this onto Gold Texture Card.

Using more Black card I made an A4 card by taping two cards together then measured it to fit the topper leaving enough on the edge to fit my Heartfelt Creations Regal Boarder & Pockets die just to add that bit of flourish, however I have since found my musical notes die which would have been more fitting lol!

I hope you like my samples so far, there are more to come lol! 

Thank you for looking, Jacquie xxx

Monday, 11 April 2016

Daffodils


Hello my crafting friends, hope this finds you all well today. May I give a warm welcome to my newest follower Sid, welcome aboard Sid good to have you here.

Thank you all so much for the wonderful comments I had on my last post of the Bluebells, the other stamp that came with them was of Daffodils and this is what I made with these.


I started by stamping Sheena Douglass Floral Fantasy Daffodils one by one on a piece of Sheena's White Stamping Card and painting over each one with Pebeo Drawing Gum before stamping the next one. I hope this makes sense to you? I then painted over the whole card with Aquatints Bright & Beautiful using the Green & the Blue from the set, I brushed over with a damp brush to blend the two colours. I then removed the drawing gum.

With some Derwent Water Colour Pencils I coloured the flower stems then blended the colours with water. I did this with the flower heads too using two different shades of Yellow with one Orange, again blending the colours with water

Once this was dry I then coloured the flowers again with the water colour pencils adding depth and shading.

To finish the card I painted over the flower heads with a Clear Spectrum Noir Sparkle Pen this added just a little sparkle to the flowers.

I matted and layered it onto some Black Card then onto the Base card.


I hope you like the finished card.


Thank you for looking, Jacquie xxx

Monday, 4 April 2016

Golden Butterflies

Hello my crafting friends, thank you for joining me today, I hope this finds you all well? A second helping from me today!!!

I have had a little play again, once again small scale lol! I took a piece of card and put Galleria Modelling Paste through Sheena Douglass Gaphics Stencil and left to dry. Once dry I spread out Aquatints Bright & Beautiful Blue, Green & Yellow along the top of the card and let the colours run down into the grooves and over each other then spritz with water and left to dry.


Once dry I stamped the fancy frame from Crafters Companion Textures Element Splats and Accessories Set 1 using Black Stazon in the center part of the card. In the middle of the frame I stamped a sentiment from Crafters Companion Kimono Porcelain stamp set, I only used half of the sentiment stamp. 

Over the raised pasted stencil pattern I rubbed some Gold Gilding Wax over and around the edges of the card, I then matted and layered it onto some textured Gold Miri card and a White base card. Using some of the same Gold Miri card I die cut the two Butterflies from the Crafters Companion Kimono Range and attached these onto the card as seen.

A small but rather quick and simple little card that could do for a number of occasions.


Thank you for looking, Jacquie xxxx

Sunday, 27 March 2016

30th Skull card

Hello there my crafting friends, good to have you with me today. May I wish you all a Very Happy Easter, sorry no Easter card but as I mentioned the other day I had made a card for a friends 30th Birthday who likes skulls so I thought I would show you this one today. My apologies for those of you who do not like these kind of cards, especially Ang lol! I shall post something different soon. It will soon be safe Ang, not a lot but soon...!!!


To begin with I wanted a colourful background but not too bright it would take the focus away from the skull so I chose three colours from the Aquatints Bright & Beautiful set and put to one side.

I cut a piece of Sheena's White Stamping card to size then using my Paisley Blockwallah  stamp block with my Versamark Ink pad I randomly stamped over the card then heat embossed with Creative Expressions White Embossing Powder.


Now with my three Aquatints, I chose the Green, Blue & Purple, using a natural sponge I sponged each colour over the card a little at a time going over each colour with a different one until I was happy with the result, now less is more is the way with this as you cannot take it off once it has been put on.

Once it was dry I wiped over with a dry piece of kitchen towel to take any excess ink from the White embossed pattern. I then wrapped a piece of Green Craft ribbon around the middle of the card, matted it onto some Sheena Black card then attached it to my base card.
Out of White card I die cut and stamped Sheena's day of the Dead Sugar Skull, with the added extra stamps that comes with the set. I stamped the flowers and leaves round the skull, then the circles round the eyes and finally the heart above the eyes. I coloured these in with Aqua Markers Floral & Nature.

I cut a piece of Black card to size so it fitted on the back of the skull giving a base to the eye sockets, using one of the smaller stamps in Sheena's Day of the Dead Floral Fantasy Stamps and Pebeo Iridescent Paint Red Blue I stamped the small flower in each of the eye sockets.

In the center of each painted eye I placed a little Red gem, this showed the eyes up more. I attached this on the ribbon in the center of the card.

I made some larger flowers by die cutting out of copier paper using Sheena's Day of the Dead Floral Fantasy and colouring them with Aquatints Bright & Beautiful, I die cut and stamped the DOTD Dancing Skeleton twice and cut of the heads and placed them in the center of the flowers and placed these in the bottom left corner. I then die cut the top hat from the DOTD Union of Souls set and coloured it Red with Aqua Marker Begonia then went over with a Clear Spectrum Noir Sparkle pen. I attached this to the head of the skull as seen.

To finish the card I die cut the guitar from DOTD Dance Macabre set out of some oriental Brown paper and placed this in the bottom right corner. There you have the finished card.

Thank you for looking, Jacquie xxx


Tuesday, 22 March 2016

Thinking of You Floral

Hello my fellow crafters, hope today finds you all well, thank you for visiting me today I do appreciate it very much and I love reading any comments which you may wish to leave.

Today's post is a card I made for a friend who is not well just to let her know I am thinking of her, so I wanted it bright and cheerful.


I started by die cutting a piece of Sheena's White Stamping Card with the Creative Expressions Striplets Die Rococo three times and attached this over the top of some Dark Blue Miri card, I then attached this to my base card.

Out of Sheena's Black card I made a frame using Square Nesting Dies from Presscut and placed this over the top of the card.

To brighten the card up I die cut some flowers from Sheena Douglass Day of the Dead Floral Fantasy using copy paper and painted them with Aquatints Bright and Beautiful, these are such vibrant colours that stay true and do not fade. I stamped them using darker Distress Inks Dried Marmalade & Fired Brick to match the colours. To finish the flowers I shaped them with a embossing tool and added a Kaisercraft Sparlet Gem in the center of each one.

I also die cut some Ivy using Creative Expressions Sue Wilson Finishing Touches Trailing Ivy and coloured this with Tim Holtz Distress Ink Crushed Olive then painted over the top with Green Aquatint from the Landscape set leaving the edge to show the colour underneath. I attached this on the card as seen.

Using more White card I stamped my sentiment with Tim Holtz Distress Ink Crushed Olive and Justrite Large Fancy Sentiments then die cut with Spellbinders Nestabilities Decorative Curved Square, whilst still in the die I inked through the die with more  Crushed Olive Distress Ink. I then placed this on the card.

There you have the finished card. I am glad to say the recipient loved it.

Thank you for looking, Jacquie xxx

Tuesday, 5 January 2016

Daughter & Sons' Christmas Cards

Hello my crafting friends, hope this finds you all well? I promised last week that I would show the Christmas cards I made for my Son & Daughter, sorry a bit delayed but here they are.


For my son's card I used some of the shaving foam technique for a background using Purple Aquatints and printed off one of the Christmas images from the House Mouse CD Collection along with the sentiment. I added the die cut 'Son' that was cut out of Red miri card.
 

For my Daughter's card I printed off an image from the House Mouse CD Collection along with a backing paper and sentiment to match, I covered the backing paper with a self adhesive sheet and coated it with Micro beads before matting it up onto Red miri card then added the word 'Daughter' which was also cut out of Red miri card.

Items Used:

Basic White and red card stock
Joanna Sheen House Mouse Triple CD Collection
Red Miri Card
Aquatints Purple
Joanna Sheen Signature Dies Son & Daughter
Shaving Foam
Creative Expressions Micro Beads


Thank you for looking, Jacquie xxx


Saturday, 19 December 2015

Wishing you all a Very Merry Christmas and Dazzle Snowflake

Hello my crafting friends, I do hope you are all safe and well and ready for the big day. I have decided to make this my last post of 2015 so I can concentrate on last minute preparations before we go to my Daughters for Christmas so may I take this opportunity to WISH YOU ALL A VERY MERRY CHRISTMAS and a  HAPPY NEW YEAR.

I hope to be more organized next year and my new year resolution will be to start making my Christmas cards all year, that way by next Christmas they may be all done lol! Watch this space!!!

Today's post is of one of the few Christmas cards I have managed to make, this one was for my dear friend, I liked it so much I have made a few more like it for my Family members!!!

This was inspired by Sue Wilson's design which you can view HERE, it is very similar but not exact but I loved the design so I went with it.


I matted up my base card with some Blue hammer card. Using the shaving foam technique, which you can find HERE  I made the background, I used two different Blues from my Aquatints paints ( I also made some using two Purples) in my shaving foam, I cut to size and stuck a piece of Double Sided Adhesive sheet over the top and coated it with Micro beads then matted this onto my card. I matted up a small rectangle of Blue card onto a piece of White card and placed this in the centre of the card.

I die cut  some snowflakes out of White card and some Dazzle miri card, mounted them together and attached it in the center of the card. In the middle of the snowflake I added a Blue crystal gem. This finished the card.

Items Used:

White Base card
Blue Hammer Card
Aquatints Bright & Beautiful & Pastel sets
Shaving Foam
Spellbinders Create a Flake die
Spellbinders Snowflakes die
Hunkydory Dazzle Miri Card
White card
HobbyHouse Blue Ocean Gem 
Double Sided Adhesive Sheet
Creative Expressions Micro Beads


Tuesday, 1 December 2015

White Poinsettias

Morning my Crafting friends, well December is finally here, still cannot believe how quickly this year has gone. have you done all your Christmas shopping yet? I still have a few items to get but those will have to wait till next pay day lol!

On Saturdays post I showed you a card inspired by Pamellia, well I loved the background so much I made two cards so today I am showing you the second one.


I made the background the same way by splodging Aquatints pastels onto the card using the Blue & Green, mixing them round till you get your desired effect. I distressed the edge of the card with scissors.

Through a metal grid I added some modelling paste and let it dry before adding embossing powder, now as I did this the same time as the other one I obviously made the same mistake, you should put the embossing powder on top of the wet paste then let dry before heat embossing that way you wont get the embossing in between the circles like I did! I matted this onto some card I had coloured with just the Blue Aquatint then splattered a mixture of Acrylic White paint and water over the whole card.

I die cut some Poinsettias out of some canvas and added a crystal gem in the center of each one then placed them in the bottom right corner along with some Christmas foliage, the branches were just painted green, the Holly leaves were cut out of Rich Green card then Silver gilding wax was applied on top to give a frosty appearance.

I added a little sentiment at the top and a little swirl behind the branches and there you have the finished card. As I said on Saturday's post I shall try this again but put the embossing powder on the paste before it dries lol!

Items Used:

White Card
Spellbinders Poinsettia
Spellbinders Holly Leaves
Sheena Douglass Perfect Partners Christmas Foliage  
Aquatints Pastels
Galleria Modelling Paste
Hobbyhouse Sparkly Gems 
Embossing Enamel
Canvas Material 
Gilding Wax Silver


Thank you for looking, Jacquie xxx

Saturday, 28 November 2015

Mixed Media Christmas card

Hello my crafting friends, so good of you to come and visit me today. This is going to be a quick post as I am off to Norwich today for a bit of Christmas shopping, can't wait!

I have started my Christmas cards, very late for me but had not time at all before, so I have been playing. This card was inspired by the lovely Pamellia, I saw her beautiful creation and just had to try my own as I loved it so much, you can find Pamellia's HERE its not quite exactly the same but close, thank you Pamellia for your inspiration.


I started by colouring in a piece of card with Pastel Aquatints using the Blue & Green and once dry applied some modelling paste through a metal grid and let that dry overnight, this is where I went wrong as I wished I had sprinkled the embossing powder on top of the wet paste then left to dry before heat embossing it that way it may have stayed only on the circles and not the places in between which I think look a bit messy. I am going to do it again that way so at some time I shall show you the results lol!

I heat embossed it with enamel embossing powder then I distressed the edges of the card a little. I took another piece of card and painted that with Aquatints but using just the Green, once dry I distressed the edge of this too. I matted this onto my base card with Foam tape and attached the top piece too.

I die cut some Christmas Fir branches, Holly leaves, Circles and Reindeer  out of various colour card, the reindeer I inked up and covered with Deco art Glamour dust, the circles I inked with Distress inks Forest Moss and Tumbled Glass, the Holly leaves I rubbed Silver gilding wax all over to add a frost look, I may have over done it a little lol!!! I attached all these on to the card as seen adding a white swirl I found in my stash just under the fir branches.

I coloured some White seam binding with Crushed Olives Distress Ink and made a bow, I did try crushing this by wetting it but this seam binding is so thick it was having none of it so I left it as it was, I placed it over the Branches and Holly leaves then added another bow out of garden twine, which I separated the four strands and used just one. On top of the bow I added a round bead, this was part of some beads I had friends save from their Christmas crackers, you know how sometimes they wrap beads and wire over the ends of these fancy ones, so in past years when we have had our Christmas meal I have claimed the beads lol!!! I attached this with some 3D glue. 

I went round the edge of the card and die cuts with a snow writer but this was a glitter one so it dried clear!!! So I went over it again adding some Deco art glamour dust so it showed up a little. I then watered down some White Acrylic paint and splashed this all over the card using a paint brush, I loved the effect this gave to the card, just like snow. The picture doe pick it up a little if you look close enough.

There you have the finished card.

Items used:

White hammer card
White card
Aquatints pastel set
Tim Holtz Distress Inks Forest Moss, Tumbled Glass and Crushed Olive
Sue Wilson dies Holly leaves
Sheena Douglass Christmas Foliage
Spellbinders Nestabilities Standard Circles Large
Memory Box Leaping Deer
Deco Art Glamour Dust
Galleria Modelling Paste
White Seam Binding
Gilding wax Silver
Acrylic paint, White and Water

Thank you for looking, Jacquie xxx

Wednesday, 21 October 2015

Three for ya!

Hello my crafting friends, hope this finds you all safe and well. Did you enjoy the marvelous shows Sheena did? Fabulous demos and fabulous cards made by the team.

I thought I would show you some more that I made for the shows.

This one was painted using Aquatints for the background then salt sprinkled over the top and left overnight to dry before rubbing all the excess salt away, this gives an amazing background. I just stamped on the shed and wheelbarrow and painted them in with Aqua markers. I stamped & coloured the pots & watering can with Aqua markers then cut them out and positioned them on the card as seen.

Background was painted with Aquatints and left to dry. Then using the Topiary Stencil I stenciled on the two topiary on the right and coloured them in with Aquatints, the bird topiary I spread modelling paste through the stencil and roughed it up a bit to add texture then painted this with Aquatints. The hanging branch was also painted by dabbing on the Aquatints with a sponge, mixing the colours to make the leaves look Autumn like.


For this one I started by stamping and painting the brick wall for the background, I then cut a door & frame out of White hammered card, cutting the door twice so I had two layers. I then stenciled the topiary onto some card, painted them in and cut out to stick either side of the door. Adding some finishing touches like the gold letterbox, door knob & letter.

I believe Sheena may have some more shows coming up next month showing these stamps again, dates are yet to be confirmed.

Thank you for looking, Jacquie xxx

Friday, 16 October 2015

Seed Gift Folder Card

Hello my crafting friends, a bit late today but better late than never lol! There are some fabulous shows coming up on create and craft with out lovely Sheena Douglass showcasing her wonderful new stamps and stencils, if you love pets or gardening then these are a must for you. The shows will be on SUNDAY 18TH AT 4PM & 7PM then MONDAY 7AM & 11AM, try not to miss out on all the fabulous demos Sheena will be doing.

I did this card/gift with the Garden/Hare stamps & stencils.


I started by going and buying some packets of seeds first to make sure I had the correct size pockets, then I embossed two sheets of A4 Kraft card. 

I measured the seeds up against some Kraft card, cutting the strip of card a bit wider than the packet but long enough to accommodate two packets, if my memory serves me right then this was almost the whole length of the A4 card. The top card of the pockets was a little wider still so that you could fold over the edges and glue them down forming the pockets. I scored these lines before folding. 

I then cut out a half circle at top of each pocket, I did this by hand as I did not have a circle punch. I repeated this process four times but for two of them make the heights of the pockets (or length of card) about half an inch shorter, this is so they sit on top of the larger ones but once the card is closed the meet up at the top. Once the pockets were finished I rubbed some gilding wax over the embossed areas, folded them in half in the middle, so there was a pocket either side and glued one smaller pocket on top of the larger pocket just in the center so that the rest of the pocket was open for access. I hope all this makes sense? I then put these to one side.

For the cover I got 1 sheet of A4 Black card and scored two lines either side of the center forming a spine of about 1- 1 1/2  inches , I found this was large enough for the pockets to sit inside. I then decorated both the inside and outside of the cover. For the inside I used 1 sheet of A4 White card and did the shaving foam technique with Aquatints, (If you do not know the shaving foam technique you can find this on You Tube using any inks) I cut the card in half to fit and stenciled the wild flowers stencil along the bottom, I matted this onto some card I had edged with Gilding flakes then placed this on the inside of the front and back of the card.

For the outside of the card I edged some card with gilding flakes to match the inside. Using another sheet of A4 White card I brushed over with Aquatints pastels blending the colours together then laying some cling film on top and left to dry for about 2 hours. On removing the cling film it leaves some lovely line detail which is usually shiny but with the pastel colour it was quite faded, it shows up more with the Bright & Beautiful Aquatints. Once again I cut this to size to fit the front and back.

I stamped the front using the shed, hanging flowers and Pots stamps and coloured these in with Aqua Markers. I stenciled round the bottom and up one side with the Sack Cloth stencil using Forest Moss Distress Ink. I stamped my sentiment then attached this to the front of my card. I stamped the back with the wheelbarrow and tree stamp and once again coloured with Aqua markers, like the front I stenciled round the bottom and one side with the Sackcloth stencil and attached this to the back.  To finish the card off I added some ribbon round the center of the inside round to the front then added a bow on the outside of the spine. 
The one thing I should have done but forgot until it was too late was before you attach the front and back covers add a strip of ribbon horizontally round the card so it can tie at the front keeping the card closed, the covers would then hide this ribbon apart from the bit you tie up. Or if you have a rivet punch you could use this to put holes in and tie with ribbon.


This would make a lovely gift for a gardener or you can adapt it to fit anything in the pockets, specialty tea bags, book tokens, vouchers whatever you like. I do hope you have understood the instructions but if anyone doesn't or if you have any questions then please do e-mail me. 

Thank you for looking, Jacquie xxx


Monday, 17 August 2015

Seasons Greetings 2015

Hello my crafting friends, good to have you here today, I am back from my little holiday it was fabulous to see my beautiful Daughter again, even if it was for only a few days, it was last Christmas the last time I saw her, such a long time.

Now as I said on my last post I have been making smaller cards with coloured backgrounds, this one is slightly different as after spraying the background I added a leaf stencil then sprayed over that in White so this gives it a bit of a focal point.


I attached my background using Foam Tape towards the top of the card, leaving the space at the bottom for my sentiment.

I die cut the bauble from 2011 Heirloom Ornament and painted it Red, then die cut the smaller bauble from Christmas Baubles and painted that Gold, I stuck them together with PVA Glue, added two foam pads on the back and placed them on the card, I drew in the hanging cord with a Gold pen.

I added my sentiment at the bottom using Forest Moss DI and there you have the finished card. Dimensions 4"X 6".

Items Used;

Sheena Douglass White Stamping Card
Aquatints
Spellbinders 2011 Heirloom Ornaments Dies
Spellbinders Christmas Baubles Dies ( These came with the GC along with the Christmas Tree)
Justrite Large Fancy Christmas Sentiments
Tim Holtz Distress Inks Forest Moss

Thank you for looking, Jacquie xxx

Saturday, 15 August 2015

A Very Merry Christmas

Hello my crafting friends, good of you to join me today, this post is scheduled as I will still be in Cornwall so I hope its come up okay? I have left hubby at home looking after the pets, my time away lol!

My last two posts have been made from the backgrounds I made and these next two are no exception, they are nice easy and small cards to make in batch for Christmas, I have decided, due to costs, to keep my cards small this year apart from close Family members, they are quicker to make too!!!


I loved how the background to this one turned out and wish I had done it bigger lol! That's the beauty of these backgrounds you never get two looking the same. Needless to say I used Yellow & Red on this one, starting with the lightest colour first, keep alternating the colours until you get the desired effect you want. I have to give credit to Loll for this one as she posted a similar one to this on her blog HERE and I just loved the simplicity of the one bauble which is why I did this particular one.

My base card was an A4 sheet of White card, folded in half then cut down the middle, so basically A6 size cards. 

I attached the coloured square with Foam Tape towards the top of the card.

Using more White card I die cut and embossed four different baubles, these two are Spellbinders Nestabilities 2010 Heirloom Ornaments and Spellbinders Christmas Baubles, I painted the larger one Blue and the smaller one Gold, attached them together then placed them on the card as seen, drew in the cord with Gold pen then stamped the sentiment at the bottom of the card using Gold ink, this did not show up as much as I would have liked but there was no way I was going to try and go over it lol!

I just stamped a very simple Christmas message inside and there you have the finished card, dimensions are 4" X 6".

Items Used:

Aquatints-Bright & Essentials
Sheena Douglass White Stamping Card
Spellbinders Nestabilities 2010 Heirloom Ornaments
Spellbinders Christmas Baubles (These came free with the first GC)
Crafty Impressions Clear Stamps Christmas Snowflake Sentiments


Thank you for looking, Jacquie xxx

Thursday, 13 August 2015

Christmas Ivy

Morning my crafting friends, so good to have you come and visit me today, I really do appreciate it.

On Tuesday I showed you a card I had made with some sprayed backgrounds, this is another one today, quite similar in fact so I hope you don't mind?


I used the White Stamping card as my base and this time I used Water-colour card for the center sprayed panel. I used just Yellow & Blue to spray this one as I knew it would give lovely shades of Green. The top photo is the true colour, the smaller close up image is showing a little darker!

I attached my panel at the top of the card using Foam Tape then die cut some Ivy using more of the Water-colour Card and placed it across the top. of the panel.

I stamped my sentiment onto White card and cut it into a ribbon banner and placed this at the bottom of the card as seen.

Another quick and easy card, I thought it would make an unusual Christmas card.

Items Used;

Sheena Douglass White Stamping Card
Sheena Douglass Perfect Partners Festive Ivy Die
Sheena Douglass Perfect Partners Festive Fancies Festive Ivy Stamps
Aquatints
Tim Holtz Distress Ink Forest Moss
Water Colour Card White


I am away for next few days in Cornwall so see you next week!

Thank you for looking, Jacquie xxx


Tuesday, 11 August 2015

Decorative Ivy

Hello my crafting friends, a bit late in posting but better late than never right? I hope you are all well and busy crafting away, I managed a little play time yesterday which is why I am posting this lol!

I had been playing with spraying some backgrounds of various colours with diluted Aquatints and this was one of them.


I die cut and embossed my card base using Spellbinders Decorative Curved Square out of White Card and used this as the whole card.

Using one of the coloured panels I die cut the middle piece of the decorative square to fit in the center of the card.

I die cut some Ivy again using White card, painted it with Aquatints, Stamped it with Crushed Olive, trimmed to fit and lay across the top. The bit I trimmed off I placed on the inside.

A very simple and quick card, I have left a sentiment off until I use it.

Items Used:

Sheena Douglass White Stamping Card
Sheena Douglass Perfect Partners Festive Ivy
Aquatints
Spellbinders Decorative Curved Square
Tim Holtz Distress Ink Crushed Olive
Spray bottles.


Thank you for looking, Jacquie xxx


Tuesday, 21 July 2015

Jewellery Box!

Morning my crafting friends, hope today finds you all well?

Today I am showing you the home decor piece I made for the Sheena Douglass 4 Day deal on Create and Craft RIGHT NOW!

I wanted to show that the Fiary was not just a fairy, she could be a ballerina as I have shown here.


I bought some cheap boxes and painted one up in a pale shade of Pink then rubbed Gold gilding wax around the edges. My son took the hinges and fastener off and burnt them to make them look old and not so shiny!

For the fairy I die cut her out and embossed her then snipped into her arms and legs to change the pose. I embossed some vellum in the Christmas Rose folder, cut the flowers out and placed them on her as her dress, I then ran some stickles glitter glue round the edges. I painted on her ballet shoes and positioned her on top of the box.

Using more vellum I stamped some Ivy and embossed it with Gold embossing powder before cutting it out, I painted on the back with Aquatints and stuck it round the sides of the box.
Using the Fairy wings  I die cut and embossed them with Vellum and heat resistant acetate, heat embossed with Gold embossing powder and painted on the back with Aquatints, I then matted and layered each vellum wing under the acetate one, added a gem for the body, some craft wire for their antennas and they became butterflies. I placed these on the box as seen.
 
For the inside of the box I just folded strips of card and stuck them together to form a frame inside the box, I covered this with Self Adhesive Felt in a deep Pink shade and placed inside the box to make the compartments for jewellery or whatever.


The design team have come up with some absolutely fabulous ideas for home decor so please do tune in to see their stunning creations. The Sheena Douglass 4 Day Deal shows are on Create and Craft over the next couple of days

Items used:

Sheena Douglass Little Fairy Die SetSheena Douglass Fairy Stamp Set
Sheena Douglass Embossing Folder Christmas Rose
Sheena Douglass Little Bit Festive Stamps 
Plain MDF Box
White Acrylic Paint 
Pebeo Iridescent Paint Red Blue
WOW Embossing Powder Gold
Crafters Companion Heat Resistant Acetate
Vellum
Aquatints Bright and Beautiful
White Card
Self Adhesive Felt Pink (Sorry cannot remember who sold this)
Craft Wire


Thank you for looking, Jacquie xxx