Followers

Total Pageviews

Showing posts with label Tim Holtz Distress Inks. Show all posts

Monday, 15 August 2016

Christmas Canvas

Hello crafters, cannot believe how long it has been since I last posted, my apologies but I have been a very busy bee lol!

Today I have something a little different for you in the way of a Christmas Canvas. I made this with all Sheena Douglass goodies along with some Pebeo Prism Fantasy paints, these were recently aired on Hochanda in the mixed media shows, they really are beautiful and create these wonderful patterns when dry.


I started with a plain canvas, painted it with White Gesso then added a couple of sheets of kitchen towel for texture and a few beads here and there and painting over this again with White Gesso to stick it down then left to dry. Don't forget to paint the sides too!

Whilst waiting for the canvas to dry I die cut some Holly leaves, Ivy and Poinsettias and coloured them in with Aquatints and Aquablend pencils. When dry I stamped over the Poinsettias with the matching stamps using Tim Holtz Distress Inks. I also die cut some Christmas Baubles. With the baubles I spread out some of the Pebeo Prism Fantasy paints in each one, the Red & Turquoise I added a bit of Gold into the colours but left the Purple as it was, I put these aside and left to dry overnight. You have to leave this paint to dry at least 6 hours so it is better to leave it overnight but its amazing to watch it dry and see the patterns form, who said time is like watching paint dry? Or something like that lol! You can see more of the wonderful pattern in the Red one.

Once the canvas was dry I painted it with Aquatints Bright & Beautiful but decided it was far to bright with what I wanted so I painted over that with watered down White Acrylic paint to diffuse the colours. When this was dry I took the Pebeo relief gilding paste and drew some small circles and trails of dots over the board, and glued down some string to attach the baubles to. I also added a few small drops in the center of the Poinsettias and once dry rubbed Gold foil over them. When the Pebeo paste was dry I filled in the circles with Pebeo Prism Fantasy paints Gold & Turquoise and rubbed Gold foils over the dots, edges of the circles, string and edges of the kitchen towel, anywhere you want it to go really to add a bit of shine.

I placed the holly leaves, Ivy and Poinsettias on the board deciding the best place to put them before attaching them with glue. The next day I added some gilding wax to the edge of the baubles before gluing them into their positions. I added more gilding wax around the canvas and on the edges and corners.

There you have the finished canvas. Quite pretty I think and very colourful, just great for Christmas.

Items Used:

Pebeo Prism Fantasy paint (various colours)
Pebeo Relief Gilding Paste
Pebeo Foils Gold
Sheena Douglass Perfect Partners Festive Fancies Festive Ivy & Christmas Ivy
Sheena Douglass Perfect Partners Festive Fancies Hollies & Berries & Holly Jolly Christmas
Sheena Douglass Perfect Partners Festive Fancies Pionsettia & Perfect Poinsttia
Sheena Douglass Perfect Partners Festive Fancies Festive Baubles &Deck the Halls
Tim Holtz Distress Inks Abandoned Coral & Victorian Velvet
Spectrum Noir Aquatints
Spectrum Noir Aquablend Pencils
Small Canvas Board & Easel
Kitchen Towel

Thank you for looking, Jacquie xxx

Thursday, 21 July 2016

Vintage 50th Card

Hello my crafting friends, hope today finds you all safe and well? Today I am showing the third card I made for colleagues at work, this one was for someones 50th Birthday. For a special birthday I never put the age on as I know some people can get really sensitive about a 'special age'.


For the background I matted some pretty patterned paper, these may have came with the Flights of Fantasy CD ROM from Crafters Companion, I say 'may' as I am not sure as I have had them so long but I love this pretty rose one and I wanted it to have the vintage look about it which I thought this had.

I cut a piece of White card to size and inked it up with Tim Holtz Distress Inks Antique Linen and Victorian Velvet I then stamped Sheena Douglass Little Bit Festive Christmas Stamp Set Vintage Postcard at an angle on the piece of card using Tim Holtz Brushed Cordroy Distress Ink and stamped the rose from Sheena Douglass Little Bit Festive Christmas Set Christmas Child underneath it. I then stamped the rose three more times on pieces of card, cut it out and coloured in with Spectrum Noir Aquablend Pencils then decoupaged the layers. I rubbed Pebeo Gold Gilding Wax round the edge of the card then placed it at an angle on top of the pretty paper.

I stamped my sentiment from Justright Large Fancy Sentiments onto a piece of card I had coloured the same way as before, backed it with a piece of the patterned paper then attached this to the card as seen.

To finish the card I made a bow out of Pink Organza Ribbon and placed that in the top left corner and added some Pink gems in two of the opposite corners.

I am glad to say the recipient loved the card and was the only one who thanked me for the card out of the four I made!!!

Thank you for looking, Jacquie xxx

Tuesday, 19 July 2016

Victorian Wedding Card

Hello my crafting friends, good to have you back today, I really do appreciate your visit. Today I am showing the second card of the four I have made for work colleagues, this is the second wedding card for one who is getting married at the end of August.


I used Sheena Douglass new Christmas stamps A little Bit Festive Christmas for this I used the Victorian Gentleman & Victorian Lady. I stamped the Lady first and painted over the top with Pebeo Drawing Gum, once dry I then stamped the Gentleman next to her. I coloured them both in using Spectrum Noir Aquablend Pencils, the Lady was painted in using a Cream colour but for some reason it turned Grey looking I guess she wanted to match her man lol! I added some Spectrum Noir Clear Sparkle pen over the top of the Lady's coat and hand muff, the picture does not show this up at all!!!

I then die cut it out with the frame from Sue Wilson Italian Collection Calabria and cut the frame part out again and layered over the top then put to one side.

I inked up a piece of card with Tim Holtz Antique Linen Distress Ink, cut to size a piece of paper from the Crafters Companion Downton Abbey Paper Pad and ran it through the Ebosser in the Crafters Companion Downton Abbey Embossing folder Fleur De Lis then attached this to the inked card.

I cut a piece of White Satin Edged Organza Ribbon and wrapped it round both card pieces then attached it to my 8 X 8 base card and placed my framed couple on top. I made a small bow out of the same ribbon and placed this at the top of the frame.

Using a piece of Crafters Companion Centura Pearl card I die cut the  Motor Vehicle from the Crafters Companion Downton Abbey range of dies and placed this on the bottom right corner of the card, I felt this kept with the Victorian look.

To finish the card I stamped a sentiment from Crafters Companion Downton Abbey Clear Stamps Sentiments 2 on top of some inked card and paper to match the card and placed this in the top left corner of the card to balance it out.

Its a bit unusual for a wedding card but that is why I did it to be different from the normal ones they may receive.

Thank you for looking, Jacquie xxx

Sunday, 17 July 2016

Wedding Card

Hello again my crafting friends, bet you are thinking 'blimey don't see her for ages then two almost together' lol! A bit like buses I hear you say ha! ha! 


Well I did say I had been doing some cards for work colleagues this past week as two are getting married, one turned 50 and the other is having a baby! There are so many staff leaving that I have not done any leaving cards this year!


This is one of the wedding cards, I wanted it a bit different to the norm! 

I inked and distressed the bottom layer which I wrapped some vintage lace ribbon round the bottom. I added a rectangle panel then two ribbon panels on the left and placed the Sizzix Thinlits Royal Paradise die on top, I coloured this with Peacock Blue DI. On the right I added a Spellbinders Nestabilities Splendid Circles die but I cut the outer ring away, on top of this was two hearts cut out of a beautiful patterned paper with Sara Davies Signiture Collection Love & Romance Elongated Heart dies, I added their initials on top of these along with several flourish die cuts around the edge. I placed a Sara Davies Signature Collection Together Forever Wings of Love Bird die in the top right. I made two little rolls of paper and stuck then under either side of the circle top and bottom for support.


To finish it off I added Paper flowers around the circle and in the two diagonal corners of the rectangle panel. I also added two hat pins behind the larger flowers as you can see in this smaller image.


The papers I used were from a 12"X 12" paper pad from The Range, sadly I cannot remember what it was called but they are all neutral colours with beautiful subtle patterns on them.

Thank you for looking, I hope you visit me again, Jacquie xxx

Thursday, 7 July 2016

More samples...

Hello my crafty friends, hope today finds you all safe and well, apologies if I have not got round to any posts to comment I will try and catch up soon.

Our Sheena starts her One Day Special shows tonight on Hochanda at 8pm, there are some really stunning samples from the Design Team and no doubt there will be some fab demos too.

Here are more of my samples...


This is the Chair stamp, I have added the Christmas hat. The chair stamp was coloured with Aqua Blend Pencils. The background is using Distress Inks and the Holly boarder was coloured in with Aquablend Pencils then painted over with Spectrum Noir sparkle pens.


The background is Distress Inks and the window scene and Gentleman were coloured with Aquablend Pencils. The wreath is made from pine branches cut down, I used gems for the berries and added some snow writer.


I cut the aperture and layered it with Blue card, the flowers are decopaged to raise them up, coloured with Aquablend pencils then gone over with Clear Spectrum Noir Sparkle Pen. The birds were coloured with Aquablend pencils.

This is the inside of the card, Blue distress ink for the background I used the Holly stamp to make a wreath around the girl, this was placed in the centre to show through the aperture.


I hope you get chance to view at least on of the shows so you are able to see the stamps in full, although they are Christmas stamps Sheena has designed most of them so they can be used all year round and not just for Christmas.

Thank you for looking, Jacquie xxx

Tuesday, 5 July 2016

Sheenas Book Lovers Christmas Stamps

Hello my crafting friends, well its been another busy week or two, don't know where the time goes lol!
As you may have guessed our Sheena has some new stamps coming out this week they are her Book Lovers Christmas Stamps. You can view them all on Hochanda on Thursday at 8pm or Friday at 9am 12 noon, 4 and 7 pm. 

Here are a couple of my samples to show you.

This Bow card  shows the head of the lady & Gentleman stamps, the Girl and the Christmas Rose

I used two Aquatint pastel colours, Blue & Purple to colour the background then on the first Bow I used one of the sentiment stamps and stamped all over the bow. I added some die cuts and Lace between the layers to give it a pretty vintage look.


This shows the lady stamp in full along with the Postcard and Roses stamps
The background was done using Aquatints and the smaller background was Distress Inks with the Christmas rose coloured in with Aqua Blend pencils. I added a bit of Spectrum Noir clear sparkle to the lady's coat.

Do look in on any of the shows the design team have made some stunning creations.

Thank you for looking, Jacquie xxx


Saturday, 18 June 2016

Two 'TORN' for ya

Hello my crafting friends, so good to have you with me today. Thank you for all your wonderful comments on my last post, I may have spoilt you with four cards but you never know when I'm coming back lol!
Today I am showing you two cards that were made for the coming shows with Sheena on Monday at 8pm on Hochanda, there will be more shows on Tuesday at 9am, 12 noon, 4pm & 7pm showcasing her new 'TORN' stamps, a lot of people liked the last set Sheena did so I hope they like the new set two, my favourite is the clocks. Due tune in to view all the stunning creations by the rest of the design team.

TORN GUESS WHO  stamp set. I scored a piece of card then coloured it with Distress Inks then I cut out the center shape to match the stamp and cut it all into strips. I  placed them on top of Black card with Foam Tape to raise them up a little and to leave a slight gap in-between each one to make it look more like a fence, I then splattered some White acrylic paint over the top! I stamped the Eye onto white card, Painted it in with Distress Inks and poked the folded 'torn' edges through the hole so it looked like her hands were coming through the fence and she is peeping behind. I inked up a piece of card to match the fence and stamped the sentiment on it then matted it onto Black card and placed in the bottom right corner.

TORN TIME this is my take on Alice in Wonderland. The background I die cut two different sizes of Heart from Red felt and stuck them on the card randomly then I drew some crowns with Pebeo Mixtion Relief Glue, let it go clear then added some Gold foil, I inked round the edge with D.I. and matted it onto some Black card. On more Black card I stamped the clocks with Versamark and heat embossed the torn edges with Cosmic Shimmer Black Embossing Powder and the clocks with Papermania Gold Embossing Powder. I then painted the clock with Pebeo Iridescent Paints. Once dry I painted round the edge of the clocks and the hands with Pebeo Mixtion Relief Glue and once clear added some Gold foil.
On Black card I stamped the hare from Sheena's Have a Nice Day and heat embossed it with Cosmic Shimmer White Embossing Powder then painted it with Tim Holtz Picket Fence Distress Ink. I cut the Top Hat from Sheena's Day of the Dead Union of Souls spread some Pebeo Mixtion Relief Glue round the brim and when clear placed Blue Foil over  the top, I cut a little slit so the Hare's ear could fit through. I stamped one of the VERY TORN empty holes and cut out the torn edge and along with the clocks I placed these onto a piece of Black Card, I placed this onto my card with the hare behind the empty hole as seen and then stamped my sentiment with Versamark Ink and drew over that using the same Pebeo glue and added Gold Foil once it was clear. I die cut this out with Spellbinders Delightful Circles, rubbed Gold Gilding Wax round the edges and placed this onto my card as seen.

I hope you tune in and enjoy the shows.

Thank you for looking, Jacquie xxx

Wednesday, 25 May 2016

SHOUT!

Morning my crafting friends so good to have you visit me today. Sorry for the confusion yesterday it was not two cards I posted but one, the second picture is what is inside the gatefold card lol!

Thank you for all your wonderful comments I really do appreciate them and I apologize if you have a blog that I have not got round to viewing and commenting on, I do try but finding it more difficult to find the time of late so I can only apologize. 

Todays post is another sample for our Sheena shows on Hochanda on Friday at 10 & 2, Saturday at 11 & 3 and Sunday at 11 & 6. 


This one showcases 'The Band' from Sheena's Sketchy Stamp Shout! For the background using Sheena Douglass White Stamping Card I used two of Tim Holtz Distress Inks Squeezed Lemonade and Fired Brick blending them together as best as I could then dabbing the ink pad over the background with Fired Brick.

I then stamped my image on top using my Versamark Ink Pad then heat embossed it with Creative Expressions Cosmic Shimmer Embossing Powder Black.
  
Using Sheena's Sketchy Stamps Grunge Band  I then stamped and heat embossed them into two opposite corners with Papermania Gold Embossing Powder, with more of the Grunge band stamps I inked them up with Pebeo Mixton Relief Paste and left it to dry a short time, not the hour it says just until it was almost clear then I added the foil on top rubbed it down and left it to dry a bit longer before rubbing the foil with the flat end of a paint brush until it released itself from the card. I then inked up a small piece of card like the background, stamped my sentiment on top with Stazon Jet Black Ink, matted it onto a piece of Black Card then placed it on the card as seen.

I hope you can manage to see one of the shows, please do let me know what you think. Do take a look at all the stunning cards the rest of the Design Team have created.

Thank you for looking, Jacquie xxx


Tuesday, 24 May 2016

Purple Rain!

Hello my crafting friends, I do apologize for being absent for sooooo long, even I did not think it would be this long, please forgive me lol!

I hope you are all safe and well? I just do not know where the time goes but its come round again for some new stamps from our lovely Sheena, if you like Rock 'n' Roll you're gonna love these!

Over the next few days I will be showcasing the cards I have made for Sheenas shows on Hochanda on Friday 27th May at 10 am in the morning then again at 2pm, followed by Saturday at 11am & 3pm then finally on Sunday at 11am & 6pm.


My first card I want to show you is one I did in remembrance and respect for the Artist Prince, his song Purple Rain is one of my all time favourites so of course I had to stick to the colour Purple A LOT! I made a Gatefold card out of Sheena's White Stamping Card and covered the front with card that I had coloured with AquaTints Pastels and ran through Crafters Companion Textures Embossing Folder Rain (well what else did you expect lol!) I matted this onto some Creatives Expressions Plum Card then stamped over the top with Sheena's new stamp set of Sheena's Sketchy Stamps Grunge band patterns using Tim Holtz Seedless Preserve Distress Ink.

I stamped and heat embossed the guitar from Sheena's Sketchy Stamps Rock n Roll twice and coloured them in with Spectrum Noir AquaBlend Pencils. I placed these on the front of the card as seen.

For the inside I lined it all with more of the Plum card and in the center I matted it up with more of the coloured 'Rain' card. 

On more of the stamping card I stamped and heat embossed the Rose stamp from Sheena's Sketchy Stamp Every Rose along with one of the sentiments and coloured this in with Spectrum Noir AquaBlend Pencils, these are so lovely to colour with as they are water colour pencils so once you have coloured in just wash over with a damp paintbrush and the colours blend beautifully. Once dry I die cut it out with X Cut Large Dies, I placed this in the center of the middle of the card.

For the inside of the gatefolds I stamped one of the distress floral stamp in each corner using Tim Holtz Distress Ink Picket Fence and also the stars. Using a White Gel Pen I wrote some of the words from Prince's songs, a different one on each corner, here showing are the words to Purple Rain. The other songs were 'When Doves Cry', Diamonds & Pearls and Kiss.


I do hope you manage to view at least one of the shows not only to watch Sheena's wonderful demos but also to view the other Design Team members stunning creations.

Thank you for looking, Jacquie xxx


Tuesday, 10 May 2016

Hummingbird

Hello my fellow crafters, I hope today finds you all safe and well? We have been having some lovely weather of late but today its absolutely chucking it down with rain lol! Saves me watering the garden!
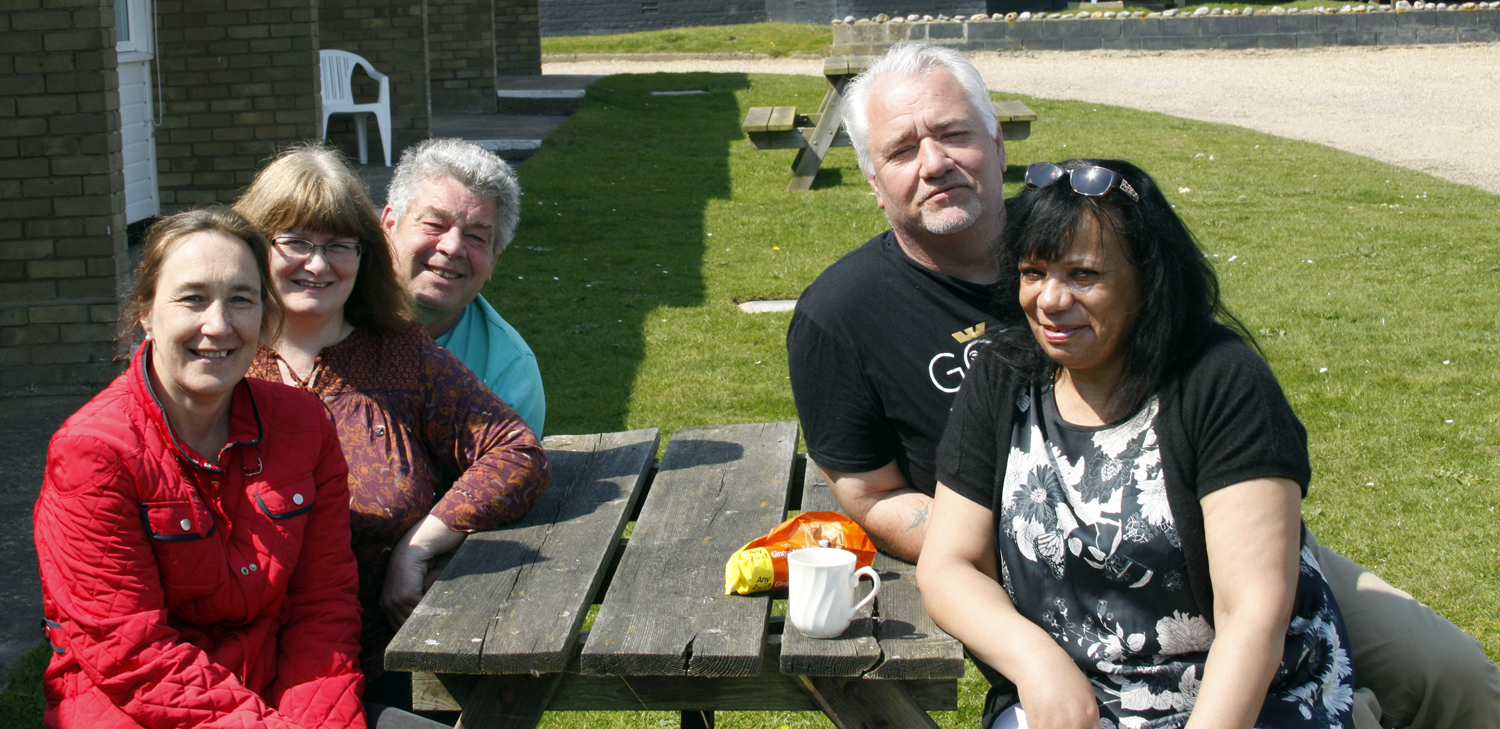
We had a lovely weekend, it was my Husbands 31st School Reunion, where some of the students who went to Eden hall Boarding school in Bacton Norfolk met up, we mainly spend the day in the pub and of course taking a stroll down to where the school used to stand, favourite places and the beach before heading back to the pub! Eden Hall was a school for special needs children, those who could not be put into main stream schools because they had heart problems, asthma, epilepsy or whatever, there were many age groups there as the school did run for many years, its no longer there as they knocked it down and built houses on the site but the people who own the properties graciously allowed for a special plaque to be put into place last year, the nicest thing is that they have all kept in touch with one another and meet up every year. Of course I like going as it means a trip back to Norfolk where I lived for 30 years and meeting up with my old friends. I will show some photos of our trip at the end of this post.


Another simple card for you. The base card was the other half of card I had from my last post. I cut a piece of card to size and coloured it in with Tim Holtz Distress Inks Bundled Sage and Peacock Feathers and attached this to my base card with Foam Tape.

On another piece of card I stamped my Hummingbird from Heartfelt Creations Romantique Wings Pre-Cut Set and coloured this in with Spectrum Noir Aqua Blend pencils. I die cut it out with X-Cut Lables die, coloured the edge with Peacock Feathers DI and then placed it in the middle of my background. 

Over the top I added one of Heartfelt Creations Regal Boarders & Pockets dies that I had die cut out of White Card.

There you have the finished card, I left a sentiment off so it could be used for many different occasions.

Now for my weekend away here are some piccies, I took loads but I wont bore you with them all, just a few lol!
  

The Plaque

Bacton Sea as the sun was going down

Some of hubbies old school friends (I am second left, hubby is behind me)

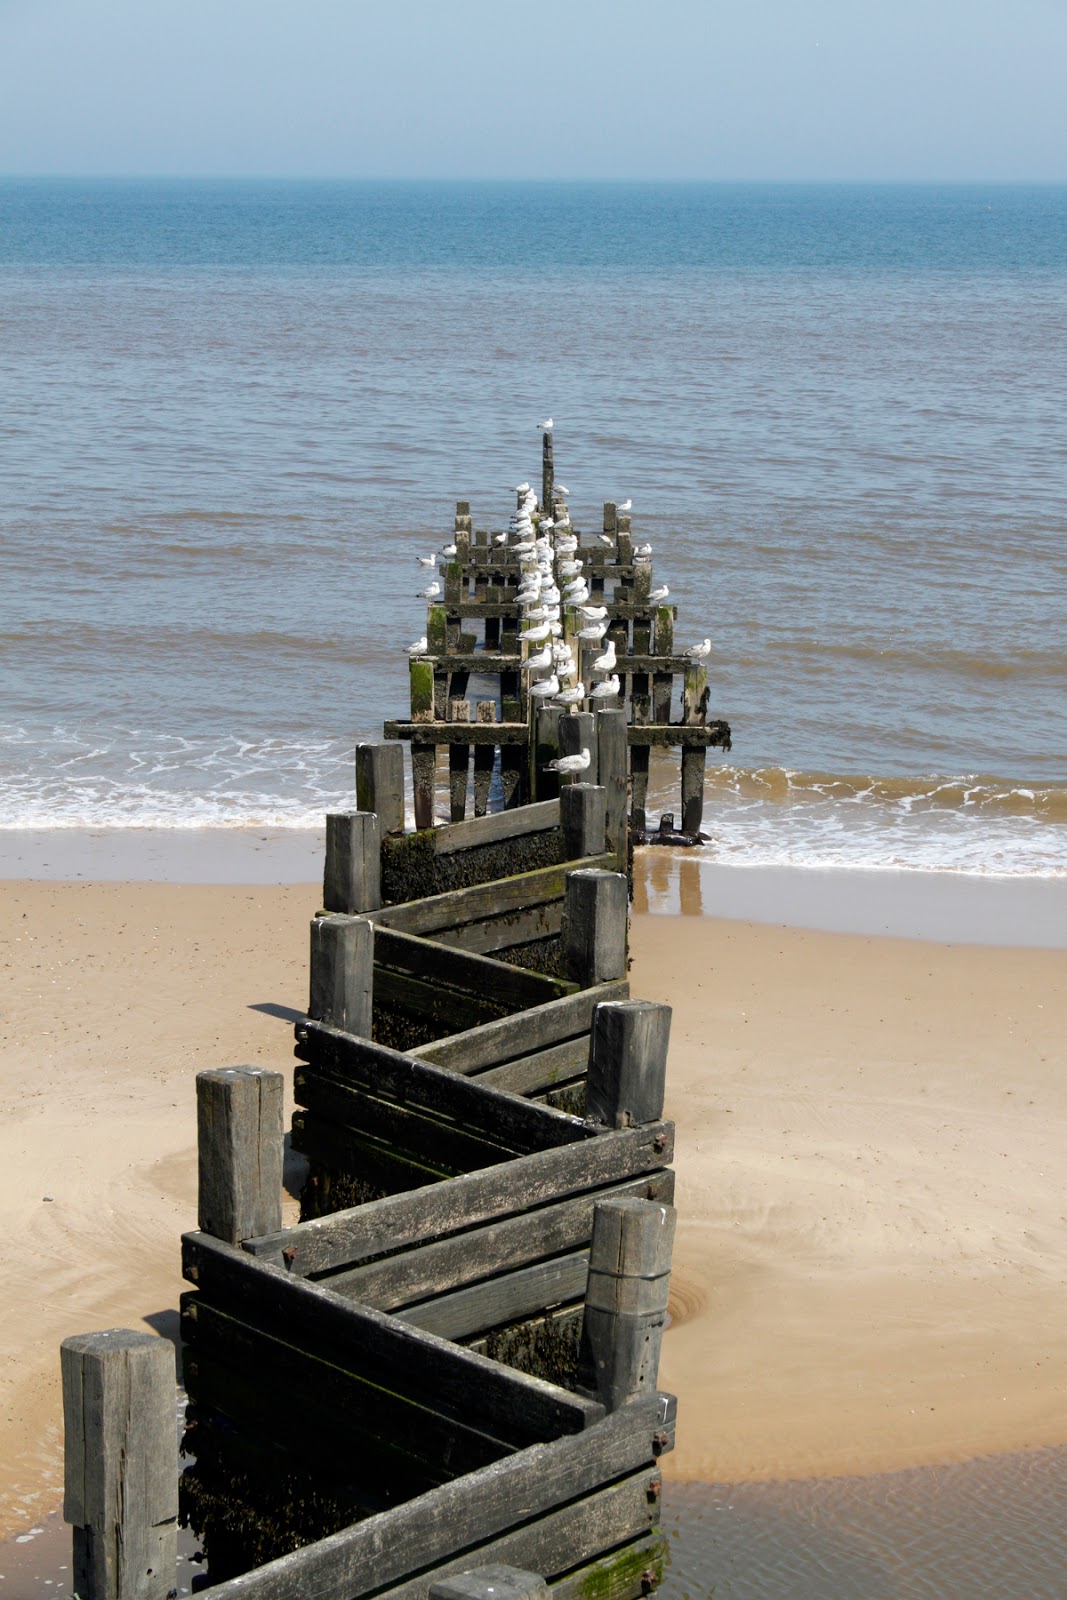
Thought this was funny, how the Seagulls sat on a post each
all looking the same way!

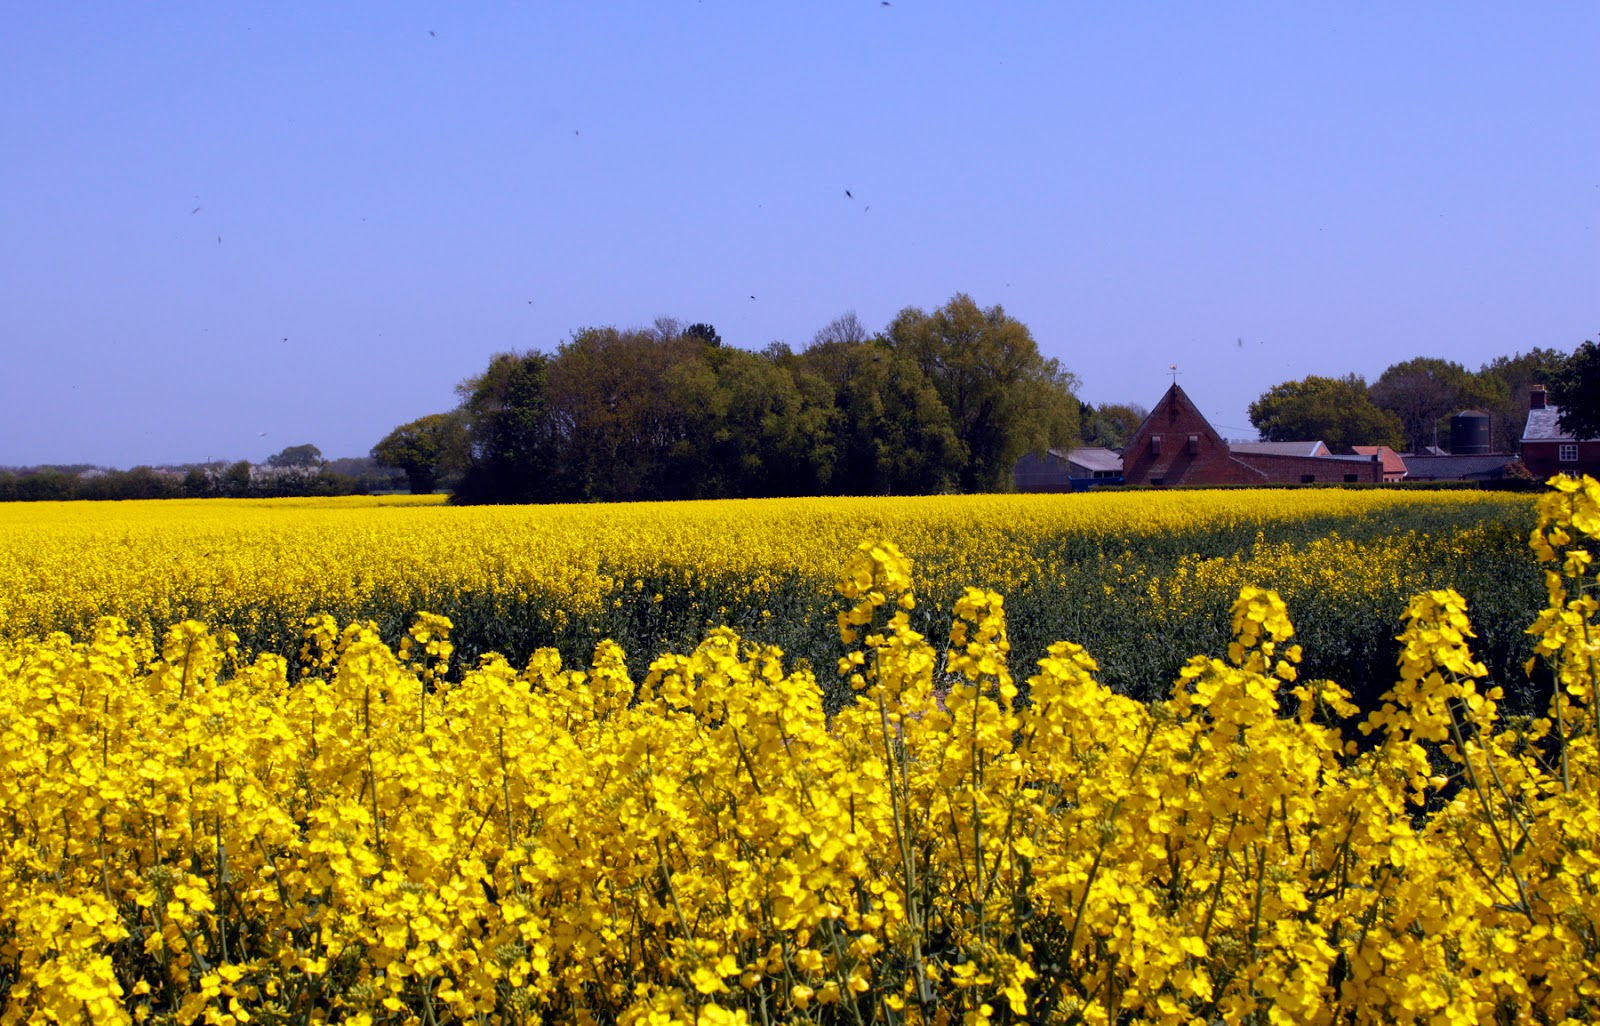
Beautiful Rape field, the colour looks stunning against the Blue sky

It was in Brunstead, Norfolk!!! We passed it on our way back home


Thank you for looking, I will be back next week, Jacquie xxx

Saturday, 30 April 2016

Happy 60th Birthday

Hello my crafting friends, I'm a little bit late with this post but better late than never right?! 

Today's card I have made for a work Colleague and friend who will be 60 next week, I love the vintage look so went for that kind of theme.


I started with my base card, I found some patterned papers that I had in my stash for quite some time which lead me to the colours Blue & Pink, I cut the papers to size and distressed the edges with some scissors then inked round the edge with relevant colours to the papers Tim Holtz Distress Inks Victorian Velvet & Peacock Feathers. On the Pink paper I stamped the sentiment from Crafters Companion Kimono range in two corners using Black Stazon Ink and matted the Blue paper on top at an angle so you could see the sentiments.

On another piece of patterned paper, this had a lovely wild rose on one edge which I kept and inked round the edge again with Victorian Velvet. I had two sheets of this one so I cut out the leaves from the other sheet and placed them on top of the leaves on this sheet for a bit of dimension.

I had the Tattered Lace Alphabet Bunting Die so I cut out the letters for her name and glued these on top of a thin strip of Blue Ribbon I had in my stash, I then glued this on top of some Rose Blue Ribbon that had that vintage look about it, I bought this ribbon from The Range. I liked the darker ribbon underneath as it showed up the letters of her name better. I placed this diagonally over the top piece of paper and glued it down on the back.
I curled the corner in the top left so I could fit a tag behind and stuck this down with Foam Tape, leaving a gap for the tag. I made a bow out of two pieces of ribbon, one Blue & one Pink and attached this at the bottom right corner above the rose image, on top of this I added three paper roses, one of White, Pink & Blue. I also cut out a Butterfly from one of the papers, added a tiny craft peg as its body and stuck this above the flowers.

 I made a tag out of White card, stamped it with Sheena Douglass Script Stamp then on top of that with one of the bird stamps from Crafters Companion Kimono range, I coloured the bird in with Spectrum Noir Pens Pink & Blue and inked round the edge with Victorian Velvet Distress Ink. Underneath the bird I added the words 'Happy 60th Birthday', these I had typed up on my PC and cut out and stuck them onto the tag (sorry forgot to take a picture of this!) Through the hole in the top of the tag I added more of the thin blue ribbon and then placed the tag in the slot behind the curled corner of the card.

I painted the peg, edge of Butterfly wings  and edge of the flowers with Spectrum Noir Sparkle Pen Clear to add a tiny bit of bling and there you have the finished card.

Thank you for looking, Jacquie xxx

Wednesday, 27 April 2016

Little Bird

Morning my crafting friends, hope today finds you all safe and well.

I have been having a little play again with a Perfect Partner set of Sheena Douglass Little Bird that I had never got round to using, believe me there are still stamps I have never used as yet lol! I am sure I am not alone in this. Anyway I am showing you the Little Birdy, he has become one of my favourites and I am sure I will use him again especially in a mixed media card.


I started by choosing a patterned paper, I chose this neutral coloured on with leaves on, I cannot remember what pad I got it from as I have had it in my stash for some time and no longer have the cover. I know I bought it from The Range, one of their 12 X 12 paper pads!
I matted this onto some Black Card then onto my base card. With a piece of Sheena White Stamping Card I painted it with Aquatints Bright & Beautiful using just the Green and Blue blending them together with a bit of water, I heat dried it then put it through Crafters Companion Textures Embossing Folder Wind, sorry I know you cannot see this as it is hidden in the layers, I should have taken a photo of it before layering lol!

On another piece of White Card I inked it up using the Joanna Sheen Stencil Plaid pattern with Tim Holtz Distress Ink Chipped Sapphire and Forest Moss, I then placed another Joanna Sheen Stencil Decorative Trellis over the top and in places spread Galleria Modelling Paste and left to dry. Once dry I inked over the raised areas with Forest Moss.

I stamped Sheena Douglass Perfect Partners Birds of a Feather with Ground Espresso Distress Ink and coloured him in by painting with Distress Inks Peacock Feathers and Squeezed Lemonade to make him appear as a Blue Tit ( watch it Ang lol!), then die cut with Little Bird, I painted over the nest with Brushed Corduroy to add a different tone of colour between the branches and cut this out by hand, the die is only the little bird. 
I die cut  my flourish Sizzix Thinlits Graceful Flourish and coloured that in, I got a smaller flourish I had in my stash out of Black card and a little branch I had from my Spellbinders Cherry Blossom, I placed these at the bottom of my card so the bird and nest had something to sit on! Using Heartfelt Creations Regal Boarder & Pocket dies I cut the larger one out and placed it at the top of the card then added my little bird.
To finish I added some words that I had typed up on my PC and cut out, inking round the edge with Forest Moss Distress Ink.

I hope you like my bit of mixed media, I apologize for the layout, blogger is not playing nicely today and will not wrap the text round my images for some reason lol!

I would like to enter this into http://anythingbutcutechallenge.blogspot.co.uk/2016/04/challenge-12-april-earth-day.html  as I think the world would be a worse place without our little feather friends and http://countryviewchallenges.blogspot.co.uk/2016/04/april-challenge-spring.html as Spring is the time when many birds are busy making their nests and homes in our gardens, I have three pairs of birds nesting in my conifers at the moment so I have told hubby he cannot trim them till Summer now lol!

Thank you for looking, Jacquie xxx


Monday, 25 April 2016

Sheena Douglass ODS Perfect Partners

Hello my crafting friends, good of you to pop by today. Now as some of you know Sheena Douglass has some One Day Special shows on Hochanda today at 9am, 12pm, 4pm and 7pm. Due tune in if you can and view the fabulous demonstrations and see the gorgeous creations by the other Design Team Members.

Today I am showing you a couple of cards I made for the shows.


My first is from Sheena Douglass Perfect Partner have a Wonderful Day, Mr Scarecrow, this was stamped, painted with Tim Holtz Distress Inks then embossed through the Sheena Douglass Embossing Folder Daisy Chain. I faux bleached the daisies then painted them with Tim Holtz Distress Ink Picket Fence. I matted him up onto Black card then onto my base card that I had stamped with Sunflowers that come with the Scarecrow.


These stamps come from Sheena Douglass Perfect Partners Fields of Gold set, there are five separate stamps on here with the grasses one I have stamped a couple of times to make a bigger field. These have all been coloured in with Aquablend Pencils then painted over with a damp paintbrush. i matted this onto Black Card and then onto the base card.

I hope you like them and if you are a fan of Sheena then please tune in to watch her wonderful shows on Hochanda.

Thank you for looking, Jacquie xxx


Sunday, 24 April 2016

Rusty the Squirrel

Hello my crafting friends, so good of you to join me today. I have another card to show you that I made for the Sheena Douglass ONE DAY SPECIAL  on Hochanda today 8pm and tomorrow at 7am, 9am, 12pm, 4pm and finally at 7pm. If you like Sheenas stamps and dies do take a look it showcasing her Perfect Partners Range. I know she will have some fabulous demos for you all.


This is one of my all time favourite Perfect Partners Die Acorn & Leaves & Little Acorn Stamp set, the dies are the little Acorn and leaves, the stamps are more leaves/acorns and the beautiful Mr Squirrel. I dedicate this one to Pamellia and all her family of Squirrels she has of late, I am sure she can give him a name lol!

I decided to just have him sitting on a bed of leaves so I made them Autumn colours as its my favourite season of the year. I have used Tim Holtz Distress Inks Crushed Olive, Rusty Hinge, Forest Moss, Antique Linen, Ground Espresso and Squeezed lemonade to colour it all in using the colours as paints, for this you rub some of the colour from the pads onto your craft sheet/glass mat and use them as paints, do not go to the distress ink pads directly as paints, although they are water based you will water down the colour and they will be no good.
I used all these colour inks to paint the leaves, trying to get as natural look as possible on the colours.

For Mr Squirrel I painted him completely over with Antique Linen, followed by Ground Espresso then Rusty Hinge until I got him the shades I wanted, of course if you prefer a Grey Squirrel then you only have to change the colours!

I was very happy with how he turned out and I did not wish to lose any of the detail by trying to cut him out so I just fussy cut around him leaving the finest White boarder I could to show him off. I raised him up on the leaves so he stood out a bit more.

Around the edge of the card I stamped the Little Acorn and leaves, the Acorn I painted with the same three colours as Mr squirrel, the leaves I used a Spectrum Noir Aquablend Pencil in one of the Greens from the Naturals selection.
To complete the card I die cut a few leaves and a couple of Acorns, painted them then added them to opposite corner of the card as seen to add some definition.

I added the sentiment using Black Stazon ink, the sentiment comes in the stamp set, I think its such a beautiful sentiment.

I hope you like my card and please join in to view the shows to see all the beautiful creations from the rest of the Design Team.

I am entering this into http://anythingbutcutechallenge.blogspot.co.uk/2016/04/challenge-12-april-earth-day.html  as for Earth Day I love all the beautiful wildlife that we have .

Thank you for looking, Jacquie xxx

Tuesday, 5 April 2016

Beauty Comes From Within Canvas

Hello my crafting friends, did you manage to view our Sheena on Hochanda last night? If not she is on today at 7am, 9am, 12 noon, 4pm and again at 7pm so plenty of opportunity to tune in if you wish. The design team have made some stunning samples so do please go and take a look

Here is the canvas that I did with the 'Butterfly Torn' stamp...


                                                                         close up!


I first covered my canvas with Galleria Modelling Paste and combed through to make the lines, this is one technique I stealed from the lovely and beautiful talented Pamellia which you can view HERE, not only have I stolen the comb technique but also the painting of the background, I so love Pamellias designs and creations and I loved this background so decided to give it a go not really knowing where it would lead! For my colouring I used Aquatints Blue from Landscape and Black from Essentials. I made sure I painted round the edges of the canvas too!!!

On some card I stamped the Butterfly Torn stamp and cut it out by hand then painted it in with Distress Inks, I put this to one side.

I stamped more of the Butterflies onto some card and painted each one with Pebeo Iridescent Paints as I knew this would show the lovely glisten and shine of the colours. I hand cut each one out and placed to one side.

In my stash I had this die cut of Sissix Tim Holtz Alterations Frameworks so I placed this onto my canvas on the left hand side vertically then placed my cut out Butterfly Torn piece on the bottom. I stuck my Butterflies down as if they were flying out of the dark hole into Freedom, showing their beautiful colours as they went, hence the sentiment 'Beauty comes from Within' which is one of the sentiments that come with the stamps. I placed this in the bottom right corner and there is the finished canvas. I do hope you like it and a Special Thank You to Pamellia for all her inspiration, go and check out her wonderful blog if you have not already done so its http://mylittlecraftthings.blogspot.co.uk/

Thank you for looking, Jacquie xxx


Friday, 1 April 2016

Beautiful!

Hello and welcome to my little bit of craft corner, I hope you like what you see and pop back again.

Today I am showing what I made in my little play time I had yesterday, I was quite pleased with how it turned out. This is only a tiny card, quite unusual for me as I love my 8 X 8's but this is a 6 X 4 so quite small!

I apologize now for all the images, I got a bit carried away lol!


I started with my White base card and measured up two other pieces of card. The first piece of card I inked up with Tim Holtz Distress Inks Antique Linen, Gathered Twigs and Ground Espresso then splashed a little water over the top. I scored some lines to make it look a bit like wood.
I then stamped on top in places with one of the stamps from Crafters Companion Texture Elements Splats & Accessories Set 1 with Ground Espresso.


On the second piece of card I inked it up with Distress Inks Peacock Feathers, Crushed Olive and Forest Moss, I love these colours together. I then proceeded to stamp up the crackle stamp from Crafters Companion Texture Elements Splats & Accessories Set 2 using Black Stazon. It actually reminded me a little of  a spiders web! Really must get some new glasses lol!


Also in Set 2 of these stamps was a long edge stamp of dots and lines so I stamped this using Chipped Sapphire Distress Ink followed by Aquatints essentials in Gold over the top, unfortunately the photos do not show this up much.

Next I ran it through a new embossing folder I had from Spellbinders, part of the Seth Apter the Altered Page called Maze, how exciting it is to have some folders with different patterns and designs just fitting with mixed media.

Once I had ran it through the folder I inked up the embossed areas with Victorian Velvet, Forest Moss and Peacock Feathers. I then inked round the edge with Peacock Feathers.

 Using a little piece of White card I stamped the word Beautiful with Black Stazon from the Crafters Companion Texture Elements Words to Inspire Set 1 then inked over it with Crushed Olive Distress Ink.

I mounted the wood effect background onto my base card using Foam tape, after attaching some Light Blue Crochet Adhesive Ribbon across the bottom half of the embossed card I attached this on top of the wood effect background.
I attached the sentiment to the top of my card then looked through my stash of die cuts to find this small spray of leaves, a partial cut die and some leaves. I also came across some frames I had made out of air dry clay a while back so I inked the edge of this with Ground Espresso and Pebeo Renaissance Gold Gilding Wax. I had some free papers from a magazine and among these was this picture of a Lady so I cut it out and placed it in the frame.

I arranged the leaf spray and die cuts across the card, placed the frame over the ribbon and arranged some little Pink & White flowers either side as seen.

There you have the finished card, I hope you like it.

I have decided to enter this into http://anythingbutcutechallenge.blogspot.co.uk/2016/03/challenge-11-crazy-for-colour.html

Thank you for looking,  Jacquie xxx