Followers

Total Pageviews

Thursday 30 January 2014

Golden Dragon

Morning crafters, today is my Son's 26th Birthday so I am showing the card I decided to make for him, he loves Dragons and the colour Purple so I kept to that!


The base card was from an old kit, I added a Gold circle using SP Grand Decorative Circles, followed by SP Hexagons using Purple pearlescent card. I cut the Dragon out of Gold card with Tattered Lace Oriental Dragon and inked parts with Tim Holtz Distress ink Victorian Velvet and touched up the tips of the back, tail and feet with Creative Expressions Micro Powder in Purple.


The sticker sentiments came from the same card kit ( Kanban) that the base card was from.


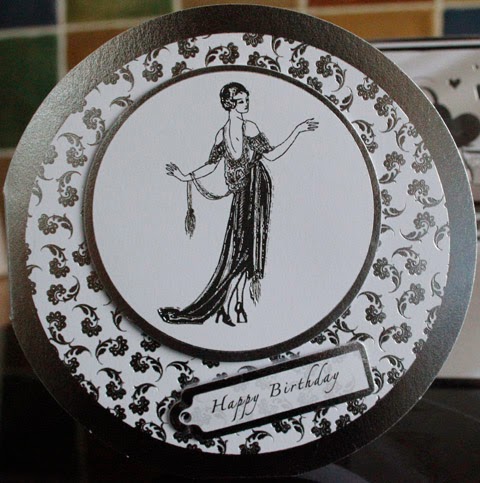
I finished the card off by adding some Purple pearls around the circle with Creative Expressions PVA Plum.


Sorry this is so short, it was very last minute putting it on here this morning and I now have to get to work lol!

Thank you for looking, Jacquie xxx


Wednesday 29 January 2014

Life is not measured...

Morning crafters, hope this finds you all well and safe. We have had some heavy rain and winds here of late but thankfully no sign of any snow yet!

Thank you for all the lovely comments over the past week for my cards it is much appreciated, I have tried to get round to everyone though not always managed it this week so I do apologize.
Shirley I am honored that you think my cards are good enough to copy so thank you and please carry on! Do you not have a blog that we can view?

I have been very naughty and ordered Sheena's new embossing folders, quite an expense but they are so gorgeous, although there were only 2 A4 and 4  5x7 that I wanted it worked out cheaper to buy the lot on offer than to get them individually so I have them on flexipay which puts my craft spending on hold for a while lol! I have taped her shows so I have quite a few to watch. No doubt you will get to see some of them in the future lol! Folders I mean not Sheena's shows lol!

For todays post I have matted and layered up a base card with some yellow card from Lidls followed by a sheet from Teresa Collins paper Pad.

I typed the sentiment and die cut it with S.P. Splendid Circles and inked through the die with Tim Holtz Distress Ink Victorian Velvet, then embossed with the same die using Create and Craft Pink Pearlescent card. I matted the die cut on top of the embossed card so the Pink came through the White.

Using SP Die-lites make a Rose I die cut all the pieces out of Crafters Companion Centura card, now I say pieces as the die is actually 1 die but shaped as 4 different size petals so you die cut the 4 petals at once but you need 12 of the larger size and 5 of each of the next sizes, so it meant putting the die through the machine 24 times in order to cut and emboss them to get the 12 larger petals, this was just for 1 flower so I don't think I shall be making many of these and I cannot say I am that happy with the flower as I could not get it the way I wanted it but that was me not the dies, I then inked the edges with Victorian Velvet, glued it all together and attached it to the bottom left corner of the card. I cut the leaves out of Green card and placed them under the flower as seen.
 
I added some Pink gems in each of the other corners and there you have the finished card.

I have the SP Lily die, as seen on Wednesdays card, also the Iris which I have not made up yet but looks very simple to do as was the Lily, unlike the Rose!


The dimensions are 6 x 6"

Thank you for looking, Jacquie xxx

Monday 27 January 2014

True Friendship

Morning crafters hope this find you all well this Monday morning?

Don't the weekends go quick? Been the usual busy one for me and yes, we are still sorting the house out lol! Once you start something you cannot see an end to it, move one thing and you find you are doing something else lol!I am sure we will get it all finished eventually, my aim is for Christmas lol!

Well for todays card I started with my basic White card, I found an odd piece of Blue miri card but wished I had more of as its such a lovely colour. I cut two corners from SP Gold Elements One out of Crafters Companion Centura card and placed them on the miri card as seen and wrapped some Blue Organza Ribbon around it to hide the join, making a bow at the corner. I then matted this onto my base card.
Out of the bit of miri card left I managed to emboss using SP  Majestic Lables Twenty Five and cut around the edge, I stamped my sentiment from Creative Expressions Classic Sentiments with Tim Holtz Distress Ink-Black Soot onto more Centura Pearl card and die cut with Lables Twenty Five, I matted this onto the miri embossed card and attached them to the center of my card.

I added an Creative Expressions Pearl Embellishment onto the bow and there you have the finished card.

The finished dimensions are 6 x 6!

Thank you for looking, Jacquie xxx


Saturday 25 January 2014

Snowboarding Girl

 Morning Crafters, hope this finds you all well and thank you for coming along to take a look at my blog, it is much appreciated and even nicer to read any comments you may feel to leave.

Now, as I said on Thursday when I posted the Boy Snowboarder, I would show you the Girl Snowboarder so here she is.

Again using the Black easel cards I got from Create and Craft, they were from a company but unfortunately I cannot remember which one! I chose to not cover the card completely but to add a piece of foiled swirly card for the background from either Crafters Companion or Hunkydory (my memory is getting worse, I have had this card for over a year now so cannot remember which company it came from sorry!) 

I coloured in my image from Chi Chi Memories using Promarkers and die cut with SP Decorative Lables One and inked round the edge with Tim Holtz Tumbled Glass. I matted this onto some Pale Blue Pearlescent card die cut with SP Nest. Decorative Elements Captivating Squares, I die cut a circle using SP Nest. Decorative Elements Delightful Circles out of Crafters Companion Centura Pearl card and cut it in half matting and layering each half under the top and bottom of my image. This might look just as good with a large Oval Die cut. I then attached all these onto my base card. Among the digi images there was this little Dog on Ski's so I coloured him in and cut him out to use as an embellishment.

There you have my finished card, dimensions are 5 X 7.

Thank you for looking, see you Monday, Jacquie xxx

Thursday 23 January 2014

Snowboarding Boy

 Morning Crafters, hope you are all well?

Todays card is one I started with the idea of giving it to my Son for his birthday next week, now I feel I could do him something better, basically its too small!!! I always, for whatever reason, do my kids large cards and giving them a teeny one doesn't seem right, silly I know. This card is only 5X7 but looks smaller, its one of a set of Black easel cards from Create and Craft, the easel part of the card is at the back so there is no need to decorate it if you don't wish to!

I got the digi images from Chi Chi Memories as I loved the images and being as both my kids are into extreme sports these were ideal, you don't see many stamps/images about showing extreme sports which is a shame. I coloured the image in to match my Son (lol!), he has this colour Ski Trousers/Jacket/Hat/ Glasses so seemed appropriate, now I may give it to my Daughters boyfriend whose birthday is also next week and he too likes Snowboarding, I will do it again on a bigger scale for my Son, bigger card just more space to fill lol!

I coloured the image using Spectrum Noir pens and cut it out with Spellbinders  Nestabilities Majestic Elements Gold Circles One die, I inked round the edge with Tim Holtz Distress Ink-Peacock Feathers then matted and layered it onto some Creative Expressions Teal card cut out with Spellbinders Grand Decorative Circles. For the base card itself, as I said these were bought plain Black and I just covered the front with Teresa Collins paper.  The little gloves at the front came with the digi images which I coloured and cut out to use as an embellishment.

On Saturday I will show the Girl Snowboarder.

Thank you for looking, Jacquie xxx


Wednesday 22 January 2014

Lily Cat

Morning my crafting friends, todays card is one I am entering in the Monthly Sassy Studios Competition, thought I would give it a try.

Sorry if I didn't get round to your blog yesterday I will catch up later when I get home from work.

I first coloured the image with Spectrum Noir and Promarkers then cut her out with SP Labels 25. I did add some Creative Expression White Snow glitter to her collar and shoes but it does not show up in the picture.

For the base card I used Crafters Companion Centura Pearl card and matted and layered with two different sheets from Teresa Collins Paper Pad, I cut a paper doily in half and placed these underneath the top sheet of paper.
I placed the image in the center of the Green sheet and added some swirls from SP Twisted Metal Tags and Accents.


I printed the sentiment onto some Red hearts off the PC and embossed them, rubbed Creative Expression Gilding Wax-Red over the top and placed them on the card, raising them up with sticky pads as seen and finally adding the SP Die-lites Lily flower, coloured in with Promarkers, in the bottom corner.

I am not sure whether I like the Red hearts as I find they stand out too much and you cannot read the sentiment 'Have a Purr-fect day', maybe its just too big?

The finished dimensions are 8 x 81/2". 

This has been entered in the Sassy Studios Monthly Progressive Challenge #9 album Competition 

Thank you for looking, Jacquie xxx

Monday 20 January 2014

Birthday Wishes

Morning crafters, I do hope  you are all safe and well.

My son actually gave me a sheet of double sided adhesive the other day so Oh yes, I had to use it with my micro beads! I used Crafters Companion Centura Pearl card for my base, matted and layered  that up with some Peach coloured card from Lidls, then chose a sheet of Teresa Collins Paper Pad with a lovely Peachy Damask pattern to which I used my adhesive sheet and covered it in Creative Expressions Micro beads. I then attached this to my card base.


Using more of the Peach coloured card I die cut the two larger frames from SP Majestic Labels Twenty Five, attached these to my card raising the smaller of the two up slightly. I wanted a solid piece of card to stamp my sentiment onto so the middle dies from SP Labels Twenty Five were not suitable so I used the oval die from SP Radiant Rectangles, I stamped my sentiment from Creative Expressions Classic Sentiments using Tim Holtz Black Soot Distress Ink and heat embossed it with Papermania Clear Embossing Powder then attached it to the center of the frame on my card.

To finish the card off I added a messy bow using American Seam Binding Ribbon, not sure of the correct colour but it looks Terracotta/Rust colour.
I added a small Decorative Pearl embellishment from Creative Expressions and there you have the finished card. Dimensions are 8 X 6".


Thank you for looking, Jacquie xxx


Saturday 18 January 2014

Some People...

Morning crafters, hope this finds you all well and safe.

Debbie- I used to live in Bradwell, so not too far from you, I still go to Norfolk occasionally to visit my friends there.
Shirley - My bandage/plaster came off yesterday so I am now back on washing up duty but my son is always willing to help if I ask! I know what you mean about foxes, they are beautiful animals but yes they, like many others kill other animals and I don't think foxes eat the chickens for food either, just kill them. I am  sure your card will look lovely whatever animal is portrayed in the center.
Patricia- the hand is much better now thank you, I am managing to make about 3 cards a week at the moment which is scandalous! Should be a lot more lol!
Ang- I hope those foxes are not still keeping you awake?

Now for todays card I played around with my stamping background again, starting off with Creative Expressions Foundation card Spring Green gave me the choice of colours that followed. Onto plain White card I stamped the Justrite background Stamp Elegant Fronds with Tim Holtz Distress Ink Crushed Olives then inked over with Peacock Feathers, I did the same for the smaller frame then matted this onto more of the Spring Green card. On the base card I attached some adhesive paper ribbon across the bottom, this I have had in my own stash for years!

 I stamped my sentiment from Creative Expressions Kind Thought stamps then die cut with SP Radiant Rectangles, I placed this in the center of the background card.

I picked an image from a card kit I had - it was a Country Cottage Floral Stepper kit but not sure from where, matted this onto some Spring Green card then placed both the image and sentiment onto the front of my card at opposite angles for interest.

There you have the finished card. Card is 8X6".

Thank you for looking, Jacquie xxx

Wednesday 15 January 2014

Little Fox!

Morning my crafting friends hope you are all well?


This is the card I was trying to finish when I injured my hand lol! Thank you for your kind comments yesterday, they are much appreciated, may I give a warm welcome to Sandy, lovely to hear from you, I do hope you come back for another visit. Shirley do let me know how you get on with the card. Suzie I would LOVE to play it for another fortnight but I don't think it would work with my lot lol!

May I give a warm welcome to all my new followers, Donna Nuce, Wlt 27 and Debbie Fisher, great to have you on board, please do keep visiting and commenting its lovely to hear from you. If you have blogs of  your own I shall get round to them soon, sorry have just not had the time of late.


I wanted to use more of the Theresa Collins papers as I love this Pad and I did intend to put Micro beads over the top but found I have run out of Double Adhesive sheets!!!  So it was left plain but still pretty. The image I love and its from the Crafters Companion CD Rom Diary of a Country Lady, it does come in a shaped background on its own but I cut it down to fit in the frame of SP Labels 25.

I messed around for ages trying to find the best colour card to use behind it, I tried so many Greens to match up with the slight Green frame around the image I finally found this one from Dovecraft Tea Party Double sided papers pad.

I was in two minds as to whether to put a sentiment on the front or not as the image still looked great in the center of the card but then changed my mind. A woman is known for doing this you know ...

I stamped the sentiment and cut round that with SP Nest Standard Circles Large, inked the edge with Tim Holtz Distress Ink Bundled Sage and matted and layered this onto the same Centura Pearl Pastel card and Green card as the focal image to match.

I did not want a bow for this so it could be used for either sex so just added a couple of Kaisercraft Sparklet Gems Fern Green in each of the blank corners. I could have gone to town on this with more frames, florals, leaves etc  but I did not want to cover the beautiful papers too much.

The finished card is 8X6", I hope you like it?


Thank you for looking, Jacquie xxx


Monday 13 January 2014

Thinking of You

Morning crafters, hope all is well with you all?

My check up with my hand went well yesterday, I now have a smaller dressing on which I still have to keep dry for another 3 days much to the dismay of the men in the house as they are now having to do the washing up lol!

What a lovely weekend of sunny weather we have had down here in the South, its been cold at times but its good to see the sun again. No doubt it wont stay for long its getting cold enough to snow. Even my cats notice the change as they are not staying out for long!

I have always liked these delicate lacy cards I see other crafters make, especially out of one die being used as the card and not just a decorative layer, so I thought I would give it a try, ha! ha! Not as easy as they look! This was my second attempt! Still not great but okay. It took me hours to get it right and I wanted to try one with Labels 25 but I think that can wait awhile!

For this one I used S.P. Radiant Rectangles, at first I folded the Centura Pearl card in half and laid the die on top using the largest frame, it was only after cutting that I realized I had cut the card in two and left no fold for the top, silly me. Of course then I realized I had to omit the largest cutting frame that cuts the edge! I also found that I could not cut the card folded I had to cut one side at a time and line the die up to match, I do hope this makes sense? Anyhow, even after putting both sides through my E-Bosser twice I still had to cut pieces out, very fiddly. At the moment I am not too impressed by the E-Bosser as I find it does not cut as well as the Grand Calibar, even with extra shims, that is unless you put the die on upside down then it cuts through the magnetic sheet no problem lol!!!
I eventually got the card looking the way it should and added the next frame down, this one was one I had in my stash from months ago that I had coated in micro beads so I decided to use that, the next layer was the decorative center of  Radiant Rectangles which I cut using Centura Pearl Pastel card.

I stamped my sentiment from Creative Expressions Classic Sentiments with Tim Holtz Distress Ink Vintage and heat embossed with Papermania Clear Embossing powder. I cut that out with the smaller oval die from the same set. I wrapped some Cream Organza ribbon around the decorative frame and tied into a bow at the side, then attached my sentiment on top.
I added three small cream Rosebuds in the center of the bow to finish the card. I think the finish look is rather pretty but its a very fiddly card to make. The finished dimensions are:6X4"


I have entered this card in the Addicted to CAS Challenge #29

Thank you for looking, Jacquie xxx

Saturday 11 January 2014

May your day be fashioned with joy (and draw winner)

 Morning crafters, good to be back with you all again, I was hoping to be back yesterday but unfortunately for me I had a little accident with the lid of a tin can and my hand, needless to say it was a quick run down the local hospital as I had cut it quite badly (I was actually pushing the rubbish down in the bin ready to take out!!) Anyway, no damage it will be fine, got to go back  to the hospital tomorrow to have it checked, in the meantime I am not to get it wet and to keep my fingers straight, this will help it heal! So it was pretty difficult to finish my card or even type lol! At least it is not painful surprisingly.

Forgot to give a VERY WARM WELCOME TO DONNA NUCE, great to see you and I do hope you visit more. Donna has a blog her own, many of you may know it its  http://houseofcardschallenge.blogspot.co.uk/  if you have not taken a look do so now as its great, full of challenges too.


Well todays card is not the one I was finishing lol! Just to confuse you more, but another one I made today, I have been making up time today and manged to do three cards!!!

Now for the background I stamped Justrite background stamp-Secret Garden with Tim Holtz Distress Ink Victorian Velvet then inked over with Tumbled Glass, I then added a piece of Pink dotted ribbon round the bottom. I used the same stamp in one of the smaller panels using the same distress inks but opposite ways. I ran it through the Embossing Folder by Couture Creations-Damask and added a touch of Creative Expressions Gilding Wax-Patina before I matted and layered it up as seen. The sentiment is from Creative Expressions Kind Thoughts stamps which I stamped and cut out with Spellbinders Lables 25 die.


The picture of the flower I got from an old card kit by Dooliecrafts, I have no idea who these are but I got the kit off Create and Craft. I felt the card looked a bit dull so I added a spot of glitter to the petals on the flower.

The finished measurements are 7x5 inches.

Now for the draw I did earlier in the week, the two winners I have picked out are...

Crafting Suzie and

Cotnob (Pauline)

so CONGRATULATIONS TO YOU BOTH, please e-mail me your address to jacobsjacquie@gmail.com along with your choice of gift from the selection shown and I will get them in the post to you asap. If you want a full list of what is there please ask in your e-mail.

Thank you for looking, Jacquie xxx


Wednesday 8 January 2014

Little Boy Blue

Hi there my crafting friends, hope this finds you all well. I have finally got to play with my new toy but only for a couple of hours last night, enough time to make todays card anyway lol! You would not believe how hectic it has been here still sorting the house out, or at least trying, we had a break Monday night as my Sister took us to see the Rock panto in Ipswich, Dick Whittington Rock n Roll, it was absolutely brilliant. There were only 10 cast members doing the whole show, dancing, singing, playing instruments and the acting, it was so funny, they were a very talented group. Well worth seeing. Anyhow, my sister is coming to see me this evening for a couple of hours before she heads off back to France tomorrow, it will be a long journey for her on her own. I have already booked my week with her for going over to France as she turns 60 this year and has so much planned for it she hardly has any gaps so I got in quick lol!

Well todays card was a quick one, thrown together by the colours the little boy is wearing, I tried to match them up as much as possible without it looking wrong!

Items used:

Crafters Companion Paintbox Poppets Collection CD Rom
Crafters Companion Centura Pearl Card
Spellbinders Grand Decorative Circles
Spellbinders Splendid Circles
Spellbinders Die-lites Blooms Four
Spellbinders Die-lites Sprigs
Creative Expressions Foundation Card-Teal
Creative Expressions Foundation Card-Light Blue
Creative Expressions Teresa Collins Designer Pad
Create and Craft Glitter card-Green
Hunkydory Sentiments 

I am hoping to get another card up by the weekend which is when I will let you know who won the draw. Thank you all for your lovely comments, they are very much appreciated and I will try to get round to everyone's posts before the end of the week.

Thank you for looking, Jacquie xxx


Monday 6 January 2014

Floral mix

 Morning crafters, and a very warm welcome to Debbie Fisher, a new follower, you can view her blog at 

http://debscraftycreations.blogspot.co.uk/

Debbie has some fantastic cards on there so please do go and take a look.

Now my little three again are from old stock I have found, when I did them I remember thinking they would make ideal 'Thank you' and 'Get Well Soon' cards, just something small and simple. I am afraid I cannot remember where the kit came from, more likely to be Kanban as I did used to purchase quite a lot of their products., however, if you know different then please let me know lol!

The first one I used the image to match the background card with a little miri card behind the image of the bay tree.
The second card, I used to love this background print and although it does not match the image I think they work well together, I matted the image onto Gold, textured, matt miri card. Lilies are one of my favourite flowers, though I do not have them in my garden anymore as they are poisonous to cats, better safe than sorry.


Finally my third card is just a different colorway to my first and using Gold miri card matted behind the main image instead of silver. Of course I changed the sentiment too.


Three very easy cards to make.

Now my crafting friends, I did mention a couple of days ago about me putting my craft stash onto e-bay to try and sell, well before I do that I have decided to put all the names of you fellow crafters on my blog list into a hat a draw out 2, yes 2 winners who can then choose a prize from my stash. Now I wont draw the names until possibly Thursday or Friday to give you all chance, then whoever names are drawn they can e-mail their address for me to send them their prize. So here is a picture of all I am getting rid of for a better word!


As you can see there are chipboard, fairy card and ribbons, some stamps, embellishments, Chinese card decoupage, Hunkydory Butterfly card, Christmas blank cards and envelopes, gel pens, glitter, Jolly nation card set & stamps, Duflex decoupage, stencils, vellum quotes stack pads, new small punches, new box Red Christmas chipboard shapes. Now I will confess some of these are new and not used, some are part used, but very little, i.e the ribbon pack may have one of the ribbons missing but in these circumstances I shall replace that with a meter of ribbon of similar colour, where there have been pack of adhesive ribbon that I may have used one of the ribbons I have removed that whole sheet so that you only have complete packs, I know this sound really cheap and I apologize for that but this is, as I have said, old stash I am getting rid of to make room for new items, these items I have not used for at least 18 months and I know I am never going to so I would rather give it away or sell rather than throw away, there are one or two items I have never used, I wish I could give away a brand new item as some crafters do in their candy blog but I could not afford to do that. Anyway, those of you wishing to participate can so let me know if you would rather I did not put your name in the hat. I would do it by computer but have not got a clue how they random pick a name that way lol!!

Thank you for looking, Jacquie xxx


Sunday 5 January 2014

Little Mix!!!

Hi my crafting friends, hope you are all well?
These little selection of cards come from various sets I bought years ago, or  at least seems like years ago! Very simple little cards with just a little matting and layering.

The first is of a Chinese look, I loved the background card so did not want to cover it up with too much so the flower in the middle was fine. The sentiment was fitting to the card.


The second 'Congratulations' one was again a simple card, just placing a boarder across the middle then placing two panels in either corner along with the sentiment. The panels and sentiment were already foiled so no matting or layering needed.


Finally the last one again was already foiled, it was just a case of choosing the background card, the image and sentiment and gluing them together! As you can see I kept the monochrome look with this one.


Well today we are having a little break as we are off for dinner with my sister and friends, tomorrow night we are all going to see a Rock pantomime in Ipswich before my sister returns to France on Thursday.  I am hoping to get over to France to stay with her this year, its been a couple of years since I have been over.


Thank you for looking, Jacquie xxx

Friday 3 January 2014

Hello Again!

 Hello my crafting friends many, many apologies for being away so long, I would not have come back today had I not found some 'more old' cards whilst clearing out lol!!! My oh my our house is a mess! I am, believe it or not, still sorting out all my craft stuff, I am trying to get it all on and around my craft desk in my sons bedroom (bless him!) which means the 3 trollies (4 drawers in each) have to be emptied and sorted out, bits and bobs I have thrown but others I am selling on e-bay as job lots once I have finished, I was hoping to get rid of all the trollies but now seems like I have to keep 1 of them as I do not have room to keep it all, I will have to take a photo of my desk once I am finished lol! Not sure whether there is going to be room for me yet!!!
My son informs me that today we are moving my bookshelf out of his room and in the place to where my trollies were (still are as I type this lol!) so going to be another busy day, my hubby, bless him, painted the hallway yesterday, he is finishing that today then we we are sanding the floor boards and staining those! It has been fun trying to keep the cats away from the wet paint so I am dreading it when we stain the floor boards, the hallway is the center of the bungalow that leads to all the bedrooms, living room and bathroom so it is in constant use! Still it should hopefully look nice when its all finished and I may have little pussycat footprints as a permanent pattern, who knows lol! Hopefully we will have a bit more room when its all finished, the conservatory is the next room to be done but that is only decorating one wall thankfully as the rest is all brick and glass! Yes d-cluttering and decorating at the same time, no rest for the wicked lol!

Among my find of cards I have little ones that I shall put up over the next week but I have not had any time to play, so I have no new ones as yet, most disappointed as I so want to play with my new toy, especially as I am back at work from Tuesday, still must get the house sorted first! Ang you are right the E-Bosser is extremely heavy, quite surprisingly, at least it should not move when in use lol! I have it set up on my desk but have not tried it yet!

Well my card on show today was made from a set I bought quite a few years ago from Kanban featuring a mixture of past times including dance and music, I remember making this one for use as a Male card. The sentiment got a bit bent in storage but still useable!

I do hope you are all keeping well and are fully recovered from any Christmas/New Year festivities. Once we have the house sorted I aim to post about 3 times a week fingers crossed lol! Thank you all for being so patient with me and for all your lovely comments, I am slowly getting round to all your posts and wonderful creations.

Thank you for looking, Jacquie xxx

Wednesday 1 January 2014

HAPPY NEW YEAR


                                       HAPPY NEAR YEAR TO ALL MY CRAFTING FRIENDS.

Hi my crafting friends, may I take this opportunity to thank each and everyone of you for taking the time to look at my blog, even though there has not been much of late lol! I will try to rectify that asap! Happy New Year to you all.

I do hope you have all had a Merry Christmas, I came back from my jollies Sunday evening and have been trying to get my house organized ever since!

We had decided over the Christmas period that we must sort out house out and get rid of the clutter, there is a lot of clutter believe me, so we are focusing on one room at a time, or at least that was the theory, now my lovely hubby bought me the E-Bosser for Christmas, well you can imagine how chuffed I was with that so needless to say my first clear up is my craft desk to fit on my E-Bosser and then sort out all my craft items in the dining room into and around my craft desk, not an easy feat! This was so then where my craft items used to be I would now have space to move my bookcase into out of my sons room in order to give him a little more space...after all my craft desk is in his bedroom lol!!! So you can see how this is gonna go can't you, trying to do one room at a time is not going to work! Watch this space lol!

I am sorry for the lack of cards of late but hope to get some new ones on here soon and I hope to get round to all your blogs and catch up on your beautiful creations, I feel I have neglected you all of late so I do apologize.

Happy New Year to you all, I hope its a good one, we will just be having a few friends round for a games evening.

Thank you for looking, Jacquie xxx