Followers

Total Pageviews

Wednesday 29 April 2015

Butterfly Swirl

Morning my crafting friends, hope this finds you all safe and well, if not plenty of hugs to you.


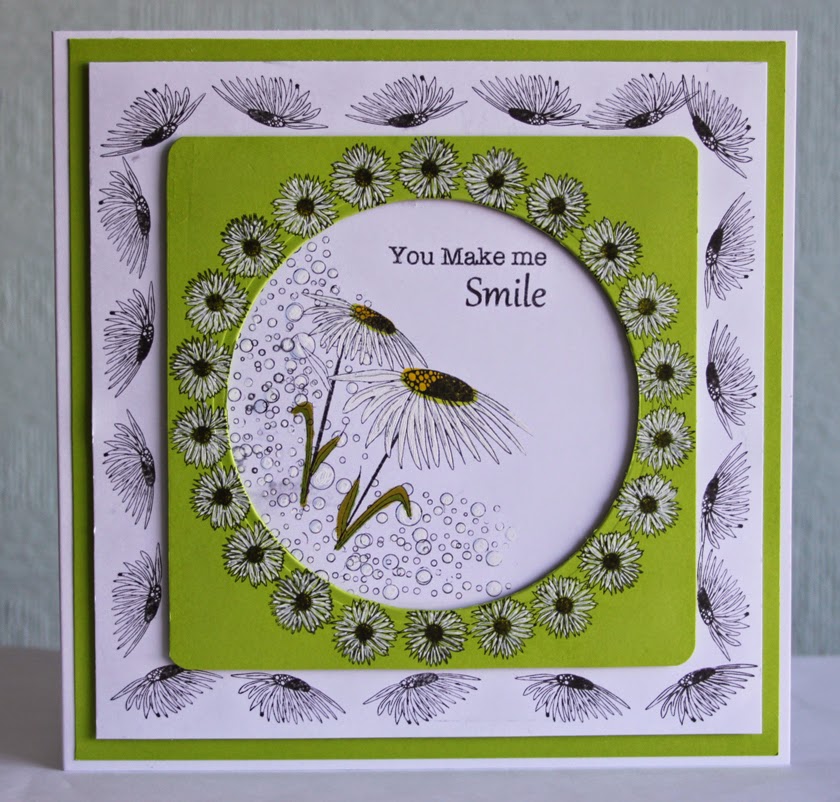
Today's post is another card I made with the left over from a sheet I had coloured for my friends Birthday card, you can see it HERE  I used up every little bit I could, I think I just have a couple of feathers and a swirl left lol!

I did not want to cover up the background so I just added an Art Deco Swirl and a MDF Butterfly that I had coloured with Promarkers  then matted and layered it onto White card.

For the background I took a sheet of Leather Look card and inked it with Crushed Olive and Peacock Feathers, blending them together as best I could, using a circle die I bleached (painting with water then blotting using kitchen towel) inside the circle, I splattered some drops of water over the card and blotted them before I dotted glue over the the sheet using a glue pen then heat embossed with embossing enamel, that was how the background was achieved.

Items Used:

White card
Tim Holtz Distress Inks Crushed Olive and Peacock Feathers
Spellbinders Standard Circles Large
Sailor Rollerball Glue pen
Stampendous Embossing Enamel Shabby Green
Crafts Too Art deco Swirl
MDF Butterfly (Poundshop)
Promarkers


Thank you for looking, Jacquie xxx


Monday 27 April 2015

Friends in the Sun!

Morning my crafting friends, hope today finds you all safe and well, plenty of hugs to those who need them. 

Well a few more days and it will be the end of another month, I had better start thinking about starting my Christmas cards lol! I know some of you have started already, I did intend to make one every week from January but that did not happen lol!

Well today's post is not a Christmas card, far from it. Some of you may remember a card I made of Two Cats in the Moonlight, you can view it HERE, at the time I said I would make one with the Sun so here it is.


I did make this one just after the other but waited to post it as I did not want to post the same image close to each other. 

I cut a piece of White card to size and coloured the Green landscape first using masks and two different colour Green Distress Inks, then the sky using Tumbled Glass Distress Ink. I then embossed the stencil with the same card, placing the stencil over the top again I coloured the tree in with Vintage Photo Distress Ink. Removing the stencil I coloured the Sun in with Squeezed Lemonade and Scattered Straw going over the edge of the embossing hoping to create a haze, not sure I have achieved it! 

Using Promarkers I coloured in the leaves and the Cats, I added a little Yellow Promarker across the top of the branch and on some of the leaves. I did not colour in the 'Friends' as the colours from the sky and the sun did this for me so I left it as it was.

I decided to turn this into an easel card so matted it onto some Black card, made the easel card out of Cream card and attached some Black card on the base that I had die cut with SW French Collection and added a boarder on top for the stopper that had been die cut using SW Spanish Collection.

Hope you like this version, I am sure it would also look good with a sunset behind too maybe over the sea!!!

Items Used:

Sweet Poppy Stencil Friends
Sue Wilson French Collection Corners, Boarders and Tags
Sue Wilson Spanish Collection Corners, Boarders and Tags
Creative Expression Gilding Wax Spring Green
White card
Black card
Cream Card
Tim Holtz Distress Inks Scattered Straw, Squeezed Lemonade, Tumbled Glass, Crushed Olive, Forest Moss & Vintage Photo
Promarkers
Foam Pads/Tape
Clarity Masks Hills


Thank you for looking, Jacquie xxx

Saturday 25 April 2015

Feathers

Hello my crafting friends, good to have you here with me today and I hope you are all having a good weekend.

May I give a warm welcome to my newest follower Jenny L. great to have you on board Jenny. Jenny has a wonderful blog of her own so please do take a look you can view it HERE

Tomorrow would have been my parents 69th wedding Anniversary had they lived to celebrate it, I often wonder what they would look like now, its also coming up to my 10th wedding Anniversary on the 7th May so I had better get my thinking hat on for a card for Hubby lol! Don't know where those 10 years went!


Now I had this small piece of card, that I had stenciled through with modelling paste, that I wanted to use as well as some feathers I had die cut, one being from the coloured background I made for my friends birthday card a few weeks ago, you can view it HERE. I did cut the edge of the feathers down to the spine so they did have the effect of real feathers and once cut they did seem to find there own shape which was rather nice.

I coloured the card with the paste on in Chipped Sapphire, Iced Spruce and Peacock Feathers, matted and layered it onto some embossed card and Teal card.

I added a banner with the sentiment then arranged the Feathers on top so the ends went under the banner and stuck these down.

Inside I added a piece of Teal card followed by a piece of White card to write on.

A tiny card made up of odd bits in my stash box of left overs, I quite like the feathers and may make up a stash for future use.

Items Used;

Crafters Companion Pearlescent Card Teal
White Card
Sue Wilson Embossing Folder Eternity
Clarity Stencils Tangle
Maimer Modelling Paste
Tim Holtz Distress Inks Chipped Sapphire, Iced spruce and Peacock Feathers
Spellbinders Shapeabilities Feathers
Creative Expressions Foundation Card Teal
Creative Expression Unmounted Stamps Classic Sentiments


Thank you for looking, Jacquie xxx


Friday 24 April 2015

Oldies Friday!!!

Hello my crafting friends, its 'Oldies Friday' again, I have manged to find another oldie for you.

Thank you for all your wonderful comments, its so lovely to have you visit me and I love to view your beautiful creations too.

KAREN & KARENLOTTY Here is the link for the supplier of the Leather card HERE  Not sure whether they still stock it but if you e-mail them I am sure you can get some, they will keep you updated on anything on offer too.


I cannot remember how long ago I made this one, must be at least two-three years ago. I die cut the the panels at the front and put behind some card I had coloured, adding some boarder dies at the top and bottom as well as the two outer corners. All of these dies were Spellbinders.

Not sure whether the Yellow ribbon goes with it but I obviously thought it did at the time lol! I have no idea who I sent this too but I can only apologize lol! I think I can say I have improved since those days. NO you say, WHAT?!!!  Seriously, it has taken a lot to put this on here but it is 'oldies'.

Well I look forward to seeing some of your 'oldies' and new creations. I will post some better ones next week...promise!

Thank you for looking, Jacquie xxx

Thursday 23 April 2015

Treasured Friend

Hello my crafting friends, good to have you visit me today, we are getting better weather here, sunny but still a bit chilly, at least it is dry!

Thank you for all your wonderful comments, I do appreciate them. Its lovely to see comments from new people too, all are welcome to browse, comment and follow should they wish I welcome you all.                 

Today's post is a very simple and easy one to do, have I told you before I love the 'Leather Look' card I got from Printed Heaven, I haven't??? Oh well you are missing out...lol! I won't bore you with all that again but I decided just to put a couple of colours in the corner along with a sentiment, added some drops of water and left it at that.


Two of my favourite distress inks are Seedless Preserve and Peacock Feathers so I used these together, I love the look the water drops give and the sentiment just finishes the card.

Items Used:

Printable Heaven Leather Look Cream Card
Tim Holtz Distress Inks Peacock Feathers and Seedless Preserve
Creative Expressions Unmounted Stamps Natures Sentiments


Thank you for looking,  Jacquie xxx

Tuesday 21 April 2015

Horse!

Hello today to all my crafting friends, hope this finds you all safe and well, lots of hugs to those who may not be.

Thank you all for your kind comments Sunday concerning the Vicar, no one else seemed to mind so I guess it was just us few that thought it was a bit disrespectful, my Uncles family certainly never complained anyway!

KarenLotty - yes I did hand cut round the Rectangles shape after embossing this way it leaves just enough for a boarder.


I decided to do a card made of stencils, so I started with my basic 6"X6" White base card, cutting more White card to size I stenciled through the Doodle Crosses stencil with Distress Inks Cracked Pistachio, Bundled Sage, Brushed Cordroy, Weathered Wood and Vintage Photo, then I used more Weathered Wood and Black Soot to go through the Funky stencil just around the edge.

For the focal point of the Horse I cut another piece of White Card and first embossed through the stencil then stenciled in the horse over the top to give it just a little dimension. Sadly these images do not show this up.

I then proceeded to continue around the Horse using the same inks and pattern as before in the background to try and match them up!

Once complete I adhered the image to the background by matching up the pattern as it is on the card, which leaves the card focal point at an angle.

This possibly would look better in more brighter colours rather than the dull look it has here. I have left the sentiment off the card until it is used.

Items Used:

Sheena Douglass White Stamping Card
Creative Expressions Sam Poole mask Doodle Crosses & Funky
Tim Holtz Distress Inks Cracked Pistachio, Bundled Sage, Brushed Cordroy, Weathered Wood, Vintage photo & Black Soot
Sweet Poppy Stencil - Horse


Thank you for looking, Jacquie xxx

Sunday 19 April 2015

Peacock Swirl

Hello fellow crafter, good to have you visit me today I do appreciate to visiting my blog, if you are not a member but have a blog of your own then please do leave the link so I can pay you a visit too.

Thank you so much for all your lovely comments on my last post, you are all so kind.
Karen Hasheck, THANK YOU, I don't think I need to say more.

Thankfully my Uncles funeral went well, the vicar was a bit of a let down, disgusting really. When they start "we are gathered here to say goodbye to... who was a wonderful Brother, Uncle, er, neighbour and anything else he was known by..." well my hubby and me looked at each other and could not believe what she was saying, I really felt for his children although they did not seem upset by it, perhaps it was just us, she made loads of errors in all her readings, you would think it was her first time, it wasn't btw lol! Anyhow, the day passed by quite quickly, we had a lovely evening with my brother who bought us tickets to see The Hollies, my favourite group of the sixties!!! I think I managed quite well as I was up at 4 Friday morning and did not retire to bed till 3 Saturday morning!! How I managed to stay awake that long I don't know, hubby could not keep up lol! Needless to say I was constantly napping on the way home yesterday and looked forward to my bed last night! So my apologies for not keeping up with your posts or commenting, I will take a look at them later today, hopefully! I will start afresh tomorrow lol!


Today's post features the lovely Peacock stamps that Heartfelt creation bought out, I thought it about time I did something with them! I cut a piece of White card to size and stamped my peacock Swirl in the center, I die cut it out using Radiant Rectangles and inked round the edge whilst it was still in the die using Crushed Olive & Peacock Feathers. I then coloured in my image using Promarkers.

Using the same die from Radiant rectangles I embossed a piece of Pearlescent Teal card and cut it out to fit as a frame around the image.

I matted this onto some Leather Look Cream card and there you have the finished card. Quite a quick and easy one which we all need at times.

Items Used:

Heartfelt Creations Peacock Swirls
Printed Heaven Leather Look Cream card
Promarkers
Crafters Companion Pearlescent card Teal
White card
Spellbinders Radiant Rectangles


Thank you for looking, Jacquie xxx

Friday 17 April 2015

Oldies Friday again!

Hello my crafty friends, this is a quick post as today I will be traveling to Birmingham for my Uncles funeral and back again on Saturday so this is a scheduled post. Luckily my son is here to look after the animals for me. Sorry we wont have time to pop by and say 'Hello' Ang, at least not this time but all being well may be up your way July sometime so maybe we can meet somewhere then? So as its 'oldie Friday' I have found an old card I do not think I have posted before, apologies if I have.


This was made with Teal card; Spellbinders Gold Elements One and Gold Labels Four; Tim Holtz distress Ink Peacock Feathers; Stamps, Aqua Silk Crushed Ribbon and Pearl embellishment were all from Creative Expressions.

I hope you all have a lovely weekend, hopefully it will get a little warmer, I want summer now lol!

Happy Crafting and I will be back on Sunday.

Thank you for looking, Jacquie xxx

Wednesday 15 April 2015

Daisy Chain Circle

Hello my friends, good to have you back with me again today. Hope you are all okay? Lots of hugs going to those who are not.


I have been playing again with these lovely stamps designed by John Lockwood, I adore Daisies and I loved these with the Bubbles around them, yes John I have added more bubbles lol!

I decided I wanted to make a Daisy Chain and as one of the stamps is a small Daisy off I went...It bought back many happy memories sitting in my Mom & Dad's front garden on the lawn which was full of Daisies and we would pick them and see who could make the longest daisy chain, simple I know but happy times.

So I started by cutting a piece of Spring Green card and die cutting a circle from the center, to work round otherwise it would not have been a circle!!! I stamped each Daisy so the petals were touching and was quite pleased with how it came out equal, I did not have to leave a gap or push one in lol!
I coloured these in with a roller ball pen in White and a Promarker pen in Yellow for the center although this does not show up to well. The pen coloured these in lovely, you could use paints or other White pens. I liked the way this looked.

I cut a piece of White card to size then choosing another of the stamps I stamped around the edge using Black Soot to give a boarder, I did not count this one out so well as the bottom is one short! Placing the Green card on top I marked out where to stamp my image for the center of the card. Taking the Green card away I stamped my image but decided I wanted more bubbles, can we have a bubble stamp on its own John without an edge please, or maybe there is one in your other sets, I shall have to look lol! This stamp does have an opposite corner with just bubbles but as it was in a frame I had to keep cleaning the edge so it did not stamp onto the card, there is a little smudge just under one of the stems of Daisies where the stamp was still too wet from me cleaning it, I did the best I could to cover it up but it is still visible lol! I proceeded to paint the petals using the White Roller Ball pen and Promarkers for the rest of the Daisies. The bubbles I coloured the edge using Promarkers then coloured them in again with the White Roller Ball pen.

I stamped my sentiment at the top then matted and layered it all with Foam Tape onto my base card which I had matted with another piece of Spring Green card.

On the inside I lined it with more Spring Green card and made a boarder  for the edge using the same stamp I used for the boarder on the background. I cut a circle out of White card to place on the inside for a message to be written on. There you have the finished card. I am quite pleased with it, do tell me what you think, good or bad.

Items used:

Creative Expressions John Lockwood Stamp Set - Daisy Corner
Creative Expressions Foundation Card - Spring Green
White Card
Roller ball Signo Pen - White
Promarkers - Canary, Lime Green, Forest green, Pear Green and Pastel Blue
Spectrum Noir - GG1
Spellbinders Standard Circles Large
Tim Holtz Distress Ink Black Soot
Foam Tape

Thank you for looking, Jacquie xxx


Monday 13 April 2015

Happy 40th!

Hello there my crafting friends, good to have you visit my little blog today, I do appreciate your visit and I do hope you come back to visit again.

May I give a warm welcome to my newest followers, International Directory and Donna, welcome aboard, its good to have you here.

It was my friends 40th Birthday today so I made this card for her:


I started by taking a sheet of the 'Leather Look' card and inking all over it with just two colours, blending them as best as I could, I chose Crushed Olive & Peacock Feathers (two of my favourite distress inks), Crushed Olive ended up looking like a Yellow once they were blended together as obviously along with the Peacock Feathers they made another Green. I loved the final look on this and I have managed to use it for three/four cards so you will probably be sick of it by the time I have finished lol!

After blending I dropped a few water drops over it, then added glue dots and heat embossed with embossing enamel, these are the little specks of White & Gold you can see, the whole sheet had a very light dusting of glitter from the embossing enamel.

I had my basic 7"X7" White card base, I cut to size a sheet of A4 White card and embossed it with a stencil and matted this onto the base.

With the colour blended card I die cut an Art Deco Swirl and cut a panel. The panel I matted onto some Green satin card and attached this to the right side of the card adding the Art Deco Swirl to the left of it.

I printed off a verse and die cut this out using Gold Labels Four that I had inked up with Peacock Feathers first, this I attached on the front of the card with Foam Tape.

I decorated the inside with a piece of Pearlescent Teal Card adding a strip of the blended card down the edge to match the front.

Items Used :

Basic White 7"X7" card
Printed Heaven leather Look Cream card
Tim Holtz Distress Inks Crushed Olive & Peacock Feathers
Sailor Roller -Ball Glue pen
Stampendous Embossing Enamel Shabby Green
Crafts Too Art Deco Swirl Die
Create and Craft Satin Card Green
Clarity Stencil Tangle
Spellbinders Imperial Gold, Gold Lables Four
Verse from Internet

Thank you for looking, Jacquie xxx

Sunday 12 April 2015

Splatter Happy!!!

Morning my crafting friends, hope today finds you all safe and well, lots of hugs are going to those of you who don't.
For those of you who went to Ally Pally yesterday I do hope you all had a fabulous time and spent every penny lol!!! If you're going today have a fab time too.

Todays post I actually did yesterday to enter in a competition over Less Is More,    
they are asking for one layer cards with splatters, I can do that I said to myself, easy peasy Well! Not in a million years is it easy, this was my third attempt as I did not like the other two, did not turn out as I hoped, more splodges than splatters lol! I decided this one was good enough!


I actually stamped the grasses on first then splattered over the top of them carefully not to cover the image, I added the butterflies to give it a bit of colour then added the sentiment last! 

Sorry for the quick post, it only consists of four stamps and lots of coloured paints/inks!Why don't you join in with the challenge?

Items Used:

Yellow DS Card (Own Stash)
Sheena Douglass Little Bit Scenic Stamps Silhouette Garden
Woodware Craft Collection Clear Magic Singles Grasses
Tim Holtz Distress Inks Crushed Olive & Peacock Feathers
Cosmic Shimmer Vintage Mist Egyptian Blue & Antique Rose
Spectrum Noir Aqua Tint Inks Bright & Beautiful

I would like to enter this in http://simplylessismoore.blogspot.co.uk/2015/04/one-layer-splatters-week-219.html 
 

Thank you for looking, Jacquie xxx

Friday 10 April 2015

Daisy Birthday

Morning my crafting friends, I hope today finds you well and a BIG thank you for visiting my blog today, its always lovely to have you here, please have a browse round, it would be lovely if you could leave me a comment on what you think before you leave and I would love for you to visit me again.

I would like to give a very warm welcome to my newest follower Traci, great to have you on board. Traci has a wonderful blog of her own so please do go over and give it a look, you can find it HERE

Now todays post...


I bought these Daisy stamps designed by John Lockwood a while back, this is the first card I had made with them. Quite a simple card, I wanted the aperture on the front to show the beautiful stamp on the inside and I think it worked by framing the top aperture with a different colour. I had to cut the aperture out three times, the base card, second layer and top frame using two of the dies from Labels Twenty Six, thankfully I managed to match them all up, its hard to see the second layer as I used White hammer card and pierced round the edge.

I love the tiny bubbles around the Daisy, just right for adding little pearl drops as I have done here in White.

I coloured the Daisies in with Promarkers and Spectrum Noir pens using a lovely bright Yellow, Orange & Green, loved how this went with the Teal colour of the frame.

To finish the card I added some PVA Pearl drops on the front of the card as seen.

Items Used:

Creative Expressions John Lockwood Stamp Set- Daisy Corner
Basic 6"X6" White Base Card
Soho Creative Hammer Brilliant Card
Crafters Companion pearlescent Card- Teal
Spellbinders Nestabilities Labels Twenty Six
Cosmic Shimmer Pearl PVA- Cosmic Pearl
Promarkers
Spectrum Noir
Piercing Ruler

Thank you for looking, Jacquie xxx

Wednesday 8 April 2015

Friends in the Moonlight

Morning my crafting friends, hope everyone is okay today, lots of hugs going to those who are not. I thank you all for coming by and visiting me its good to have you along.

Thank you do much for all your wonderful comments on my MDF Love Heart (last post) we now have a date to scatter Joys ashes, 21st April, cannot believe we have to wait so long but never mind.

Now I have recently bought three new stencils from Sweet Poppy, I bought some a couple of years ago and love them because they are sturdy being metal as well as easy to clean, nothing wrong with any other kind they all do a great job and yes it means they are a bit more expensive and these were on offer, as soon as I saw this one I had to have it being a cat lover and all that lol!


I knew I wanted to keep the cats as a silhouette so I attached my stencil to the Hammer card and inked through with my Versamark ink pad then heat embossed with two Black embossing powders, one sparkly the other Matt.

I inked round the image with Black soot but leaving the moon White, then went over the edges with Black Soot again and I have just noticed that I have left it looking like the tree is floating, silly me!!! I should have trimmed it back to the end of the tree branch!

To keep the monochrome look I matted this onto some White corrugated card then onto my Black base card.

Very simple to do, I am sure it would look just  as good with using Black Soot or some other ink through the stencil rather than embossing.

I shall do it again but with the moon as the sun...watch this space!

Items Used:

Soho Creations Hammered brilliant card
Sweet Poppy Stencil Friends
Tim Holtz Distress Ink Black Soot
Crelando Corrugated Card White (Lidls)
Crelando Card Black (Lidls)
Versamark Ink Pad
Papermania Embossing Powders Black Sparkly & Black


I would like to enter this into:


Thank you for looking, Jacquie xxx

Monday 6 April 2015

Love Heart

Morning my crafting friends, hope today finds you all safe and well, thankfully those high winds we had over from Iceland have more or less gone, hope no one suffered too much damage?

May I welcome my newest follower Bonnie Garby, good to have you on board Bonnie. If you have a blog of your own then please do let us know the link.

As most of you know I lost a good friend recently, still no word on when we can scatter her ashes yet but I decorated this heart to hang on a tree in the garden near where she will be, I am just hoping no one takes it but that's a chance I shall have to take.


I bought the MDF hearts, tags and banners from Creative Expressions on a John Lockwood show a while back.

I put a hole in the top by using a hand screwdriver then painted the front of the heart with White Gesso then Cosmic Shimmer glue before mixing two Acrylic colours together to paint the front and back. The glue has left a lovely sheen on the front where the back is Matt. Would have looked a lot better had I smoothed it out more lol!

I added my stencil on top and covered it in modelling paste, once dry I painted the edges of the flowers and stems with Mica pigments.

The little MDF Butterfly I bought I coloured in with Promarkers then used a glue pen and covered with Diamond Sprinkles, this did have a lovely sparkly effect but I decided to spray it after I had finished it with Matt Varnish to protect it and it made the sparkle Matt too! Never mind, we all learn by our mistakes.

Using an alphabet stencil I put the name JOY on the side using a black permanent marker.

I did not wish to leave the back plain so using the same Arch Flower stencil I painted through it with Titanium White acrylic paint, once dry I painted the edge of the flowers as the front. I stamped a Black cat in the center, Joy loved cats and her beautiful Black cat Sooty is now being looked after by her other neighbour as that's where he chose to go, my female cat keeps chasing him out of the garden bless him but he does come to visit me on the odd occasion. I wrote on 'Friend' using a Black Promarker then adding some Pink cord for hanging and it was complete.

I hope you like it, it would be interesting to know what you think.

Items used:

Creative Expressions MDF Heart
Creative Expressions Cosmic Shimmer Glue
Creative Expressions Glitter Jewels Diamond Sprinkles
Cosmic Shimmer Mica Pigments Circus Brights
Reeves Acrylic paints-Cerulean Blue Hue, Phthalo Green and Titanium White
Imaginations Crafts Stencil Arch of Flowers
Docrafts Clear Stamps Pampered Pets- Purrfect Chair (just used the cat)
Maimer Modelling Paste
MDF butterfly (Poundland)
Promarkers
Crafty Expressions Alphabet Embossing Stencil
Coloured Cord (own stash)
Matt Varnish


Thank you for looking, Jacquie xxx


Saturday 4 April 2015

Jordan Rock Star

Morning my crafting friends its time for another challenge, number 7 over at http://lilpatchofcraftyfriendsdt.blogspot.co.uk/  I do hope you can join us we have some lovely sponsors and some great prizes:

Prize ~ $20 to spend in store
 
Prize ~ 3 Images
     
Prize ~ 10 Gift Voucher


Here is my post its Jordan Rock Star from kith and kin stamp company.


I first die cut my image out using Grand Ovals and coloured in the background roughly with Promarkers. I then proceeded to colour in the image, again using Promarkers, before stamping across on his headband. As soon as I saw this image I knew the Guitar had to be Red and not just any Red but Glitzy Red, so I added glue to the Guitar with a glue pen and heat embossed it with Tinsel Red embossing powder. I was quite pleased with how this turned out.  

I stamped around the image 'Rock', 'Band' & 'Guitar' and coloured the stars in to match the star on his face.

Using the Grand Oval die I ran it through the E-Bosser with some Red card, cut it out and placed it behind the image bringing the embossed areas into the die cut areas of the image itself. I hope that makes sense to you all? I felt it needed the Red background to bring out the image and tie in with the Red Guitar and headband!

For the background I used a sheet of Pale Blue card cut to size, then stamped over it with the Music melody stamp in Black ink, I then ran it through the E-Bosser with Knotted Trellis Folder then inked around the edge of the card with Weathered Wood distress ink. I matted this up with a sheet of red card folded in half to make the base card.

I added my image to the front and attached the sentiment at the bottom on top of the Fancy Framed Tag I had die cut using more of the Red card.

I wanted to add an embellishment but was not sure what would look right until my son gave me a couple of his Guitar Picks, job done!


I have lined the inside of the card with more of the Pale Blue card.


Items Used:
Kith and Kin Stamp Company 'Jordan Rock Star'
Creative Expressions Foundation card Rich Red & Pale Blue
Promarkers
Spellbinders Grand Ovals 
Spellbinders Shapeabilities Fancy Framed Tags One 
Sheena Douglass Stamping Card White
Range Archival Ink Black
Studio G Clear Stamps Series 24 Rock
Inkylicious Clear Stamps Music Melody 
Sue Wilson Embossing Folder Knotted Trellis
Tim Holtz Distress Inks Weathered Wood
Sailor Rollerball Glue Pen
Papermania Embossing Powder Tinsel Red 
Do go over and view all the DT wonderful creations and why not join in yourself, the theme every challenge is 'Anything Goes' and you never know you might win a prize.
 
Thank you for looking, Jacquie xxx


Friday 3 April 2015

Stags Head

Morning my crating friends and a very Happy Good Friday to you all, I hope you are all well and have an enjoyable Easter weekend ahead. Now don't get sick eating all them Chocolate  eggs lol!

Recently I have got back into stamping and stenciling, as you may have noticed lol! Today's post is a stencil I bought last year of a Stags head, I love the detail on this one. Some of you may remember the Christmas card I did with him last year which can be viewed HERE.


I wanted to show off the beautiful filigree parts of the stencil so I decided to mix some modelling paste with some acrylic paint to make the Brown and spread this over the stencil onto some White card. I was quite pleased with how it turned out as I was not sure I would catch every bit of detail, the second image below just about shows the depth of the paste.

Once dry I rubbed the chisel end of a Promarker pen around the edges then matted it onto some 'Leather Look' Cream card and Pearlescent Brown card. I was going to keep it to this size but then decided to add it as a topper on a larger card to make it stand out more.

Adding the sentiment at the bottom completed the card.

Items Used:

Sweet Poppy Stencil Stags Head
Printed Heaven Leather Look Cream card
Crafters Companion Pearlescent card Brown
Soho Creations Hammered Brilliant White Card
Maimer Modelling Paste
Reeves Acrylic Paint Brown
Tim Holtz Distress Ink Vintage Photo
Promarker Brown


Thank you for looking, Jacquie xxx


Wednesday 1 April 2015

No Bird Soars...

Morning my crafting friends, good to have you visit me today and I hope this finds you all well? I hope you all had a fabulous weekend despite the weather we had, more to come they say...
Be careful today as its April Fools Day, at least till mid-day lol! Gosh this year is flying by.

Ang; I definitely was a Happy Bunnie yesterday lol!

Now for today's post I just wanted a quick and simple CAS card, I think I have achieved it, I am never too sure how many layers of card you should have, if any! I always want to add another layer, it doesn't bother me having no embellishments as its easier to post but I always think another layer of card would make it look that much better lol!


I started with a piece of White card and cut it to size, I then pierced all around the edge with the piercing ruler.

Using a metal grid that I have I lay it across the card and coloured in with a stencil brush and distress ink diagonally across the card. I then proceeded to stamp the Birdcage and Bird using Vintage Photo, once dry I used a bit of water to brush the distress ink and colour in the white spaces on the bird & cage.

Just under the bird I stamped my sentiment, from the same set of stamps, again using Vintage Photo, I did not wish to put it any lower as I did not want to cover the background too much.

There you have the finished card.

Items Used:

Basic White Card 6"X6"
Sheena Douglass Stamping Card White
Metal grid (own stash)
Tim Holtz Distress Inks Scattered Straw and Vintage Photo
TCP Studio Rubber Cling Stamps Vintage Birdcage
Creative Expressions Piercing Ruler
Stencil Brush (own stash)

Thank you for looking, Jacquie xxx