
Followers

Total Pageviews

Showing posts with label Spectrum Noir Aquablend Pencils. Show all posts

Friday, 22 February 2019

Blazing Poppies

Products used; White card stock, Spectrum Noir Harmony Water Reactive Ink Pads, Spectrum Noir Aquablend Watercolour Pencils, Versafine Ink Pad Back, Gel Glue, PVA glue, Heartfelt Creations Blazing Poppy Die & Stamp, Heartfelt Creations Blazing Poppy Stems Stamp, Creative Expressions French Collection Burgundy Die, Black Sparkly Gems, Red Mirri Card.
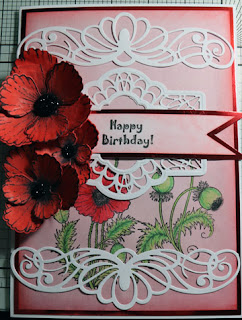


Instructions; Card base, white card stock A4 size folded in half to form A5 base card (6" x 8.5") with side fold. Cut a piece of Red Mirri card 5.5" x 8" adhere to base card. Cut a piece of red paper 5" x 7.5" and ink round the edge with Harmony Water reactive ink pad Chinese Red. On this paper stamp the Heartfelt Creations Blazing Poppy Stems using Black Versafine Ink and colour in using Spectrum Noir Aquablend Watercolour Pencils. Adhere this to the mirri card using red liner tape.

Stamp the Heartfelt Creations Blazing Poppy Stamp onto white card stock and colour with Harmony Water Reactive inks Chinese Red & Bordeaux. Then place the die Heartfelt Creations Blazing Poppy in position over the top and die cut.
Shape the flowers using a flower shape tool, adhere the smaller petals on top of the larger ones with gel glue to make the flowers and put to one side to dry.

Die cut two Heartfelt Creations Regal Boarders & Pockets with the straight edge and die cut one Creative Expressions French Collection Burgundy omitting the center piece, put these to one side.
Make a banner out of Red Mirri card and cut more of the Red paper to fit inside the banner, ink the edge of the red paper as before, stamp onto this the Heartfelt Creations Heartfelt Wishes sentiment 'Happy Birthday' then adhere the red paper to the mirri card banner using gel glue, adhere the flat end of this inside the Burgundy die so the banner comes up and over the edge of the die. Adhere the two Regal Boarders & Pockets dies to the top and bottom of the card as seen using PVA glue then adhere the burgundy die with banner under the top die cut so you can still see the stamped Blazing Poppy Stems underneath.
Place a Black sparkly gem in the center of your poppies, arrange and adhere them with gel glue to the side of the card so they cover the edge of the Burgundy die and banner.

Thank you for looking Jacquie xxx

Saturday, 24 September 2016

AMOR ETERNO

Morning my crafting friends, hope this finds you all safe and well. I had a request from my daughter last week to make a DOTD wedding card as her friends were having a Mexican themed wedding so here is what I made, it was originally A4 size as we wanted the skeletons on the side but it seemed to big for a wedding card so made it into an Gatefold card. My apologies got to Ang lol! ...


This was the front, I did not want it too fussy so kept to the corner and edge stamps with sentiments and just added a few flowers.


For the inside I chose Creative Expressions Foundation card Rich Plum and Silver Miri card for the layering, although the main colours had to be Pink & Blue I chose these as contrasts.


So I got my Rich Plum card and embossed it with the Sheena Douglass Indian Lattice Embossing Folder so it had some texture. 

I made each skeleton from Sheena Douglass day of the Dead Range of Perfect Partners up in a certain pose, the man with his top hat and cane the woman with her veil and flowers. I even coloured their boots to go with the colour scheme lol!


For the main feature inside I chose the Sheena Douglass DOTD Union of Souls stamp, I got a piece of White card and stamped the couple on then painted Pebeo Drawing Gum over the top, let it dry before I coloured the background with Aquatints Pastels to get the light Blue & Pink then I removed the Drawing Gum.


Using Aquablend pencils I coloured in the couple keeping to the colour theme but adding a little Purple in certain places. Once coloured I ran it through the Sheena Douglass DOTD Frame Embossing Folder, this just fitted round the couple perfectly, I decided not to colour over the embossed area as I did not want the focus lost from the couple and the beautiful deep embossing you get from these folders made it stand out anyway. I matted this onto some Silver Miri card. 

For the inside I matted with the Silver Miri card and Rich Plum  Embossed card but before I stuck down the Rich Plum card I wrapped some Vintage Lace Ribbon round the bottom, not only did this give it a slight vintage look and filled up the empty space but I think the pattern of the lace went well with the DOTD theme. I glued this down in place then added the couple so the bottom of the card just covered the top edge of the Lace.

There you have the finished card. I am happy to say the recipients absolutely loved it and are getting it framed.

If you have any questions please do not hesitate to contact me.

Thank you for looking, Jacquie xxx

Thursday, 25 August 2016

Christmas Samples

Hello my crafting friends time to hopefully inspire you with another card and a gift box I made for the forthcoming shows with our Sheena Douglass on Hochanda tomorrow at 10am,1pm & 5pm.


I made this gift box to show all four of the new larger dies in Sheena Douglass Scenic Winter Collection, the Robin, The Rose, The Stag and of course The Snowdrops. These were all coloured using Spectrum Noir AquaBlend Pencils.

For the base I coloured Sheena Douglass White Stamping Card with Tim Holtz Distress Inks Tumbled Glass and Stormy Sky then stamped on top some Snowflakes from Sheena Douglass A Little Bit Scenic Ornate Snowflake, again using the same distress inks, then putting Blue Glitter Glue over the top of the ones that were showing around each die. The lid was just decorated with the Snowflakes. The finished box measured 6"X 6". I allowed a 1" fold over the edge of each side.


This was a small tunnel card showing Sheena Douglass Scenic Winter Christmas Trees and Sheena Douglass Scenic Winter The Stag. To make the card I had my base which I coloured in the sky using Spectrum Noir Aquatints Bright & Beautiful.  Then I had my center card which I stamped on the trees, coloured it in with Spectrum Noir Aquablend Pencils then cut it down at the top hill and just above the top of the trees, the my front card was using the Stag die. This again was coloured in with Aquablend Pencils.

To fix them together I got two pieced of card and  folded it like a fan to make the concertina sides, make sure you really crease these so it does stand out. I attached one to the left side of my base card and one to the right side. I then attached the middle section on the middle fold of the concertina and finally the stag at the front.  You can make these tunnel cards a lot deeper by making the concertina a lot longer, I only wanted the three scenes for this one. I love the 3D look this gives a card. Of course this lends itself to a 6" X 6" card but you can make them bigger with these by placing this on top of an 8" X 8" card and just decorating  round the edge or stamping a sentiment around the edge.

I do hope you can tune in to one of the shows to view all the beautiful samples by the Design team and to watch some fabulous demos from our Sheena.

Thank you for looking,  Jacquie xxx

Monday, 15 August 2016

Christmas Canvas

Hello crafters, cannot believe how long it has been since I last posted, my apologies but I have been a very busy bee lol!

Today I have something a little different for you in the way of a Christmas Canvas. I made this with all Sheena Douglass goodies along with some Pebeo Prism Fantasy paints, these were recently aired on Hochanda in the mixed media shows, they really are beautiful and create these wonderful patterns when dry.


I started with a plain canvas, painted it with White Gesso then added a couple of sheets of kitchen towel for texture and a few beads here and there and painting over this again with White Gesso to stick it down then left to dry. Don't forget to paint the sides too!

Whilst waiting for the canvas to dry I die cut some Holly leaves, Ivy and Poinsettias and coloured them in with Aquatints and Aquablend pencils. When dry I stamped over the Poinsettias with the matching stamps using Tim Holtz Distress Inks. I also die cut some Christmas Baubles. With the baubles I spread out some of the Pebeo Prism Fantasy paints in each one, the Red & Turquoise I added a bit of Gold into the colours but left the Purple as it was, I put these aside and left to dry overnight. You have to leave this paint to dry at least 6 hours so it is better to leave it overnight but its amazing to watch it dry and see the patterns form, who said time is like watching paint dry? Or something like that lol! You can see more of the wonderful pattern in the Red one.

Once the canvas was dry I painted it with Aquatints Bright & Beautiful but decided it was far to bright with what I wanted so I painted over that with watered down White Acrylic paint to diffuse the colours. When this was dry I took the Pebeo relief gilding paste and drew some small circles and trails of dots over the board, and glued down some string to attach the baubles to. I also added a few small drops in the center of the Poinsettias and once dry rubbed Gold foil over them. When the Pebeo paste was dry I filled in the circles with Pebeo Prism Fantasy paints Gold & Turquoise and rubbed Gold foils over the dots, edges of the circles, string and edges of the kitchen towel, anywhere you want it to go really to add a bit of shine.

I placed the holly leaves, Ivy and Poinsettias on the board deciding the best place to put them before attaching them with glue. The next day I added some gilding wax to the edge of the baubles before gluing them into their positions. I added more gilding wax around the canvas and on the edges and corners.

There you have the finished canvas. Quite pretty I think and very colourful, just great for Christmas.

Items Used:

Pebeo Prism Fantasy paint (various colours)
Pebeo Relief Gilding Paste
Pebeo Foils Gold
Sheena Douglass Perfect Partners Festive Fancies Festive Ivy & Christmas Ivy
Sheena Douglass Perfect Partners Festive Fancies Hollies & Berries & Holly Jolly Christmas
Sheena Douglass Perfect Partners Festive Fancies Pionsettia & Perfect Poinsttia
Sheena Douglass Perfect Partners Festive Fancies Festive Baubles &Deck the Halls
Tim Holtz Distress Inks Abandoned Coral & Victorian Velvet
Spectrum Noir Aquatints
Spectrum Noir Aquablend Pencils
Small Canvas Board & Easel
Kitchen Towel

Thank you for looking, Jacquie xxx

Thursday, 21 July 2016

Vintage 50th Card

Hello my crafting friends, hope today finds you all safe and well? Today I am showing the third card I made for colleagues at work, this one was for someones 50th Birthday. For a special birthday I never put the age on as I know some people can get really sensitive about a 'special age'.


For the background I matted some pretty patterned paper, these may have came with the Flights of Fantasy CD ROM from Crafters Companion, I say 'may' as I am not sure as I have had them so long but I love this pretty rose one and I wanted it to have the vintage look about it which I thought this had.

I cut a piece of White card to size and inked it up with Tim Holtz Distress Inks Antique Linen and Victorian Velvet I then stamped Sheena Douglass Little Bit Festive Christmas Stamp Set Vintage Postcard at an angle on the piece of card using Tim Holtz Brushed Cordroy Distress Ink and stamped the rose from Sheena Douglass Little Bit Festive Christmas Set Christmas Child underneath it. I then stamped the rose three more times on pieces of card, cut it out and coloured in with Spectrum Noir Aquablend Pencils then decoupaged the layers. I rubbed Pebeo Gold Gilding Wax round the edge of the card then placed it at an angle on top of the pretty paper.

I stamped my sentiment from Justright Large Fancy Sentiments onto a piece of card I had coloured the same way as before, backed it with a piece of the patterned paper then attached this to the card as seen.

To finish the card I made a bow out of Pink Organza Ribbon and placed that in the top left corner and added some Pink gems in two of the opposite corners.

I am glad to say the recipient loved the card and was the only one who thanked me for the card out of the four I made!!!

Thank you for looking, Jacquie xxx

Tuesday, 19 July 2016

Victorian Wedding Card

Hello my crafting friends, good to have you back today, I really do appreciate your visit. Today I am showing the second card of the four I have made for work colleagues, this is the second wedding card for one who is getting married at the end of August.


I used Sheena Douglass new Christmas stamps A little Bit Festive Christmas for this I used the Victorian Gentleman & Victorian Lady. I stamped the Lady first and painted over the top with Pebeo Drawing Gum, once dry I then stamped the Gentleman next to her. I coloured them both in using Spectrum Noir Aquablend Pencils, the Lady was painted in using a Cream colour but for some reason it turned Grey looking I guess she wanted to match her man lol! I added some Spectrum Noir Clear Sparkle pen over the top of the Lady's coat and hand muff, the picture does not show this up at all!!!

I then die cut it out with the frame from Sue Wilson Italian Collection Calabria and cut the frame part out again and layered over the top then put to one side.

I inked up a piece of card with Tim Holtz Antique Linen Distress Ink, cut to size a piece of paper from the Crafters Companion Downton Abbey Paper Pad and ran it through the Ebosser in the Crafters Companion Downton Abbey Embossing folder Fleur De Lis then attached this to the inked card.

I cut a piece of White Satin Edged Organza Ribbon and wrapped it round both card pieces then attached it to my 8 X 8 base card and placed my framed couple on top. I made a small bow out of the same ribbon and placed this at the top of the frame.

Using a piece of Crafters Companion Centura Pearl card I die cut the  Motor Vehicle from the Crafters Companion Downton Abbey range of dies and placed this on the bottom right corner of the card, I felt this kept with the Victorian look.

To finish the card I stamped a sentiment from Crafters Companion Downton Abbey Clear Stamps Sentiments 2 on top of some inked card and paper to match the card and placed this in the top left corner of the card to balance it out.

Its a bit unusual for a wedding card but that is why I did it to be different from the normal ones they may receive.

Thank you for looking, Jacquie xxx

Thursday, 7 July 2016

More samples...

Hello my crafty friends, hope today finds you all safe and well, apologies if I have not got round to any posts to comment I will try and catch up soon.

Our Sheena starts her One Day Special shows tonight on Hochanda at 8pm, there are some really stunning samples from the Design Team and no doubt there will be some fab demos too.

Here are more of my samples...


This is the Chair stamp, I have added the Christmas hat. The chair stamp was coloured with Aqua Blend Pencils. The background is using Distress Inks and the Holly boarder was coloured in with Aquablend Pencils then painted over with Spectrum Noir sparkle pens.


The background is Distress Inks and the window scene and Gentleman were coloured with Aquablend Pencils. The wreath is made from pine branches cut down, I used gems for the berries and added some snow writer.


I cut the aperture and layered it with Blue card, the flowers are decopaged to raise them up, coloured with Aquablend pencils then gone over with Clear Spectrum Noir Sparkle Pen. The birds were coloured with Aquablend pencils.

This is the inside of the card, Blue distress ink for the background I used the Holly stamp to make a wreath around the girl, this was placed in the centre to show through the aperture.


I hope you get chance to view at least on of the shows so you are able to see the stamps in full, although they are Christmas stamps Sheena has designed most of them so they can be used all year round and not just for Christmas.

Thank you for looking, Jacquie xxx
Tuesday, 5 July 2016

Sheenas Book Lovers Christmas Stamps

Hello my crafting friends, well its been another busy week or two, don't know where the time goes lol!
As you may have guessed our Sheena has some new stamps coming out this week they are her Book Lovers Christmas Stamps. You can view them all on Hochanda on Thursday at 8pm or Friday at 9am 12 noon, 4 and 7 pm. 

Here are a couple of my samples to show you.

This Bow card  shows the head of the lady & Gentleman stamps, the Girl and the Christmas Rose

I used two Aquatint pastel colours, Blue & Purple to colour the background then on the first Bow I used one of the sentiment stamps and stamped all over the bow. I added some die cuts and Lace between the layers to give it a pretty vintage look.


This shows the lady stamp in full along with the Postcard and Roses stamps
The background was done using Aquatints and the smaller background was Distress Inks with the Christmas rose coloured in with Aqua Blend pencils. I added a bit of Spectrum Noir clear sparkle to the lady's coat.

Do look in on any of the shows the design team have made some stunning creations.

Thank you for looking, Jacquie xxx

Thursday, 26 May 2016

Rock & Roll!

Hello my fellow crafters, good to have you with me today, only one more day till our lovely Sheena is back on our screens with her wonderful Rock n Roll stamps, her first show is tomorrow (Friday) at 10 am.

Here is another of my samples...


This cards shows the Guitar and Amplifier from Sheena's Sketchy Stamps Rock n Roll. For the background I painted over Black Card with Aquatints Bright & Beautiful set using the Yellow, Orange and Blue colours working from the center out then covered round the edge with salt and left to dry overnight. This gives the little crackle effects you can see, each time is different you never get the same look twice but make sure the paint is really wet, this is why Aquatints are ideal for this technique. I then mixed some White Gesso and water and dabbed it over the center with an ink pad using first, second & third prints each time to get the different shades.

I then stamped the Amplifier off center with my Versamark Ink Pad and heat embossed it with Cosmic Shimmer Embossing Powder Black. On a piece of card I stamped and heat embossed the guitar in the same way, coloured it with Aquablend Pencils then cut it out by hand and placed it against the Amplifier as seen. I stamped the sentiment straight onto the card using Stazon Jet Black Ink. I matted this onto Gold Texture Card.

Using more Black card I made an A4 card by taping two cards together then measured it to fit the topper leaving enough on the edge to fit my Heartfelt Creations Regal Boarder & Pockets die just to add that bit of flourish, however I have since found my musical notes die which would have been more fitting lol!

I hope you like my samples so far, there are more to come lol! 

Thank you for looking, Jacquie xxx

Tuesday, 24 May 2016

Purple Rain!

Hello my crafting friends, I do apologize for being absent for sooooo long, even I did not think it would be this long, please forgive me lol!

I hope you are all safe and well? I just do not know where the time goes but its come round again for some new stamps from our lovely Sheena, if you like Rock 'n' Roll you're gonna love these!

Over the next few days I will be showcasing the cards I have made for Sheenas shows on Hochanda on Friday 27th May at 10 am in the morning then again at 2pm, followed by Saturday at 11am & 3pm then finally on Sunday at 11am & 6pm.


My first card I want to show you is one I did in remembrance and respect for the Artist Prince, his song Purple Rain is one of my all time favourites so of course I had to stick to the colour Purple A LOT! I made a Gatefold card out of Sheena's White Stamping Card and covered the front with card that I had coloured with AquaTints Pastels and ran through Crafters Companion Textures Embossing Folder Rain (well what else did you expect lol!) I matted this onto some Creatives Expressions Plum Card then stamped over the top with Sheena's new stamp set of Sheena's Sketchy Stamps Grunge band patterns using Tim Holtz Seedless Preserve Distress Ink.

I stamped and heat embossed the guitar from Sheena's Sketchy Stamps Rock n Roll twice and coloured them in with Spectrum Noir AquaBlend Pencils. I placed these on the front of the card as seen.

For the inside I lined it all with more of the Plum card and in the center I matted it up with more of the coloured 'Rain' card. 

On more of the stamping card I stamped and heat embossed the Rose stamp from Sheena's Sketchy Stamp Every Rose along with one of the sentiments and coloured this in with Spectrum Noir AquaBlend Pencils, these are so lovely to colour with as they are water colour pencils so once you have coloured in just wash over with a damp paintbrush and the colours blend beautifully. Once dry I die cut it out with X Cut Large Dies, I placed this in the center of the middle of the card.

For the inside of the gatefolds I stamped one of the distress floral stamp in each corner using Tim Holtz Distress Ink Picket Fence and also the stars. Using a White Gel Pen I wrote some of the words from Prince's songs, a different one on each corner, here showing are the words to Purple Rain. The other songs were 'When Doves Cry', Diamonds & Pearls and Kiss.


I do hope you manage to view at least one of the shows not only to watch Sheena's wonderful demos but also to view the other Design Team members stunning creations.

Thank you for looking, Jacquie xxx


Tuesday, 10 May 2016

Hummingbird

Hello my fellow crafters, I hope today finds you all safe and well? We have been having some lovely weather of late but today its absolutely chucking it down with rain lol! Saves me watering the garden!
We had a lovely weekend, it was my Husbands 31st School Reunion, where some of the students who went to Eden hall Boarding school in Bacton Norfolk met up, we mainly spend the day in the pub and of course taking a stroll down to where the school used to stand, favourite places and the beach before heading back to the pub! Eden Hall was a school for special needs children, those who could not be put into main stream schools because they had heart problems, asthma, epilepsy or whatever, there were many age groups there as the school did run for many years, its no longer there as they knocked it down and built houses on the site but the people who own the properties graciously allowed for a special plaque to be put into place last year, the nicest thing is that they have all kept in touch with one another and meet up every year. Of course I like going as it means a trip back to Norfolk where I lived for 30 years and meeting up with my old friends. I will show some photos of our trip at the end of this post.


Another simple card for you. The base card was the other half of card I had from my last post. I cut a piece of card to size and coloured it in with Tim Holtz Distress Inks Bundled Sage and Peacock Feathers and attached this to my base card with Foam Tape.

On another piece of card I stamped my Hummingbird from Heartfelt Creations Romantique Wings Pre-Cut Set and coloured this in with Spectrum Noir Aqua Blend pencils. I die cut it out with X-Cut Lables die, coloured the edge with Peacock Feathers DI and then placed it in the middle of my background. 

Over the top I added one of Heartfelt Creations Regal Boarders & Pockets dies that I had die cut out of White Card.

There you have the finished card, I left a sentiment off so it could be used for many different occasions.

Now for my weekend away here are some piccies, I took loads but I wont bore you with them all, just a few lol!
  

The Plaque

Bacton Sea as the sun was going down

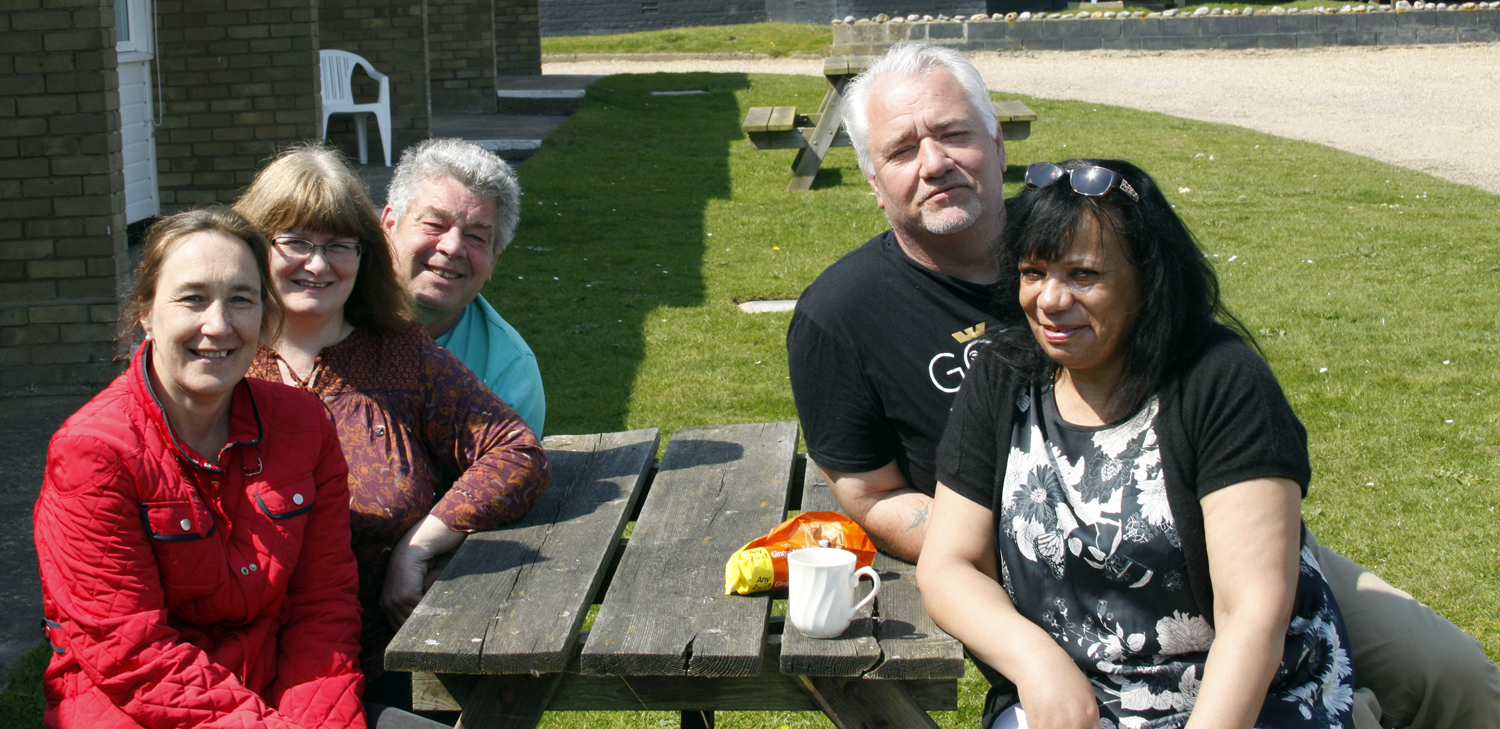
Some of hubbies old school friends (I am second left, hubby is behind me)

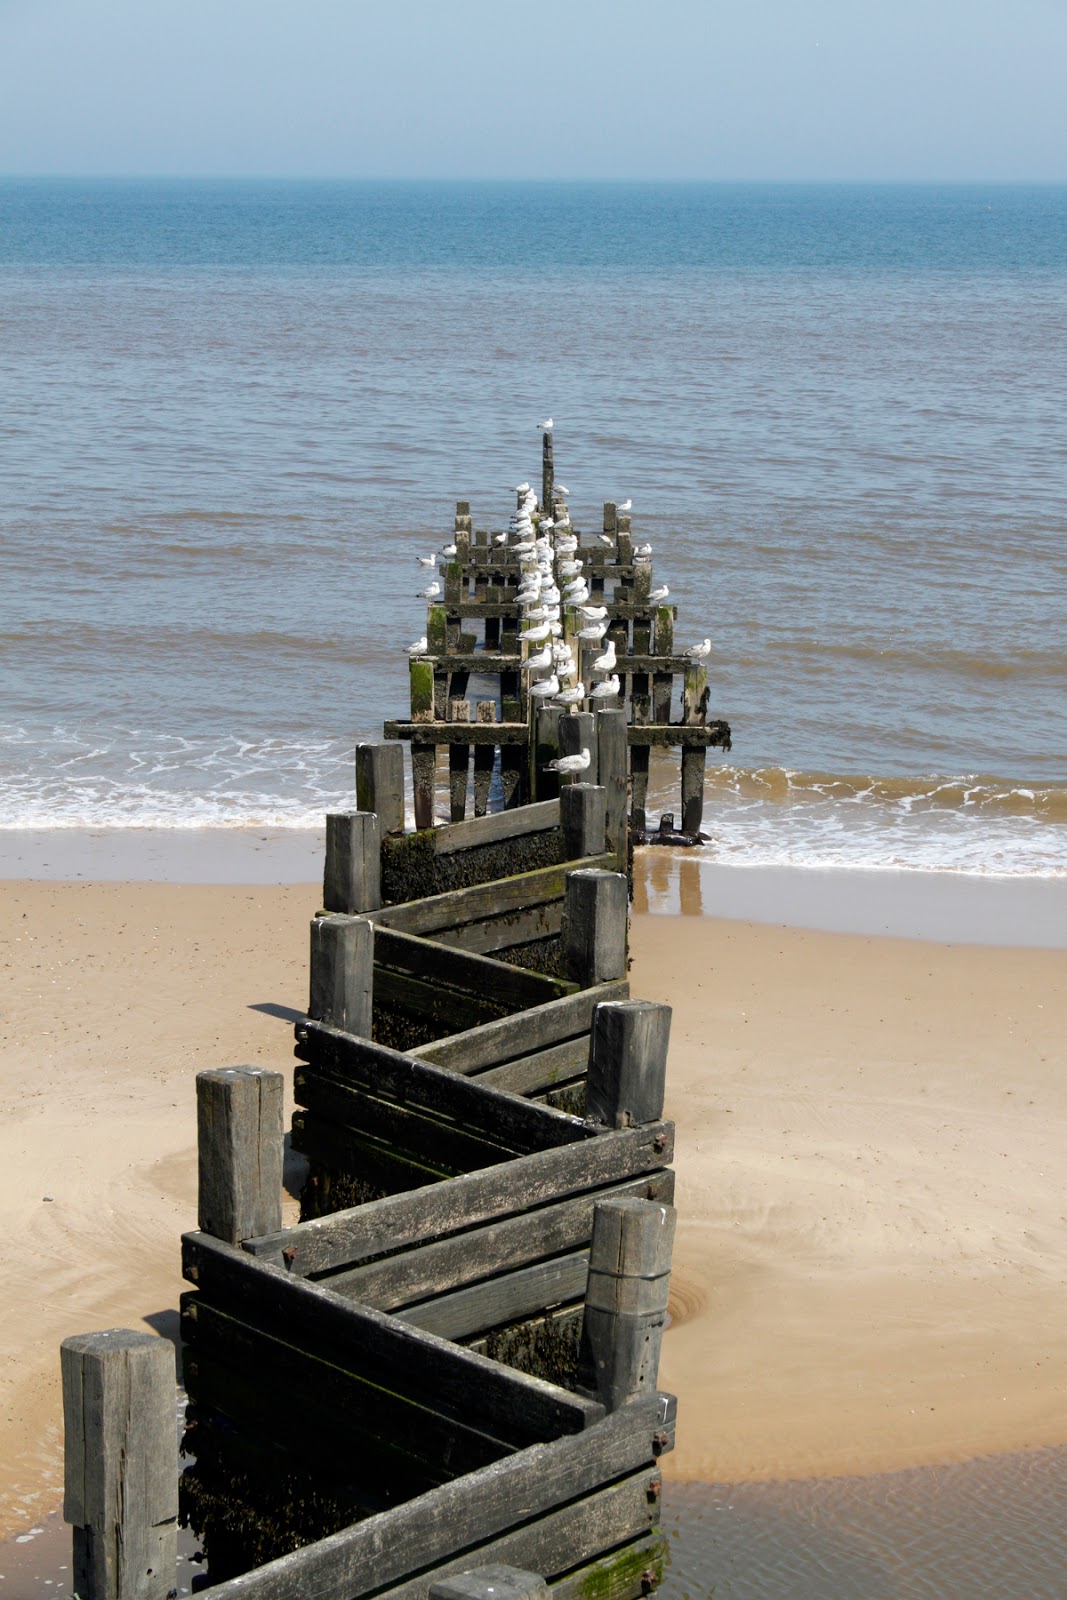
Thought this was funny, how the Seagulls sat on a post each
all looking the same way!

Beautiful Rape field, the colour looks stunning against the Blue sky

It was in Brunstead, Norfolk!!! We passed it on our way back home


Thank you for looking, I will be back next week, Jacquie xxx

Monday, 25 April 2016

Sheena Douglass ODS Perfect Partners

Hello my crafting friends, good of you to pop by today. Now as some of you know Sheena Douglass has some One Day Special shows on Hochanda today at 9am, 12pm, 4pm and 7pm. Due tune in if you can and view the fabulous demonstrations and see the gorgeous creations by the other Design Team Members.

Today I am showing you a couple of cards I made for the shows.


My first is from Sheena Douglass Perfect Partner have a Wonderful Day, Mr Scarecrow, this was stamped, painted with Tim Holtz Distress Inks then embossed through the Sheena Douglass Embossing Folder Daisy Chain. I faux bleached the daisies then painted them with Tim Holtz Distress Ink Picket Fence. I matted him up onto Black card then onto my base card that I had stamped with Sunflowers that come with the Scarecrow.


These stamps come from Sheena Douglass Perfect Partners Fields of Gold set, there are five separate stamps on here with the grasses one I have stamped a couple of times to make a bigger field. These have all been coloured in with Aquablend Pencils then painted over with a damp paintbrush. i matted this onto Black Card and then onto the base card.

I hope you like them and if you are a fan of Sheena then please tune in to watch her wonderful shows on Hochanda.

Thank you for looking, Jacquie xxx