Followers

Total Pageviews

Sunday 21 December 2014

Three Angels

Morning my crafting friends, Hope today finds you all safe and well and not too stressed out with all the Christmas preparations. I do wish you all a VERY MERRY CHRISTMAS and a  HAPPY NEW YEAR!  

This will be my last post before Christmas, I am taking a week off over the Christmas period to recharge my batteries and to enjoy the festivities with my family without worrying about getting a post on here so this is my last Christmas card...Oohha!


If you remember Wednesdays post I made a card with the Angel cut out of the center, as I made a few of these cards in different colours I put three of the Angels together as toppers on one card but added different elements in each Angels hand. 

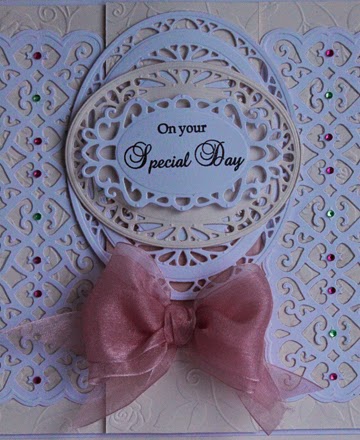
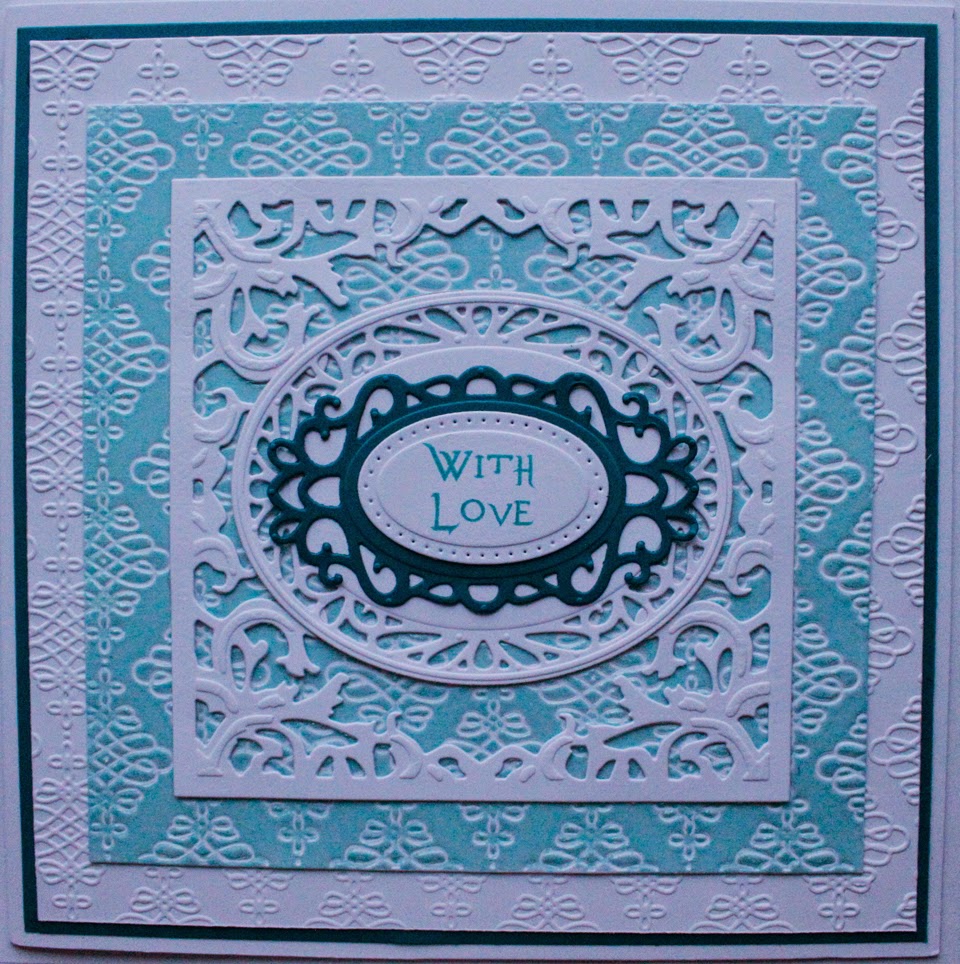
These were from the Purple/Gold, Blue/Silver and Green/Gold colour ways.  The base card was two White A4 cards put together, the next layer was white card pierced round the edge, the top layer was embossed with the eternity embossing folder. 

I finished the card off with a sentiment done on the PC and die cut with the Saltzburg die.

Items Used:

White Card
Creative Expressions Sue Wilson Embossing Folder Eternity
Creative Expressions Sue Wilson Festive Angel
Creative Expressions Sue Wilson Austrian Collection Saltzburg
Hunkydory Foiled card, various colours.

Thank you for looking and I wish you all a very Merry Christmas and a Happy New Year, Jacquie xxx


Friday 19 December 2014

Penguin cake

Morning crafters, hope today is a good one for you, its my last day at work, I break up for the Christmas holidays so hopefully after Christmas I may get some crafting done, after all the house should be well cleaned by then lol!!!

Well as most of you know its 'Oldies Friday' so I thought I would show you a Christmas cake I made three years ago. My son helped me with the figures, which actually we still have in a box, dread to think what they look like lol!


It was supposed to be a ski slope with the Penguins sliding down it lol! Along with the two Eskimos!!!


I used to make Novelty cakes many years ago but it became quite expensive so gave it up, however, I have always made birthday cakes for my kids so perhaps some other Fridays I will see if I can show some of those.

Thank you for looking, Jacquie xxx

Wednesday 17 December 2014

Gilded Angel

Hello crafters! Only one more week till Christmas!!! I am nearly finished with all my shopping its been hard thinking what to buy people this year, I hope you are all coping well with it all?

Sorry I have been absent of late, had so much to do, still boring stuff like cleaning and I am still looking after my neighbour, I just decided it was best to leave the blog for a few days to get everything done, only I have not got it all done lol!!! Not much left to do so I am getting there, don't know what has happened to me this year I am usually organized, cards sent, presents bought and wrapped, this year I am still making Christmas cards let alone sent them out! Its all fun!


Today's post shows a card I did four times over in different colour ways for friends at work, unfortunately I forgot to take photos of them before giving them out so made another similar one to show you what I did!!! I love the Sue Wilson Angel die with all its little elements and I also love the idea of the Angel done in Gilding Flakes so I have combined the two!

I have had some patterned foiled Christmas card in my stash for a few years now, I did get quite a bit when it came out!!! I decided this would look good as a background for my Angel die cut instead of an embossed background so I picked out three colours and patterns and started die cutting! Depending on the colour of the foil I matted and layered them up with Matt Miri card to match and using a colour for the base card to match the colour of the foiled card. I hope this all makes sense? For just this card I did not Matt and layer as you can tell!!!

I cut all the card to the required size then die cut the Angel out of the foiled card and attached some Double Sided Adhesive on the back, I attached this to the miri card then adhered gilding flakes to the front covering the Angel die cut. I then attached all the pieces of card to together.

Out of some odd bits of Glossy Miri card I die cut the little gift and attached this on top of the Angels hand.

Adding a sentiment finished the cards off. Obviously I still have the Angels that was cut out of the foiled cards I will show you the card I made with these on Sunday.

Items Used:

Creative Expressions Foundation Card Rich Purple, Teal, Red & Cobalt Blue
Creative Expressions Sue Wilson Festive Dies Angel
Creative Expressions Sue Wilson Austrian Collection Boarder Corner & Tag
Hunkydory Foiled Card
PC typed sentiments


Thank you for looking, Jacquie xxx

Thursday 11 December 2014

On Your Special Day 2

Hello my crafting buddies, hope today finds you all well? Today I am showing you the replacement card I made for my supervisor, if you don't remember the first one that I made and posted on Monday, but was not happy with, you can view it here. http://jewelscardcraft.blogspot.co.uk/2014/12/on-your-special-day.html


I have changed it slightly, instead of having three strips laid on top I have kept it to one piece and rather than die cut the striplet and placing it on top either side I have cut it out of the top layer that I embossed instead, placed double sided adhesive sheet on the back and put diamond snow over the top to make it sparkle a little, though sadly the photo does not show just how much it did sparkle!

I used the Austrian Collection Salzburg on top of the card. I stamped my sentiment with Archival Ink and die cut with the Austrian Corner, Boarder & Tag and placed this across the center of the Salzburg die cut.

I added a bow made out of the same ribbon as before and to finish the card I added four sparkly gems in each corner.

I do prefer this one to the previous and everyone at work seemed to like it so that was a bonus.

Items used:


Creative Expressions Foundation Card Blush
Creative Expressions Sue Wilson Dies Austrian Collection  Salzburg & Corner, Boarder & Tag
Creative Expressions Sue Wilson Dies Embroidered Striplet
Creative Expressions Unmounted Stamps Treasured Memories
Sheena Douglass Stamping Card White
Embossilicious Desire Embossing Folder Rose Vine
Tattered lace Big Bow Maker & Pink Organza Ribbon
Kaisercraft Sparklets Coral
Archival Ink Black

Thank you for looking, Jacquie xxx

Tuesday 9 December 2014

NOEL

Morning my crafting friends, hope today finds you all safe and well, BIG, BIG Hugs to those who are not.

I actually came across a card the other day that I do not think I have posted on here yet, if I have (I have looked!!!) then I apologize lol!


I made a base card using White card and matted it up with a Rich Green card, For the top layer I embossed the Green card with knotted trellis, I die cut the NOEL out of White card and placed this in the center of my card.

To finish the card off I added three Poinsettias, with some beads for the stamens, in the top left corner and two leaves made out of vellum and heat embossed with White embossing powder.

A quick and simple card to make but one that does not need to much embellishment other than the flowers.

Items Used:

Sheena Douglass White Stamping Card
Creative Expressions Foundation Card Rich Green & Coconut White
Creative Expressions Sue Wilson Embossing Folder Knotted Trellis
Creative Expressions Sue Wilson Festive Collection Framed Noel
Spellbinders Layered Poinsettia
White Vellum
Papermania Embossing Powder Seafoam White
Beads from own stash.

Thank you for looking, Jacquie xxx

Sunday 7 December 2014

On Your Special Day

Hi there my crafting friends, sorry for the late post today, still better late than never right? As some of you may remember I had been accepted on the DT for a new crafty blog that is starting up in January called  http://lilpatchofcraftyfriends.blogspot.co.uk/   this past week they have been introducing us DT members, one each day so you get used to us all and view some of our creations, I was introduced on Friday, if you click on the link it will take you straight to the blog where you can meet us all, not long to go till the first challenge (Jan 4th) so I do hope you come and join us, every week is Anything Goes so its open to anything crafty.

Now onto todays post, a card I made for my Line manager who is 30 this coming week, however, I did not like the finished look so I plan to re do this later today lol! It will be similar but hopefully better!


I started with my Blush card as a base layered up with White card. The second layer of Blush card I embossed and cut into three strips, placing two on either side and one in the middle raised up with foam tape.

I cut two striplets out of White card and placed these either side of the card and placed a gem on each section down the middle of the striplet.

Out of Blush & White card I die cut using the Austrian Collection Salzburg, Innsbruck & Corner, Boarder & Tag, I stamped my sentiment on to the Tag and layered these up as seen.

Underneath these I added a bow made out of Organza ribbon.

There you have the finished card, I will show you the actual one I will be giving her later in the week.

Items Used:

Creative Expressions Foundation Card Blush
Creative Expressions Sue Wilson Dies Austrian Collection  Salzburg, Innsbruck & Corner, Boarder & Tag
Creative Expressions Sue Wilson Dies Embroidered Striplet
Creative Expressions Unmounted Stamps Treasured Memories
Sheena Douglass Stamping Card White
Embossilicious Desire Embossing Folder Rose Vine
Tattered lace Big Bow Maker & Pink Organza Ribbon
Kanban Self Adhesive Gems
Tim Holtz Distress Inks Black Soot
Foam Tape


Thank you for looking, Jacquie xxx

Friday 5 December 2014

Hello again and Oldies Friday!

Hi my crafting friends, so sorry for the long absence. My friend and neighbor is home and making good progress, her other neighbor & myself are taking it in turns to cook a meal for her each night so with that and running the dog back and forth to the vets for check ups I have not had time to do much crafting, actually none lol!!! I have also set myself a goal of doing some cleaning every night to sort the house out (and get the whole house clean) ready for Christmas, there are just not enough hours in the day right now.

Anyhow, I have not forgotten Oldies Friday, I cannot remember ever posting this one before but if I have then I apologize!

The sad thing is I cannot even remember what I used to make this, it must have been a couple of years ago at least, my brain is not working at the moment so sorry no list just the image!

I hope you are all well, I do try and view your posts each day. Hopefully after this weekend I may be back in the saddle so to speak!

Until then, thank you for looking, Jacquie xxx

Sunday 30 November 2014

May Time Bring Happy Memories...

Hi there crafting buddies, hope today finds you all well, less than four weeks to Christmas HEELLLP!!! Still not much Christmas shopping done!!! Doesn't it creep up fast?!!!

Today's post is one of those cards you never like to make but sometimes have too. I have not had to may I hasten to add but I liked the sentiment so used it!!!


I started with my basic White card and matted it up with some Lilac card. I embossed some Rich Purple card with Knotted Trellis, rubbed gilding wax around the edge and attached this to my base card. 

Using the Sue Wilson Austrian Background I die cut with White card and adhered to some Lilac card and placed this in the center, raising it up with foam tape.

The center piece I die cut out of Rich Purple card and White card, stamped my sentiment onto the White card and cut round the edge to fit inside the Purple piece as seen.

There you have the finished card.

Items Used:

Sheena Douglass White Stamping Card
Creative Expressions Foundation card Rich Purple
Creative Expressions Sue Wilson Austrian Collection Background
Creative Expressions Unmounted Stamps Natures Sentiments
Creative Expressions Gilding Wax Amethyst
Creative Expressions Sue Wilson Embossing Folder Knotted Trellis
Create and Craft Coloured Card Lilac
Tim Holtz Distress Ink Black Soot
Foam Tape

Thank you for looking, Jacquie xxx

Friday 28 November 2014

'Oldie Friday' Fused Glass

Happy Friday to you my crafting buddies, hope it has been a good week for you all? Thank you for visiting me today I really do appreciate all your visits so do please keep coming.

I may be missing off here for a while next week as the posts I have on have been scheduled but my dear good neighbour has been rushed into hospital so I am visiting her each night after work so no crafting time at the moment, she has no family down here so I don't like to leave her on her own. Sorry guys, I think there are a couple more scheduled posts but depending on how things go over the weekend not sure when I will get chance to do more.

Its Oldie Friday again so as promised here is the glass product I made my Daughter. As you may remember for my son I did a Snowboarder out of stained glass, for my daughter I did Surf boards on the beach out of fused glass.


With fused glass you cut all the pieces out as you would with stained glass but you can use very thin strips of glass as well as glass particles to add patterns i.e as I have done here on the surf boards.

You start with a sheet of clear glass then add the layers of glass on top, gluing them down as you go and hoping they stay! You can use special pens to draw on the glass to as I have with the palm leaves, clouds and flowers, when you have finished it all goes in the Kiln to fuse the glass pieces together, this is when you pray it all goes well as lots of times pieces tend to break off or move. Some strips of glass broke off this but it was not too bad.

The photo does not do it justice as with this one the effect is 3D so you have to imagine the surf boards protruding out on the top where the background the glass has fused together smoothly.

I was quite pleased with it as again it was the first, and only time I have done fused glass, I did want to do it as a stained glass like my sons but the  tutor persuaded me to try fusing it. My Daughter loves it and has it sitting on her fire place in her dining room.

The dimensions are around 8 inches wide by about 6 inches high if my memory serves me correctly!

Thank you for looking, Jacquie xxx

Wednesday 26 November 2014

Framed Noel Tags

Hi there crafters, hope today finds you all well. Thank you for all your lovely comments on Monday, I really do appreciate them and I do read every single one. Thank you for the comments on my Rabbit, it was for the best, she's now with her partner who went back in February! The dog is doing fine.

Ang, you never know one day I may pop in lol!

As I mentioned on Monday I was going to start making some smaller cards so I thought I would use the Sue Wilson die Framed Noel!!! 


That would make a sweet little card I thought until I had finished then decided it looked more like a gift tag! So that is what I would do, make gift tags out of it, such a gorgeous die and although it can be time consuming as it needs cutting at least twice, it does make for a lovely gift tag.

Thankfully as it is such a small die I managed to use my offcuts from my other cards, just fold over the card, place it on the die and run it through your machine, ink in the die if you wish, line it with either patterned card or White card, add a bit of glitter and there you have some lovely tags. They are a lovely size to write in too!

You can do whatever colour you wish, maybe to match your wrapping paper, embellish them or decorate them as you please.

I shall be making more of these out of miri card I think.


Items Used:

Creative Expressions Sue Wilson Festive Collection Framed Noel
Creative Expressions Diamond Snow
Various Coloured Card


Thank you for looking, Jacquie xxx

Monday 24 November 2014

Oval Frames

Hi there my crafting friends, so sorry for the delay on today's post have had a lot on lately, mainly with Pets, dog has had her op (she had burst her blood vessels in her right ear) so she has needed constant watching, needless to say she has not liked me leaving her side, good job I had a long weekend this week!!! On another note sadly I have to take one of my rabbits to be put to sleep later today, not a nice thought, she has injured the nerves in the base of her spine and has almost lost use of her back legs and other things I wont go into but I don't think its fair leaving her like it even though she is eating & drinking she looks so depressed, she is an old rabbit at 10 years of age.

Sorry about all the doom & gloom, on a brighter note a BIG thank you for all your lovely comments on my stained glass, I had some wonderful comments and they were much appreciated, I would love to do more and Ang I was hoping to do the glass in our front door, I would have loved to have re done your windows lol! Sadly the woman whose workshop I went to has since closed, hopefully one day I shall find another, when I have time and cash!!! For those of you who may not read all comments on my post Loll has done some fantastic glass work that you can view here http://www.stampingwithloll.com/2014/02/welcome-spring.html   A lot more professional looking than mine, Loll has a wonderful blog too, she is a very creative, talented person.

Now today's post...


I thought I would start making some smaller cards, this being the first, the next well, wait till Wednesday lol!

I had this background piece sitting on my desk for quite a few months, I had coloured up some card with some form of media, unfortunately I cannot remember what I used, I don't think it was distress inks as I do not have this colour Purple so I can only guess it may have been paints sorry! I had die cut the Californian background, rubbed over with gilding wax Cast Bronze and adhered it to the coloured panel and this is how I had left it for a project, so I thought it was about time I had used it!

A small card was my choice, so what to put on the front? I decided on an oval with a sentiment so I die cut using the Oval Frame and Teal card then the Salzburg and center of the Oval Frame out of White card. I stamped my sentiment in the center piece and matted and layered all together placing them in the center of my card. 

On the corners I added the Austrian Corner, after inking them with Peacock Feathers, I then added a Camellia flower and some Leaves to finish off the card. I may have over done it with the dies and now wish I had not coloured the corners but apart from that I am happy!

Items Used:

White card
Paints?
Creative Expressions Sue Wilson Californian Background
Creative Expressions Sue Wilson Austrian Collection Corners, Boarders & Tag
Creative Expressions Austrian Collection Salzburg
Creative Expressions Sue Wilson Finishing Touches Camellia
Creative Expressions Sue Wilson Finishing Touches Petite Vinery
Creative Expressions Foundation Card Teal
Creative Expressions Gilding Wax Cast Bronze
Wild Rose Studio Oval Frame
Sheena Douglass Little Bit Magical Angels Among Us (Sentiment)
Black Archival Ink
Flat-backed pearl (own stash)
Tim Holtz Distress Ink Peacock Feathers

Thank you for looking, Jacquie xxx

Friday 21 November 2014

Oldie Friday!

Morning crafters, hope this day finds you all safe and well? Thank you for visiting me today, I have a long weekend this week as we are not in work today or Monday as its non-pupil days so a nice long weekend and I plan to play! What's the betting something will put a stop to that lol!

Anyhow today's post is for 'Oldie Friday', its been a while since I put anything up, I believe Erika started this off but please don't quote me on that lol! You can find her blog here: http://snappycrafts.blogspot.co.uk/

For many years I have loved stained glass windows, all stained glass really and it was a few years ago I had a chance to give it a go when I had to accompany a student to the classes, she was quite poorly and could not do a lot in school so they arranged for her to do this, needless to say she loved it as did I, in fact I do remember putting a grinder on my Christmas list so I could do it at home but that has never come about lol!

After the first tutorial and trial, where I made a little butterfly, we were able to have a go at whatever design we wanted, my student did a lovely mirror edged in stained glass but me I decided to be a bit more adventurous if you like as I wanted to do a snowboarding scene for my Son, I was told if I could do that then I could do anything, the Lady thought it was a bit too ambitious for my first project!!!  Well here it is...


I was well chuffed with how it turned out, I chose the colours to match my son's snowboarding gear at the time and even found some Black glass that was patterned enough to look like the sun on his goggles! I did copy the image from a drawing I found on the internet as I wanted a snowboarder in the air! My son loved it and still has it kept safely.

My Daughter did not miss out as I followed this with a surfing theme for her but using fused glass, this I shall keep you waiting to see until next Friday! I know...lol!

They both received them as a surprise Christmas present a about 4 years ago.

Thank you for looking, Jacquie xxx

Wednesday 19 November 2014

With Love

Morning my crafting friends, thank you for visiting me today, I hope you are all okay?

Today's post is one of those cards you want to make but then don't! A work colleague and friend of mine, a wonderful Lady who has the most gigantic heart and will do anything for anyone has just been given the news that her cancer is terminal, she only found out by accident that she had the big C just a month ago, it has spread to her Liver and there is nothing they can do. Needless to say we were all in shock last week when we were informed, they have given her 3 months to 2 years with Chemo, she has a partner and four children, she is only in her middle 40's, such terrible news so I offered to make this card for her that we could all sign, obviously I had to be careful what I put on the front so opted for  'With Love'. I did not want to make it too fancy or bulky as that makes it hard for people to sign inside but I did not want it too plain either so I hope I have managed an even ground. She has always loved my cards so I wanted it to be special, not sure whether I have achieved the 'Special' card I would have wanted but it was not just from me.


To start with I was not sure what colour to use as certain colours are used for certain occasions, so although I knew she liked Purple, that colour was out. Not sure whether she would like Pink so that went, I opted for Teal and White in the end.

I started by putting two sheets of White together to make an 8" X 8" card, matted it up with Teal Card, with more White card I embossed, trimmed to size and matted on top. Using the same embossing folder I embossed another piece of White card and turning it over I did the John Lockwood technique of inking up the de-boss side and heat embossing it with Artic Bay Lustre, this makes it look like a tiled effect, I trimmed to size and attached to the card.

Using more White card I die cut the Couture Creations Fancy Frame and placed this in the center. I die cut White card using  the Salzburg  die and placed this in the center of the frame. 

With Teal card I die cut the tag from the Austrian Collection Corner, Boarder & Tag, I stamped my sentiment onto White card with Peacock Feathers and die cut the top layer of the Tag die out placing it in the center of the Teal Tag. Hope all this makes sense?


This finished the card as I did not want to add any glitter, gems flowers or bows, just wanting the dies to work for themselves.


Items used:

Sheena Douglass White Stamping Card
Sheena Douglass Little Bit Magical Stamps Angels Amongst Us
Creative Expressions Foundation Card Teal
Creative Expressions Sue Wilson Embossing Folder Eternity
Creative Expressions Sue Wilson Dies Austrian Collection Corner, Boarder & Tag
Creative Expressions Sue Wilson Austrian Collection Salzburg
Creative Expressions Cosmic Shimmer Embossing Powder Artic Bay Lustre
Couture Creations  Fancy Frame
Versamark Ink Pad
Tim Holtz Distress Ink Peacock Feathers

Thank you for looking, Jacquie xxx

Monday 17 November 2014

JOY!

Morning crafters, hope this finds you all safe and well, lots of hugs to those who are not. Another weekend over and wasn't it dismal? Rain, rain & more rain lol! Well a little over 5 weeks to Christmas I think! Don't you just love it when I keep reminding you?????? Got no where near getting all my Christmas presents, struggling what to get people really, same old in shops or far too expensive!  Anyhow, onto today's post...


This started out as a White on White card!!! As I was going along I thought I would add some pretty paper behind the die all glittered up, then I decided to add the ribbon around the die as the colour matched the pretty paper, unfortunately you cannot see the paper very well. I have used the same paper behind the JOY die.

Very simple card just Matt and layer white card, top card embossed and die cut out. Glitter some paper and attached it to the back of the die piece. Thread ribbon through the die and make a bow at the bottom, place the die cut back in place in the aperture along with the center die.

Die cut the JOY out of pretty paper for the back and White card for the top scroll bit, attach together with glue and place them on the card as seen.

Add a sparkly gem in the middle of the bow and there is your finished card.

Items used:

Sheena Douglass White Stamping card
Creative Expressions Sue Wilson Embossing Folder Eternity
Creative Expressions Sue Wilson Die Italian Collection Calabria
Creative Expressions Sue Wilson Die Festive Collection Joy
Creative Expressions Diamond Snow
Tattered Lace Papers
Kaisercraft Sparklets Saffron 
Copper Orange Ribbon - E-Bay


Thank you for looking, hope you visit again, Jacquie xxx


Saturday 15 November 2014

Believe in Santa!

Morning crafters, lovely to have you visit me today. Another week has passed and Christmas is getting closer lol! Sorry to keep reminding you all!!!

May I give a very warm welcome to Michelle M, great to have you on board, thank you for following me its much appreciated and if you have a blog of your own Michelle please let me know.

Another Christmas card today, I should stop making them really as I have more than enough lol!


I decided to do a Green card as I had not done one for quite a long time, so my theme was Green & Gold.

I made an 8" X8" card from Rich Green card and matted it with some White. My next layer I put double-sided Tape around the edge and covered it with Gilding flakes. I then matted a layer of Rich Green card cut to fit inside the gilded edge boarder.

Using more White card I embossed it with the Knotted Trellis Folder, inked on the back, the de-bossed side with my Versamark and heat embossed with Gold embossing powder, I then attached this in the center of my card.

I stamped my Santa onto White card with my Versamark and heat embossed it with Black embossing powder then coloured it in with Promarkers. I die cut it out with Gold Circles One and inked whilst still in the die with Crushed Olives distress ink. I attached this to the top right hand side of the card.

I die cut the 'Believe' out of Rich Green card, went over with a glue pen and covered it with Green Glitter. This did not look right sitting straight on the card as it was so I die cut some card with Labels Eighteen and inked it up with Crushed Olives again and placed the 'Believe' on top, this helped it stand out. I attached these to the bottom left hand side of the card.

To finish the card off I placed a little green gem in each of the knots that were showing.

Items Used:

Creative Expressions Foundation Card Rich Green & Coconut White
Creative Expressions Sue Wilson Embossing Folder Knotted Trellis
Creative Expressions Singles Stamp 'Santa'
Creative Expressions Gilding Flakes Morris Dance(I think!)
Sue Wilson Dies Believe
White Card
Papermania Embossing Powders Gold & Black
Green Glitter
Promarkers
Tim Holtz Distress Ink Crushed Olives
Green Gems
Versamark Ink Pad
Glue Pen
Pinflare Double Sided Adhesive
Spellbinders Labels Eighteen
Spellbinders Imperial Gold Gold Circles One


Thank you for looking, Jacquie xxx

Thursday 13 November 2014

Good Friends

Morning crafters, hope this finds you all safe and well. Thank you for coming and visiting me today, I love to have you here and to read all your lovely comments. 

Well its only six more weeks to Christmas and I say ...HELP!!! No problems with cards, got all those done but presents, well that's another problem. What to buy for people? Last year it was easy this year No!  I shall just have to keep thinking and looking, I keep telling myself only two more pay checks till Christmas lol!

Anyhow, enough of that, todays post focuses all around the bow! Yes you did read that right the BOW! I recently bought the Bow maker as I am hopeless at making complete bows and I love the double bows though this is not one lol! When it arrived I had to try just a basic bow, it came with two reels of organza ribbon in White and Pink so I did both colours together, seeing as I was so pleased with the result I had to use it on a card! This is the card I have sent to my friend whose Birthday is today, so HAPPY BIRTHDAY ROS!

I had already done the stenciled coloured background so I used that along with some paper I had found printed off from Tattered Lace papers CD Rom.


The base card I made using two sheets of Blush card, layered it up with the paper and background and attached the bow in the top left corner. I only wanted to add a sentiment so I stamped my sentiment onto some waste card with Victorian Velvet to keep the Pink theme, unusual for me I know as I don't like Pink but remember it was all about the bow lol! I die cut it using the Die-Lectables Baroque Oval and inked through the die, then decided to add another oval behind it so that one I die cut out of the spare paper and placed it behind the sentiment one as a shadow. I attached both of these using foam pads.

Adding some pearls in two corners and a large pearl on the bow, along with a couple of hat pins the card was complete. Dimensions are 7.5" X 7.5".

Items Used:

Creative Expressions Foundation Card Blush
Creative Expressions Cosmic Shimmers (several colours mixed)
Creative Expressions Unmounted stamps Kind Thoughts
Creative Expressions Large Fancy Pearls
Creative Expressions Pearl Hat Pins
Tattered Lace CD Rom Papers
Clarity Stamps Stencil
Create and Craft Die-Lectables Baroque Oval
Tim Holtz Distress Ink Victorian Velvet
Hobby House Self Adhesive Pearls
Foam pads

Thank you for looking, Jacquie xxx


Tuesday 11 November 2014

WE WILL REMEMBER THEM

Morning crafters, hope today finds you all safe and well? Today as I am sure you will know is Remembrance Day LEST WE FORGET. I will be joining in with the 2 minutes silence at work at 11am as always.

Just a quick note, if anyone is wondering what has happened to your comments on my posts its ME! That's what happened, I was deleting all spam and ended up deleting all comments on all posts too sorry! Lol!

Today's post is in honour of all our brave Armed Forces past and present.


I matted and layered up my Red card with White card. I lay the stencil down on the Coconut card (before attaching it to the base card lol!) and inked through with my Versamark Ink Pad then ran it through the E-bosser to transfer the ink and emboss the card, I rubbed Cosmic Shimmer Gold all over. I wrapped some red ribbon around opposite corners then attached to my base card.

I added the poem onto the image in Photoshop, printed it onto photo paper and die cut with Grand Decorative Ovals and attached to card using foam tape.

I added a bow on top of the ribbon in the bottom corner, made my Poppy using Red card and once dry and put together added my poppy on top of the bow. This is quite a big poppy and too big to be put into an envelope so I will have to make a box for it at some stage.

Finished dimensions are 7.5" X 7.5"


Items Used:

Creative Expressions Foundation Card Red & Coconut White
Creative Expressions Cosmic Shimmer Pigments Gold
Clarity Stencil Tangle
Spellbinders Create a Flower Poppy
Spellbinders Grand Decorative Ovals
Image and John McCrae poem from the Internet
Fantastic Ribbons Red Satin 
Kaisercrafts Sparklet Gems Red
Foam Pads
White card

I would like to enter this card in the Challenge http://allsortschallenge.blogspot.com.es/2014/11/week-284-poppiesremembrance_8.html

Thank you for looking, Jacquie xxx

Sunday 9 November 2014

Snowflake Christmas Batch

Morning my crafting friends, another weekend is upon us. Hope you all stayed safe on Bonfire night? Bonfire night is something we celebrate here on the 5th November each year when loads of firework displays are on and there were loads here, in fact we have had them around for the last couple of weeks and no doubt another week at least until they stop!!! My two cats will be relieved then as they will be allowed out of an evening again! I live opposite two schools, they had their display Wednesday night so we were out watching those, my it was cold!
My Daughter thanked you all for you birthday wishes, she had a good time and seems to be coping well with living alone again and enjoying herself, at least that is what she tells me lol! She liked her cards too.

For today's post I had a go at making a little batch of Christmas cards, something that would not take too long and simple. I have to say they did not turn out as good as I had in my head, but then nothing ever does lol!

I have had these coloured cards and envelopes in my draw for about three years now so I decided to use them and keep to the colour of the card for my toppers.


They are all DL cards and I just matted each one up with White off cuts from my sheets of White card from my other cards, usually too small to make another card out of well they were perfect for these. I then, with more off cuts, coloured with distress inks but in a gradient way leaving a hint of white at the side going from dark to light. 

For each card I stamped snowflakes on the card with my versamark ink pad and heat embossed with White embossing powder. The first one I did (Pink one) I tried stamping the sentiment and heat embossing in Silver, I did not like the look of this so for the others I just stamped the sentiment in Black ink. 

I was hoping to make the snowflakes sparkle but I could not over ink them correctly so left it, I might add some glitter by way of a glue pen later. Here I have shown the Lilac, Pink & Blue, using Peacock feather with the Blue, I also have Yellow and Green cards and envelopes.

Quick, easy and simple cards to make if you want a batch done quickly.

Items Used:

Coloured DL cards (think these were bought from The Range)
Creative Expressions Foundation Card Coconut White
Tim Holtz Distress Inks Shaded Lilac, Victorian Velvet & Peacock Feathers
Sheena Douglass Little Bit Festive Stamps Snowflakes
Papermania Embossing Powder Seafoam White
Justrite Large Fancy Sentiments
Archival Ink Black

Thank you for looking,  Jacquie xxx

Friday 7 November 2014

Christmas Time is here Again!

Morning crafters, hope today finds you all safe and well? Sending loads of hugs to those who need them right now.

Sorry for the late post today, my  post features a cute image from http://www.pinkgemdesigns.com the lovely Rudy. I thought he was so cute with his baubles (Now Ladies/Gentlemen, especially Ang, I did say baubles!!!) I thought it was such a cute image I had to have it, now I have to admit its very rare that I buy and  download any images, possibly because its very time consuming colouring in and then making a card as I have so little free time, so I tend to stick with sentiments on the front of most of my cards, I have at times put images on from CD Roms, however, I must admit I do enjoy colouring in so I keep the digi images for the Design Teams that I am on. I did actually buy two images but you will have to wait to see the other one as I bought it in mind for my daughter's Christmas card, yet to make lol!

Promarkers have a lovely Challenge Theme at the moment its make card inspired by a Beatles Song, so this is mine, the song 'Christmas Time is Here Again'. Yes I know I have opted for the easy option, but the time of year is appropriate lol! You can find a list of all Beatles songs here http://www.maccafan.net/SongIndex/BeatlesSongIndex.htm.


Being as he had some snowflakes around him I decided on the Blue theme again (cold colour!!!) so I chose the Cobalt Blue card for my base and matted it up with some White card.

Using a piece of Sky Blue card I put double-sided adhesive tape all around the edge and covered with Diamond Snow and attached to my base card. I cut a piece of the Cobalt Blue card to fit inside the glittered bordered card and stuck that down. I then embossed a piece of Sky Blue card, rubbed over the embossed area with gilding wax Patina and attached this on top with foam pads.

I coloured Rudy in with Promarkers giving him a Red scarf to match his Red nose! I die cut him out using Radiant Rectangles, inked round the edge whilst still in the die then attached him to the top of my card with foam tape.

To finish the card I added a sticker sentiment matted up on Cobalt Blue card and a glittered snowflake with a snowflake brad in the center in opposite corners to balance the card.

Finished dimensions are 5" X 7".

Items Used:

Creative Expressions Foundation Card Cobalt Blue & Sky Blue
Creative Expressions Diamond Snow
Creative expressions Gilding Wax Patina
White Card
Pinflare Red Double Adhesive Tape
Promarkers
Tattered Lace Embossing Folder Snowflakes
Spellbinders Create a Flake
Spellbinders Radiant Rectangles
White Vellum
Metal Snowflake Brads
Sentiment Sticker from an old set from Hunkydory. 
Tim Holtz Distress Ink Tumbled Glass 
Foam Pads and Tape


Thank you for looking, Jacquie xxx

Thursday 6 November 2014

Happy Birthday Sister!

Morning my crafting friends, so good of you to join me today I do appreciate it.

A very warm welcome to my newest follower Janet, lovely to have you on board, if you have a blog of your own Janet please send me the link so I can return the favour.

On Tuesday I showed the card I had done for my Daughter's birthday, today's is the one I made for my Son to give to her, unfortunately I do not have a 'sister' stamp so Birthday wishes had to do lol!


I started with my basic White card base and matted it up with some Kraft card. I then embossed a piece of White card and put to one side.

Using more Kraft card I stamped the Lace Oval Frame background stamp and heat embossed with White embossing powder then die cut the center Oval with Grand Decorative Ovals.

I attached the background oval onto the embossed card and wrapped some Brown ribbon across the middle, taped it on the back and attached to base card.

I stamped my sentiment onto a piece of White card with Vintage Photo and die cut with Baroque Ovals landscape way.

With the center Oval I had die cut I stuck that over the background portrait way,  on top of the ribbon with Foam pads, then added the sentiment oval on top of that landscape way, again with foam pads to add dimension.

Adding a bow out of the same ribbon on the side and some self adhesive gems on each corner finished the card.

Finished dimensions 7.5" X 7.5"

Items Used:

Creative Expressions Foundation Card Coconut White
Creative Expressions Unmounted Stamps Classic Sentiments
Create and Craft Kraft Card
Create and craft Die-Lectables Baroque Ovals
Spellbinders Grand Decorative Ovals
Tattered lace Embossing Folder Fretwork
Justrite Lace Oval Background Stamp
Papermania Embossing Powder Seafoam White
Fantastic Ribbons Double Sided Ribbon Gold/Brown
Tim Holtz Distress Ink Vintage Photo
Kaisercraft Sparklets Daffodil
Foam Pads.

Thank you for looking, Jacquie xxx

Tuesday 4 November 2014

Happy Birthday Daughter!

Morning my crafting friends, hope today finds you all well and thank you for popping by to view my blog, it is much appreciated. I hope you like what you see and will come back again.

I would like to give a warm welcome to my newest follower Pamellia Johnson, good to have you on board. Pamellia has a most wonderful blog of her own you can find it here http://mylittlecraftthings.blogspot.co.uk

Today Thirty Three Years ago I gave birth to my beautiful Daughter Toyah and this is the card I have sent her. Does not seem like Thirty Three Years lol!!!


I was not sure what I was going to do at first so I worked backwards, I had the base 8" X 8" card, I matted that up with some card that I had pierced around the edge. I then cut some White card to fit inside the pierced card and embossed it, it was only then I decided to keep to the same design as the embossing folder. I attached the embossed card onto my card then cut another piece of card small enough to leave a wide gap to show off the embossed card, I stamped the card with the Mandala stamp using my Versamark Pad, this includes a large flower and a smaller one and heat embossed with White embossing powder. I inked all over the card with Peacock Feathers then added Forest Moss on top of the flowers and around the edge, once happy with how it looked I placed some Adhesive sheet over it and covered it with Micro beads. I attached this to the center of my card.

Using more White card I again stamped the Mandala with Versamark and heat embossed again with White embossing powder, I inked up with Peacock Feathers and Seedless Preserve, the smaller ones with Peacock Feathers and Forest Moss. I attached these to the card as seen then stamped my sentiments (Two different stamps) on a piece of White card using Forest Moss and inked round the edge with Peacock Feathers. I cut one end to look like a banner and placed the other end under the main flower, I attached this using Foam pads. I was going to add a bow but it did not look right so I left it off.


Items Used:

Creative Expressions Foundation Card Coconut White
Creative Expressions Micro Beads
Create and Craft White Textured Card
Sheena Douglass Little Bit India Embossing Folder Mandala 
Sheena Douglass Little Bit India Stamps Mandala
Tim Holtz Distress Inks Peacock Feathers, Forest Moss and Seedless Preserve
Justrite Large Fancy Sentiment Clear Stamps
Craft Impressions Clear Stamps Christmas Snowflake Sentiments
Papermania Embossing Powder Seafoam White

Thank you for looking, Jacquie xxx

Saturday 1 November 2014

Bird Cage & Winners of Draw

Morning crafters, so good to have you here with me today, I hope you are all well? Sending lots of hugs to those who need them right now.

Well we are in our Eleventh month already, where has this year gone? 

I will announce the winners of my Prize draw at the end of this post, just to keep you in anticipation a little longer lol! Now don't go skipping to the end will you?

Today's card is one I made for a work colleague who was 60 last month, I am glad to say she loved the card. Sorry for the bad photograph, I had forgotten to take a photo of it so had to use my mobile phone!!!

I used a basic White card, matted it up with some Pink card, I then wrapped some scalloped lace ribbon around the bottom half of some pretty paper, unfortunately I cannot remember where I got this from, and matted this onto of the card.

I had some shaped die cuts from a card kit so I chose a Pink one and stamped it up with a Bird Cage and flowers. I coloured in the flowers with Promarkers and stamped the two larger flowers again to place on top of the stamped ones. I stamped the two birds, cut them out and added them on the branches. I attached this onto the card at an angle.

I made some flowers out of Blue card and placed a pearl in the center and attached these as seen along with some leaves. The sentiment came from the same card kit as the shaped die cut.

There you have the finished card. Dimensions are 7" X 7".

Items Used:

White Card
Crafters Companion Pink card
Pretty Paper
Hunkydory card Kit (shaped die cut & sentiment)
Anne Marie Designs Stamps Floral Bird Cage
Promarkers
Creative Expressions Blue Card
Creative Expressions Self Adhesive Pearls
Creative Expressions Scalloped Lace
Spellbinders Delicate Asters
Tattered Lace Blooms & Leaves
Tim Holtz Distress Inks Black Soot & Vintage Photo


Now for the winners...names drawn from the box...

First prize of the two Carolers goes to...

PAULINE ( Crafting with Cotnob)                


Second prize of The Snowman goes to...

JANICE (Created by Jan)

Congratulations Ladies, please e-mail me your address and I will get them in the post to you asap.
I think I still have your address Pauline so Janice you just need to send me yours.

Thank you to all who took part, sorry if you did not win this time but I am sure there will be others in the future.

My next post will be on Tuesday for someones very special Birthday!

Thank you for looking, Jacquie