
Followers

Total Pageviews

Showing posts with label Christmas. Show all posts

Wednesday, 23 October 2013

Iced Angel

 Morning crafters,another Angel card for you today, I love this stamp but then I like Angels.

Today I am off to visit The Tower of London with the Year 7 at our school so that should be eventful! Always wanted to visit there so quite excited myself lol! This will mean a late day back from work so hopefully will get a chance to visit everyone's blog sometime during the evening, I do like to comment on everyone's as I truly appreciate you all welcoming me into the blog world and commenting on my posts.

Now todays card...an inspiration from Sue Wilson.

I started with some Black card and stamped my image from Creative Expressions Singles Christmas-Herald Angel with Versamark, then heat embossed it with Papermania Embossing Powder-Sea foam White. 

On deciding what die to use I measured and cut a piece of Crafty nations double sided Adhesive Sheet and placed this onto my image with the Spellbinders Nestabilities Majestic Elements-Majestic Labels Twenty-Five die on top then ran it through the Grand Calibar, it was only then I realized I had forgotten this die cuts out the middle! I had the intention of coating the Angel in Cosmic Shimmer Glitter Jewels-Iced Snow which I continued to do but I chose not to coat the frame the same, I wanted it to stand out, so I covered it in Cosmic Shimmer Gilding Flakes-Persian Dawn.  I attached these together onto some Black card cutting round it leaving a slight edge.

I matted and layered this onto some Crafters Companion Centura Pearl card Gold that I had pierced round the edge, then matted it again onto Crafters Companion Centura Pearl card Silver.
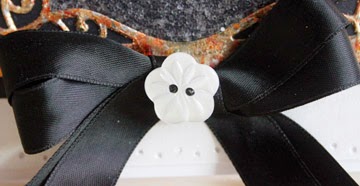
Finally I added a Black satin bow at the bottom and embellished it with a White Pearl Button.
I have not put a sentiment on this but I don;t think it needs one.

There you have the finished card. I hope you like it?

Thank you for looking, Jacquie xxx


Monday, 14 October 2013

Farmhouse Christmas

 Morning crafters, another Monday is upon us, don't know where the weeks go and the weekends just fly by.

I have done two interpretations of todays card, I have put the image of the other card at the end of this post.

I got a sheet of Creative Expressions Foundation Card Blue (sorry not sure exact color) and folded it in half. I cut a piece of Crafters Companion Embossed Snowflake card to size, rounded the corners and inked round the edge with Tim Holtz Distress Ink Tumbled Glass, I then attached this to my base card.

Using some White card I stamped my image from Sheena Douglass Little Bit Festive stamps Farmhouse Christmas (hence the title!) with Versa Color Ink Pad in Royal Blue and spread the ink by painting with just a damp brush putting extra ink on the darker parts. I painted the windows with Tim Holtz Distress Ink Squeezed Lemonade. Using Spellbinders Nestabilities Grand Decorative Ovals I die cut the image and inked through the die with Tumbled Glass, I placed this onto my card off setting it to the right. I added a little sparkle to the rooftops and ground by using my glue pen with Deco Art Glamour Dust.

Using some White card and White Vellum I die cut some snowflakes with Spellbinders Shapeabilities 2012 Snowflakes Pendants and heat embossed each one with Cosmic Shimmer Embossing Powder Tropic Pearl Lustre. I made up a few snowflakes and placed them curved around the edge of the focal image, on top of each set of snowflakes I placed an Habico Self Adhesive Flat-backed Pearl to finish the card. I did not add a sentiment as I did not feel it needed one.


Now this is the other card I made using the same ideas as  this one, the only difference is I used Spellbinders Nestabilities Lables 20 instead of the Grand Oval and used Teal coloured card instead of Light Blue for the base card. Although I like them both I think I prefer the one with the Grand Oval.


Thank you for looking, Jacquie J xxx


Saturday, 28 September 2013

Merry & Bright Christmas

Morning Crafters, my apologies for the colours on this one, decided to try something different, still not sure whether I like it or not but its certainly bright!
Thank you all for your lovely comments yesterday
I shall stay with what I am doing then, much appreciated.

Now today, quite a simple card.

Items used:

Basic White 8 x8 card, with another piece of white card I stamped Justrite Elegant Fronds background stamp randomly using Tim Holtz Distress Inks - Tumbled Glass, followed by stamping Creative Expressions Stamps to Die for - Mini Lattice Bauble and Mini Ornate Bauble randomly using Tim Holtz Distress Inks - Peacock Feathers and Dried  Marigold over the White card too. I rounded the corners and matted this onto my base card.

Out of more White card I die cut two Spellbinders Nestabilities 2011 Heirloom Ornaments, one I embossed with Couture Creations Embossing Folder - Damask, the other I inked through the die with Tim Holtz Distress Inks - Dried Marigold and stamped with Heartfelt Creations Pre Cut Set - Sweet Memories. I placed the stamped  bauble on top of the embossed bauble and placed them in the center of the card. At the top of the baubles I attached a bow out of Orange ribbon from my own stash and placed a Creative Expressions Large Pearl Embellishment in the center of the bow.

To add the finishing touch I put Cosmic Shimmer Pearlescent PVA - Teal round the edges to look like pearls.

Thank you for looking, Jacquie xxx

Friday, 27 September 2013

Elegant Reindeer & Sleigh

 Morning Crafters, I am going to try a new format over the next few days as I do find I write an awful lot to describe how I make my cards and they take a lot of time to do it, so much so I find I am not having time to make any more and that would never do lol!
So  I am just going to list the products along with how they have been used and we'll see how that goes. Do let me know whether you preferred it the other way or not, thank you.


Items Used:
  • Basic White card
  • Creative Expressions Foundation card - Teal -matted onto base card
  • White card embossed with Spellbinders M-Bossibilities Folder Tweets & Twigs, inked round the edge with Tim Holtz Distress Inks - Peacock Feathers and matted onto Teal card.
  • Justrite Elegant Fronds background stamp - stamped onto white card using Tim Holtz Distress Inks - Peacock Feathers then die cut with Spellbinders Nestabilities Majestic Elements - Majestic labels Twenty-Five, this was then attached to the top of the card.
  • Out of some packing corrugated card I die cut the Elegant Reindeer & Elegant Sleigh, both from Cottage Cutz. I think these looked rather snazzy if I do say so myself, I just thought I would give it a try as it was only thin card and it worked. I placed these inside the Majestic labels Twenty-Five cut out. The Reindeer's antlers were just lying over the top of the Majestic Labels Twenty-Five.
  • Die cut some petals & leaves from Spellbinders Shapeabilities - Layered Poinsettia and inked through the die with Tim Holtz Distress Inks - Peacock Feathers. Attached these to the bottom right corner.
  • I typed up some sentiments onto White card and cut these out, inking round the edge with Peacock Feathers again and matted it onto some Teal card die cut with Spellbinders Shapeabilities Petite Labels One, placing this in the bottom left corner of the card, to finish I put a small Red gem from Kanban on the Reindeer's nose and a  Pale Blue pearl from Imports Ltd Flat beads FL397 onto the center of the Poinsettia.


Thank you for looking, Jacquie xxx

Wednesday, 25 September 2013

Home from Home

Morning crafters, Sorry about another Christmas card but there are still more to come as I have been busy with just Christmas cards of late, I will throw in a couple of others now and then for you though lol! I just LOVE Christmas.

My apologies for not commenting on anyone's post yesterday, I will do it today I  was extremely busy and decided to enter the Crafters Companion Competition at the last minute (!!!) so I finally got that posted up by 11pm last night then it was time for bed lol! So here goes with today s card...

Items Used:
  • Creative Expressions Soft Gold Card
  • Creative Expressions Un-mounted Stamps - Winter Greetings 
  • Crafters Companion Centura Pearl Gold card
  • White card
  • Spellbinders Nestabilities Grand Decorative Ovals
  • Anna Griffin Cuttlebug Embossing Folder - Pirouette
  • Sheena Douglass A Little Bit Festive stamps - 'Christmas is Coming' & 'Home from Home'
  • Tim Holtz Distress Inks - Vintage Photo
  • Hunkydory Snow Acetate
  • Deco Art Glamour Dust
  • Pinflare Silicone Glue
I folded a sheet of A4  Creative Expressions Soft Gold Card in half to make an A5 base card. With some Crafters Companion Centura Pearl Gold card I ran through the Anna Griffin Cuttlebug Embossing Folder - Pirouette and put to one side.

I stamped the image using both Sheena Douglass A Little Bit Festive stamps - 'Christmas is Coming' (Truck) & 'Home from Home' (House) with Tim Holtz Distress Inks - Vintage Photo onto White card, then with a paint brush and a little water I spread  the ink out to fill the image adding more ink to the darker areas. On some more White card I again stamped the Sheena Douglass A Little Bit Festive stamps - 'Christmas is Coming' (Truck) with the Vintage Photo Ink and again painted in the rest of the image, I cut this out and put to one side.

Using the  Spellbinders Nestabilities Grand Decorative Ovals I die cut out the first image with both stamps and inked through the die with Tim Holtz Distress Inks - Vintage Photo, using Vintage Photo Ink again I stamped my sentiment with Creative Expressions Un-mounted Stamps - Winter Greetings. With the second image of the truck that I had put aside I attached this on top of the truck on the first image to add dimension using Pinflare Silicone Glue.  With a glue pen I placed some glue on the tree, bushes, fence and roof of the house and sprinkled  Deco Art Glamour Dust over the top to look like snow. I attached the image onto the embossed centura card I had put aside, then with a sheet of Hunkydory Snow Acetate I wrapped this over my image and taped it at the back, I then attached this to my base Gold card and there you have my finished card.

Thank you for looking, Jacquie xxx


Sunday, 22 September 2013

Christmas Is Coming

Morning Crafters, another Christmas one for you today, actually there may be a few this week lol!

First may I give a very warm welcome to two new followers Lydia & Beryl, WELCOME LADIES it's great to have you on board and I welcome any comments you wish to make concerning my blog.

Now today's card, this is a fairly simple one to make.

Items Used:
  • Creative Expressions Foundation Card - Lime Green
  • Creative Expressions Sentiments - Winter Greetings
  • White Card
  • Spellbinders Radiant Rectangles
  • Spellbinders Shapeabilities Di-Lites Petite Lables One
  • Sheena Douglass Little Bit Festive Stamps - 'Christmas Is Coming'
  • Crafters Companion Embossed Card - Snowflakes
  • Royal Lang nickel Watercolor Paints
  • Dove craft Grosgrain Creative Ribbon - Christmas Holly
  • Tim Holtz Distress Inks - Fired Brick
  • Deco Art Glamour Dust
  • Sailor Rollerball 2 in 1 Glue Pen
  • Bakers Twine - Green
  • Pinflare Glaze
I took a sheet of A4  Creative Expressions Foundation Card - Lime Green and folded it in half so I had a A5 landscape card. I cut a piece of Crafters Companion Embossed Card - Snowflakes and wrapped some Dove craft Grosgrain Creative Ribbon - Christmas Holly round it horizontally and vertically, I then matted this onto my base card.
Using some White card I stamped my image from Sheena Douglass Little Bit Festive Stamps - 'Christmas Is Coming' and painted it using Royal Lang nickel Watercolor Paints, once dry I die cut with Spellbinders Radiant Rectangles, I then glazed over the Van and Postbox with Pinflare Glaze giving it two coats to add shine, though the images do not pick that up sorry. I applied some glue using Sailor Rollerball 2 in 1 Glue Pen to the postbox and the road under the wheels of the van and sprinkled Deco Art Glamour Dust. With some more Creative Expressions Foundation Card - Lime Green I embossed using the Spellbinders Radiant Rectangles die, cut this out and layered it under the image so the Green came through the White card, I placed this in the  top left of the card using foam pads to raise it up slightly.
With a piece of White card I stamped my sentiment from Creative Expressions Sentiments - Winter Greetings using Tim Holtz Distress Inks - Fired Brick and die cut with Spellbinders Shapeabilities Di-Lites Petite Lables One, whilst still in the die I inked through with Tim Holtz Distress Inks - Fired Brick, I made a small hole at the end of the sentiment and threaded some Bakers Twine - Green and tied a bow, with some more Dove craft Grosgrain Creative Ribbon - Christmas Holly I tied a messy bow and attached the tag and bow to it and placed this onto the card down in the bottom right corner of the image so it hung over the other ribbon.

There you have the finished card.

Thanks for looking, Jacquie xxx

Friday, 13 September 2013

Christmas baubles

A very warm Friday welcome to you crafters out there. Friday the 13th today, who's superstitious out there? I know I am, I am always wary of Friday 13th, not sure why but never like them!!!

I like to say a special welcome to two new followers today, Christine & Patricia, thank you for your nice comments guys. Now Christine and Patricia have  beautiful blogs that you can find on

http://christinescardsandcrafts.blogspot.co.uk

and

http://patricia-summerhousecrafts.blogspot.co.uk


Anyway, today I have another Christmas card for you today.

Items Used:
  • Basic White 8" x 8" base card
  • Creative Expressions Foundation Card - Teal
  • Creative Expressions Stamps to Die For - Floral Bauble
  • Creative Expressions Un-Mounted Stamps - Winter Greetings
  • Crafters Companions Foil Embossed Card - Christmas Baubles
  • Spellbinders Shapeabilities Dies - 2012 Snowflake Pendants
  • Spellbinders Nestabilities Dies - 2011 Heirloom Ornaments
  • Create and Craft Pearlescent Card - Turquoise Blue
  • Papermania Embossing powder - Silver
  • Versamark Ink Pad
  • Own Stash - Silver Chain Boarders White and Teal Coloured Ribbon
  • Tim Holtz Distress Ink - Tumbling Glass
  • Pinflare Silicone Glue
  • Grand Calibar
First I cut some Creative Expressions Foundation Card - Teal and matted this onto my base card, from a sheet of Crafters Companions Foil Embossed Card - Christmas Baubles I cut this to size and matted & layered it on top of the Teal card, this lovely card came from a Christmas kit I had a couple of years ago and I came across it when sorting my craft room out, it was a bonus find as there were quite a few sheets I had not used.
Out of more Teal card and Create and Craft Pearlescent Card - Turquoise Blue I die cut using Spellbinders Nestabilities Dies - 2011 Heirloom Ornament, the Teal card bauble I stamped with  Creative Expressions Stamps to Die For - Floral Bauble using my Versamark Ink Pad and heat embossed with Papermania Embossing powder - Silver to make the pattern of the stamp stand out, these stamps are wonderful and were designed by Sue Wilson.

Out of White card I die cut one of the snowflakes from  Spellbinders Shapeabilities Dies - 2012 Snowflake Pendants, I inked through the die with Tim Holtz Distress Ink - Tumbling Glass then stamped my sentiment from Creative Expressions Un-Mounted Stamps - Winter Greetings using my Versamark Ink Pad and heat embossed again with Papermania Embossing powder - Silver. I placed the snowflake in the center of my Turquoise Bauble to add interest and a place for my sentiment to be shown.
I glued the baubles onto my card with Pinflare Silicone Glue placing the smaller Teal bauble behind the larger bauble, I attached a bow on top of each bauble using Own Stash -  White and Teal Colored Ribbon then from that I attached Silver Chain Boarders to make it look like the baubles were hanging rather than sitting in mid-air.

There you have my finished card, hope you like it?

Thank you for looking, Jacquie xxx


Thursday, 5 September 2013

White Christmas

Apologies for those of you who may have been trying to look at older posts, to access them, where it has the list of cards you need to click on 2013, then you will be able to view all, not sure why it does not work if you click on 'Older Posts' at the bottom of the page lol! If anyone can help with that please do lol!
Another little Christmas card for you today folks.

Items Used:
  • 6" x 6" White base scalloped card
  • White card
  • Gold Mirri card
  • Joanna Sheen Thomas Kinkade CD-Rom
  • Heartfelt Creations Pre-Cut Stamp set - Sweet Memories
  • Heartfelt Creations Pre-Cut stamp Set - Peaceful Night
  • Creative Expressions A4 Emboss Folder - Sea Garden
  • Spellbinders Dies - Decorative Labels One
  • Spellbinders Shapeabilities Dies - Layered Poinsettia
  • Cosmic Shimmer Pearlescent PVA - Olympic Gold
  • Tim Holtz Distress Ink - Crushed Olive & Fired Brick
  • Color Box Pigment Ink - Hunter Green
I first matted some White card onto my base card then with another piece of White card I stamped randomly with  Heartfelt Creations Pre-Cut Stamp set - Sweet Memories and Heartfelt Creations Pre-Cut stamp Set - Peaceful Night using Tim Holtz Distress Ink - Crushed Olive and Color Box Pigment Ink - Hunter Green.
I embossed this with Creative Expressions A4 Emboss Folder - Sea Garden and inked round the edge with Tim Holtz Distress Ink - Crushed Olive. I cut this down to size and rounded the corners before matting it onto my base card leaving space around the edge to put some Gold Pearls using Cosmic Shimmer Pearlescent PVA - Olympic Gold, I put this aside to dry overnight.

I printed an image from Joanna Sheen Thomas Kinkade CD-Rom using the Special Christmas Disc, I cut the image out with the second largest die from Spellbinders Dies - Decorative Labels One then cut the largest die out of Gold Mirri card, I matted and layered these as seen onto my card.

Using the two smallest dies from Spellbinders Shapeabilities Dies - Layered Poinsettia I cut these out of White card then inked through the dies with Tim Holtz Distress Ink - Fired Brick, I layered these together off setting the top from the bottom and placed them in the top right hand corner, I added a Gold Pearl using Cosmic Shimmer Pearlescent PVA - Olympic Gold as the center of the flower and there you have your finished card.

Thanks for looking, Jacquie xxx