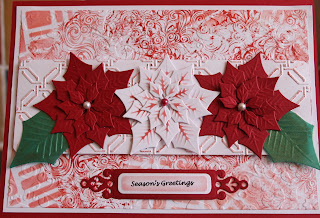
Now, my card for today is all Christmas, very Red with a touch of Green!
I folded a sheet of Creative Expressions Foundations card-Burgundy in half and layered that up with a sheet of White card. With more White card I inked randomly over the card with Creative Expressions 'That Special Touch Mask-Funky' and JustRite Background Stamp-Elegant Fronds using Tim Holtz Distress Inks-Fired Brick.
using a strip of White card I put it through Sue Wilson Embossing Folder Garden Lattice, rounded the corners, then inked up with Fired Brick. I attached this along the center of the card.
 Out of some Burgundy and White card I die cut a few flowers with Spellbinders Shapeabilities Layered Poinsettia, the White ones I inked with Fired Brick, I die cut a couple of leaves out of Green Vellum and attached these onto the strip of card as seen. In the center of each Poinsettia I have placed a Self Adhesive Flat Backed Pearl, White ones from Habico and the red one from Imports Ltd -FL396
There you have my finished card.
Thank you for looking, Jacquie xxx


No comments:
Post a Comment
Thank you for leaving me a comment I do appreciate it. I love to read what you think of my creations and I hope you will visit me again.