Followers

Total Pageviews

Saturday, 30 November 2013

Winter Scene

Morning crafters, another little Robin for you today.

Thank you for all your lovely comments yesterday, I really do appreciate them.
Ang: I love Robins, they are such lovely little characters, we too have had a couple of blackbirds in our garden for a number of years, I do feed them bird balls each day but that's all as I have to be careful as I have two cats and my female one is a little hunter with the patience of a saint! Many a summer do I chase her round the garden either freeing a bird or mouse! She knows where they are and waits and waits! The blackbirds bless them warn me if shes too near, they run up and down the fence making such a racket until I go and get her in.
Suzie: Invertage, if I have pronounced it right, has been around a while though I do not see much of it anymore, invertage was yesterdays card where the image goes in, in steps rather than out. I think it can look quite effective depending on the image.

Shirley: I know what you mean, bird food is quite expensive, another reason I only give them bird balls, I buy enough to last a month at a time, I know certain birds eat certain foods but that will be too expensive. I try and help where I can by not putting slug pellets down and my do we have a lot of slugs, I have never seen as many as we have in our garden!

Now for todays card, I am pretty sure these came from Kanban, I used to buy a lot of their items as they were of such good quality, such a shame they are not around anymore.

This one could have done with more matting & layering but at least it shows a bit of the beautiful card I used for the background! I love the Robin on the Post box.

Thank you for looking, Jacquie xxx

Friday, 29 November 2013

Little Robin

 Hi crafters, hope this finds you all well?

Todays card is of a dear little Robin, it was part of a kit I bought years ago where you had some pyramage and some invertage, sorry if I have not spelt/pronounced these correctly! Unfortunately I cannot remember whether they were Crafters Companion or Kanban, at a guess I would go for Kanban but not sure. Same goes for the card.


We have a dear little Robin in our garden that has been visiting for the past 2-3 months now and we do miss him if we don't catch him when he visits, he's such a dear character.

Thank you for looking, Jacquie xxx

Thursday, 28 November 2013

Keep the Home Fires Burning

Another one from Joanna Sheen 'American Frontiers' CD, there really are some lovely images and backing papers on this CD Rom which could be done a lot more attractive now, maybe one day I will redo some.

I thought this one would make an unusual Christmas card, what do you think?


Thank you for looking, Jacquie xxx

Wednesday, 27 November 2013

New Home

 Hi crafters, thank you for understanding with my post yesterday. No I could not do a 48 hrs day either Ang, sorry Shirley but that is not on my Christmas List but I do know what you meant by it lol!

 This image and backing paper were from Joanna Sheen 'American Frontier' CD Rom. I felt this was very fitting for a New Home! The CD has some beautiful images on it and loads for mens cards.


These were the times when I only had the sticky letters and had not learnt what a difference all the matting & layering made lol!

Thank you for looking, Jacquie xxx

Tuesday, 26 November 2013

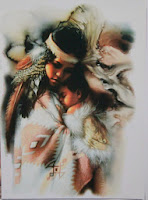
Tribes

Morning Crafters,

You are probably thinking what...well I have come to the point where I either had to stop posting for a while to catch up with some card making or start posting some really old cards, I really do mean old! These were way before I knew of Spellbinders or the Grand Calibar, so I am sorry for what may seem poor quality, I would like to think I have learnt a lot since these were made! I am just so busy at the moment with work and getting ready for Christmas I just have not had the time to make any cards, I started my Daughters card 4 days ago and still have not had the time to finish it, where does the time go?!!!

My apologies to everyone, these will be over the next few weeks so if you do get bored or would rather not see them (though they may give you a laugh lol!) please do say. I will try and remember where I got the images etc from but there won't be any essays as usual, maybe that's a good thing lol!

Now for the first one...


These images were from My Craft Studio 'Four Season' CD Rom,  there were a few American Indian images on there to which I put together to make this card.

I have always been fascinated by the American Indian tribes and their way of life.
They have some lovely stories to tell and not so nice ones.


Thank you for looking, Jacquie xxx


Monday, 25 November 2013

Poinsettia Peace

Morning Crafters, hope this finds you all well?

Another little card for you today, I started off with the intentions of having a large die cut in the center but then decided to have a poinsettia in the middle instead!

Items Used:

Basic 6x6 White card
Creative Expressions-Foundation card Spring Green & Burgundy
Joanna Sheen-Christmas Patchwork Stamps
Spellbinders Shapeabilities- Layered Poinsettia
Tim Holtz Distress Ink-Crushed Olive, Fired Brick & Black Soot
Cosmic Shimmer-Olympic Gold PVA
Craft Impressions-Christmas Snowflake Sentiments
Couture Creations Embossing Folder-Damask
Grand Calibar

I started by running some Spring Green card through the Grand Calibar using the Damask Embossing Folder I then matted this onto the base card.

Using the back of the Centura card I stamped two of the stamps from J.S. Christmas Patchwork stamps using T.H. Crushed Olive & Fired Brick, I matted this onto some Burgundy card and attached it to the card in the center.

Using more Burgundy card I die cut the Layered Poinsettia and using more of the Spring Green card I stamped my sentiment with Black Soot and die cut the leaf, I placed both the flower and leaf onto the center of the card, then using the Olympic Gold PVA glue I added a few spots in the center of the Poinsettia and there you have your finished card.

Thank you for looking, Jacquie xxx


Sunday, 24 November 2013

Stags Head

 Morning Crafters, hope this finds you all well?

I went a bit warmer with todays card (Just for you Ang!)

Items Used:

Basic 6x6 White card
Creative Expressions-Burgundy Foundation Card
Crafters Companion-Centura Pearl Card
Sheena Douglass Little Bit Scenic-Highlands Silhouette
Spellbinders Nestabilities Majestic Elements-Majestic Lables Twenty Five
Indigo Blu-Flitter Glue
Cosmic Shimmer Gilded Flakes-Summer Meadow
Tim Holtz Distress Inks-Vintage Photo, Rusty hinge, Black Soot
Colour Box Tuscany-Brown Ink pad
Crafty Impressions-Christmas Snowflake Sentiments

I first matted a piece of Burgundy card onto my base card then working on the back of the Centura card I stamped some branches and thistle from Sheena's Highlands Silhouette stamps using T.H. Vintage Photo and Rusty Hinge along with the Brown from the Colurbox Tuscany set. Filling in the space at the bottom I used another stamp from the same set using Black Soot, the stamp showed an island on a lake. I inked round the card using Vintage Photo to bring the colours together.

On more Burgundy card I stamped the Stags head from the Highlands Silhouette set with Flitter Glue and covered with Summer Meadow Gilding Flakes. I die cut this with Majestic Labels Twenty Five and attached it to the card in the center. I know this covers the stamped image but I liked how it made the Stag look like King of the Highlands with it just peeping through the die cut pattern.

In the top right hand corner I stamped my sentiment using Vintage Photo and there you have the finished card.

Thank you for looking, Jacquie xxx


Saturday, 23 November 2013

Let it Snow

Hi crafters, another weekend upon us, don't they come round quick?

Another quicky card for you.

Items Used:

Basic White 6x6 card
Creative Expressions-Foundation Card Blue
Crafters Companion-centura Pearl card
Joanna Sheen-Christmas Patchwork Stamps
Tim Holtz Distress Inks-Peacock Feathers, Tumbled Glass
Fantastic Ribbons-Dotted Baby Blue Ribbon
Spellbinders Shapeabilities-Petite Labels One
Crafty Impressions-Christmas Snowflake Sentiments

I matted the base card up with some Blue card then with the Centura Pearl card I used the back of it to stamp onto with two of the Patchwork stamps, leaving a White boarder round the edge. I attached the strip of ribbon around the card and matted this onto the base card, I made a bow out of the same ribbon and attached this onto the strip of ribbon.
Using T.H. Distress Inks Peacock Feathers I stamped my sentiment and inked round the edge slightly with Peacock Feathers then die cut with S.B. Petite Labels One, I attached this above the ribbon on the card and there is your finished card.

Thank you for looking, Jacquie xxx


Friday, 22 November 2013

Snowdog


Hi Crafters, hope today finds you all well, if not get well soon.
Now todays card is another fairly quick one. I absolutely adore the Snowdog so I gave him pride of place on a card of his own!

Items used:

Creative Expressions-Foundation card Spring Green
Crafters Companion-Snowman & Snowdog CD Rom
Crafters Companion-Centura Pearl card
Spellbinders Nestabilities-Lables Twenty Eight
Tim Holtz Distress Inks-Tumbled Glass & Black Soot
Creative Expressions-Unmounted Stamps-Christmas Greetings
Pinflare-Silicone Glue

I folded the Green card in half Landscape and matted it up with some Centura card. On top of this I added a piece of the backing papers from the Snowman CD featuring the Snowdog.

With more Centura card I die cut using Lables Twenty Eight, I inked them with Tumbled Glass DI whist still in the die, from the CD I printed a page of Snowdog images, chose Three, cut them out and attached them on top of the inked Labels Twenty Eight die cuts, I then mounted these onto my card with Pinflare Glue.

I stamped my sentiment on a small bit of Centura card and die cut with the smallest die from Lables Twenty Eight and attached to the card in the center as seen.

There you have the finished card.

Thank you for looking, Jacquie xxx

Thursday, 21 November 2013

Tree & Snowflakes

Morning Crafters, hope this finds you all well.

 First I would like to thank you all for your lovely comments, you are all so nice.
Christine: these are my favourite flower die too.
Shirley: Please feel free to copy, I am honored lol!
Hazel: Once you start making them you wont stop, I try and make a batch up at a time using cut offs.
Lydia: Sorry the picture is not that good, the frame was out of one of the sheets from Delicate Asters Paper pad, it was a light Green so guess it does look Yellow lol!

Back to the Christmas cards today. It is nearly upon us lol!

Items Used:

Basic 8x8 White card
White Card
Creative Expressions-Foundation Card Milk
Creative Expressions-Foundation Card Teal
Create and Craft-Silver Miri Board
Spellbinders Shapeabilities-2012 Holiday Tree
Spellbinders Nestabilities-Majestic Elements Lables Twenty Five
Sue Wilson Embossing Folder-Sea Garden
Sheena Douglass Little Bit Scenic-Ornate Snowflake
Color Box Tuscany-Antique Pewter
Tim Holtz Distress Inks-Peacock Feathers & Tumbled Glass
Own Stash-Little Gems

I cut to size some Milk card and pierced round the edge then matted it onto my base card, inside this I matted some Silver Miri board.

Using some White card I stamped several snowflakes over in different inks then ran it through the Grand Calibar in Sue Wilson Sea Garden embossing folder. I rounded the corners and matted this on top of the Silver card.

Using some Teal card I die cut with Majestic Elements Lables Twenty Five and placed this in the center of the card, I die cut the tree out of White card and attached this to the top of the Teal card.

I finished the card by placing several Gems on the tree and on the four corners of the card.

Thank you for looking, Jacquie xxx

Wednesday, 20 November 2013

Wishing you Happiest of Birthdays

Hi there Crafters, hope this finds you all well?

A warm welcome to Diane, thank you for looking, please come again its so lovely to hear from people. Diane has a blog its:
http://charmingly-creative.blogspot.co.uk/
so do take a look if you haven't already.

Another quick card for you today.

Items used:
Basic 6x6 White card
Heartfelt Creations-Delicate Aster Collection Pad
Spellbinders-Delicate Asters
Spellbinders Imperial Gold-Gold Lables Four
Creative Expressions-Unmounted Stamps Kind Thoughts
Lidls Card-Lilac & Green
Own Stash-White card
Color Box Inks-Hunter Green
Tim Holtz Distress Ink-Crushed Olive & Black Soot

I measured and cut two papers from the delicate Aster collection and matted & layered these on to the card, the top paper having the Aster print in the corner.
Out of the Lilac & Green card I die cut the leaves & flower from Delicate Aster dies and attached these to the card as seen. I die cut the smallest center flower out of a little bit of scrap yellow card.


Out of more of the papers from Aster Collection I die cut with Gold Lables Four, onto some White card I stamped my sentiment, inked the die with Crushed Olive and die cut using the smaller die from Gold Lables Four. I inked through the die with Crushed Olive and attached these together and placed them onto my card off setting it with the Aster flower.


There you have the finished card.


Thank you for looking , Jacquie xxx


Tuesday, 19 November 2013

Friends fill your Life

Hi crafters, Today my son travels to London where he will stay for the next 12/13 days working on the Freeze Festival at Clapham Common, so here's hoping he enjoys himself, I will miss him like mad and this house will seem so 'empty' without him being here.

I decided on a quick card for today.

Items used:

Basic White 6x6 card
Heartfelt Creations-Delicate Asters Collection Pad
Creative Expressions-American Seam Binding Ribbon Green
Creative Expressions-Unmounted Stamp Heartfelt Sentiments
Spellbinders Nestabilities-Labels Eighteen
Spellbinders- Asian Motifs
Habico-Self Adhesive Pearls
Tim Holtz Distress Ink-Black Soot & Squeezed Lemonade

I measured and cut two of the papers from the Asters Collection, wrapped some Green Seam Binding Ribbon round the center of the two and attached these to the base card.

Using some White card I die cut the square from Asian Motifs and matted this onto the center of the card.

I stamped my sentiment onto the other White card and die cut with Lables Eighteen then inked through the die with Squeezed Lemonade, I attached this to the center of the Asian Motif with Foam Pads.

To finish the card off I added a Pearl in each of the four corners.

There I did say it was a quick card lol! Would have looked better if I had matted & layered it up with more card. 

Thank you for looking, Jacquie xxx


Monday, 18 November 2013

Teddy Bears Picnic

Morning crafters, start of another week, I hope you are all well.

For todays card I used:

Lidls Card - Cream
Own Stash-White card
Crafters Companion-Centura Pearl Gold card
Crafters Companion-Centura Pearl Pastel Card
Crafters Companion-Crisalis Classics & Paintbox Poppets Collection CD
Creative Expressions-Foundation Card Lilac
Spellbinders-Die-lites Blossoms 2, 3 & 4
Spellbinders-Die-lites Sprigs
Spellbinders Nestabilities-Delightful Circles
Spellbinders Boardabilities-Curved Boarders Two
Sheena Douglass Little Bit Magical-Knowledge

I first folded the Centura card in half, with some Lidls card I cut to size then die cut the edge with the scalloped Curved Boarder and matted this onto the Centura card.

I chose my image and printed it out twice, the first image I matted onto White card, the second image I die cut the girls head & shoulders with Spellbinders Delightful Circles and matted this into place on top of the first image.

I die cit some flowers using Purple, Lilac & Cream card and placed these on the curve of the card over some Sprigs.

I die cut another boarder and stamped my sentiment on it from Sheena's Knowledge stamps so the sentiment was on the curve and placed this on top of the other curve under the flowers.

There you have the finished card.

Thank you for looking, Jacquie xxx


Sunday, 17 November 2013

Boys Best Friend

Morning crafters, hope this finds you all well. Thank you again for all your lovely comments I do appreciate them. Shirley don't feel guilty, backs are tricky things. Ang-Thank you.

Right back to some lovely images from the paintbox Poppets CD.

Items Used:

Crafters Companion-Centura Pearl card
Lidls-Coloured card pack (Blue)
Own Stash-White card
Crafters Companion-Crisalis Classics & Paintbox Poppets Collections CD
Creative Expressions-Unmounted Stamps
Papermania-Embossing Powder Seafoam White
Spellbinders Boraderbilities-Curved Boarder Two

Started with Centura Pearl card for the base, with some Blue card I die cut the bottom edge twice then matted it onto the base card as seen.

I printed the image out twice, with one of the images I matted it onto White card, with the second image I die cut just round the boys upper body and the dog and placed this over the top matching it up as closely as possible to give a bit of added interest to the image. Now I could have added a layer of blue card under this and still matched it up but decided against it.

I stamped my sentiment at the bottom of the card and embossed it with White embossing powder.


There you have the finished card.

Thank you for looking, Jacquie xxx

Saturday, 16 November 2013

Peace on Earth

 Morning crafters, hope you are all well and crafting loads lol!

May I give a very warm welcome to Beverley, thank you for visiting my blog, I do hope you come back again, Beverley has a good blog of her own its: http://unikostudio.blogspot.co.uk/ so take a look.

Shirley-my op was to fit a Wallis Device in my spine to open it up as my spine was closing in on my nerves, I am fine now thank you.

May I thank all who wished me well yesterday, you are so kind and glad to report the soreness went quite quickly!

Ang-  you MUST get them dies out gal lol!! All wrapped up and no where to go...!!!

Now, I decided to give Baubles a rest today and used a Snowflake instead just so you don't get too used to them lol!

I folded a sheet of A4 White card in half and matted it up with another piece of White card.

With a sheet of Silver Mirri card (Create and Craft) I die cut Spellbinders Shapeabilities 2012 Snowflake Pendant Die Set using the largest die out of the card, this left an aperture big enough to show the sentiment I had stamped on the White card underneath from Heartfelt Creations Sweet Memories Pre Cut Set using Tim Holtz Distress ink Black Soot.

Now I wanted to stamp Snowflakes over the card as a water effect like yesterdays card but being as it was mirri card it did not work, luckily I had tried on a piece of scrap first! Then I thought of White embossing but it was not the look I wanted  so in the end I opted for gluing on some Snowflakes that I had made previously out of White Vellum and heat embossed with Cosmic Shimmer Embossing Powder-Tropical Pearl Lustre.I attached these to the mirri card with Pinflare Silicone Glue cutting some off the edge, I put Foam Tape on the back of the Mirri card and attached it to my card.

With some White Ribbon (Own Stash) I made a bow, attached it to the bottom of the card and after die cutting two of the Spellbinders Shapeabilities 2012 Snowflake Pendant Die Set out of Silver Mirri Card I glued these onto the center of the bow and added an Habico self Adhesive Pearl in the middle.

There you have the finished card.


Thank you for looking, Jacquie xxx


Friday, 15 November 2013

Peaceful Wishes

 Morning Crafters, Hope this finds you all well, not too many weeks till Christmas, whose got all their Christmas gifts yet? Not me that I do know lol!

Had my first Physio at the gym yesterday following my op earlier in the year so feeling rather sore and stiff today lol! I have had to wait a long time for it so I hope it works! 6 treatments in all so finish just before Christmas.

Anyhow, todays card is another Bauble, sorry found myself doing a few as they are quick cards.

I first folded a sheet of Crafters Companion Centura Pearl Silver card in half then matted it up with some Creative Expressions Foundation card-Milk which I had pierced round the edge, quite poorly but pierced none the less lol!!

With some Creative Expressions Foundation card-Burgundy I die cut using Spellbinders 2010 Heirloom Ornaments out of the middle of the card, I cut the same die again out of Crafters Companion Centura Pearl Silver card but also using the next size die down to form a frame, I put this to one side.

Using my Versamark Stamp Pad I inked up Sue Wilson Stamps to Die for-Beaded Bauble lined it up where my aperture was going to be then stamped onto the Milk card and heat embossed with Papermania Embossing Powder-Tinsel Red.

 Now with the White bauble frame I covered it in Double Sided Adhesive sheet and coated it in Creative Expressions Clear Micro Glass Beads and attached it to the Burgundy card over the aperture. With Sheena Douglass Little Bit Scenic Pinescape Stamps I used the end of a fur tree branch and stamped it on the card round the bauble with just my Versamark Stamp Pad to form a watermark effect. I inked up my sentiment from Creative Expressions Unmounted Stamps-Winter Greetings, stamped under the bauble in the center and heat embossed with Papermania Embossing Powder-Seafoam White.

I attached the burgundy card onto my card with Foam Tape to raise it up and there you have the finished card.

I hope you like it?

Thank you for looking, Jacquie xxx

Thursday, 14 November 2013

Gilded Bauble

Morning Crafters, hope you are all keeping well.

Todays card is similar to yesterday's, I did say I was going to make a few up lol! I try and make them quick, elegant looking but at the same time not exactly the same!

Anyhow, I took a sheet of Crafters Companion Centura Pearl  Gold Card and folded it in half to roughly make a 5x7 card. On top of this I matted a sheet of Create and Craft Gold Mirri Card, using another sheet of Crafters Companion Centura Pearl card cut to size, I die cut the Spellbinders 2010 Heirloom Ornament out of the center and put this aside so I was left with the frame, I stamped my sentiment from Creative Expression Unmounted Stamps-Winter Greetings with my Versamark Stamp Pad and heat embossed using Papermania Embossing Powder-Gold.


With the die cut Bauble I covered it with a piece of Double Sided Adhesive and coated it with Cosmic Shimmer Gilding Flakes-Summer Meadow, I put Double Sided Sticky Tape on the back then laying the frame on the card I lined up where the bauble should go and attached it to my card, I put some Foam Pads on the back of the frame and attached this to the card over the top of the bauble.

With some Double Sided Satin Ribbon (Brown & Gold) from Fantastic Ribbons.com I made a bow, this was actually my third attempt to get it right lol! I placed the bow at the top of the bauble to finish the card off. This is lovely ribbon I also have it in Red and Green both have the gorgeous Brown on the back.

There you have my finished card.

Thank you for looking, Jacquie xxx


Wednesday, 13 November 2013

Snow Bauble

Morning Crafters, hope this finds you all well and safe.

Todays card was just a quicky, I shall try and do a few more of these now Christmas is getting nearer so sorry if it seems like I am repeating myself lol!

I started with my basic 6x6 White card, on top of that I matted a piece of Create and Craft Gold Pearlescent card.

With a piece of Crafters Companion Centura Pearl Gold card I die cut the largest die from Spellbinders 2011 Heirloom Ornament, I put aside the Bauble that had been cut out and with the frame I stamped my sentiment from Craft Impressions Clear Stamps-Christmas Snowflake Sentiments with Versamark Stamp Pad then heat embossed with Papermania Embossing powder-Gold. I mounted it up with Foam Pads then placed it on my card.
With the bauble I had die cut I covered in Double Sided Adhesive sheet and coated it with Cosmic Shimmer Glitter Jewels-Iced Snow then popped it back in the middle of the frame on the card.

I had in my stash a Reindeer that I had die cut a while back with corrugated card using Tattered Lace Reindeer die so I attached this in the center of my Bauble.

I added a little bow at the top of the bauble along with a little Yellow Gem, both from my own stash.

There you have the finished card.

Thank you for looking, Jacquie xxx

Tuesday, 12 November 2013

Cobblestone Mill In Autumn

Morning my crafting friends, hope this finds you all safe and well.

Thank you to Christine, Hazel & Suzie for your lovely comments yesterday on the Remembrance image, I would love to visit some battlefields, though my sister did take me to the ones in France near where she lives and I love to see a field of poppies, nothing so beautiful. 

I thought today I would post this card as Autumn is definitely coming to an end so before it does I wanted to show one of my favorite images of Thomas Kinkade.

I took my base card, matted it up with some White card then embossed Burgundy card that had first been wrapped with some beautiful Autumn Leaves Ribbon.

I printed the image, cut it out and matted and layered it onto Burgundy card then White card. I placed this on top of the ribbon on the left side of the card.

I stamped my sentiment onto some White card, die cut, inked through die and matted it onto some Burgundy card also die cut with the a larger die from same set, I attached this to the ribbon with Foam Pads and added a bow out of the same Autumn Leaves Ribbon and placed this on top of the ribbon at edge of the sentiment.

There you have the finished card.

Items Used:


Joanna Sheen-Thomas Kinkade Papercraft CD
Crafters Comapnion-Centura Pearl Gold card
Creative Expressions-Foundations Card Burgundy
Own Stash-White Card
E-Bay-Autumn Leaves Ribbon
Spellbinders-Die-lites Petite Lables One
Tim Holtz Distress Inks-Fired Brick
Sheena Douglass-Little Bit Oriental Embossing Folder Maple Leaf

I am trying to shorten the 'essays' on my post explaining how I make my cards as they seem rather long at times and I am sure by looking at the image you could tell what I have done, so please do let me know if it sounds rather abrupt or whether its not enough information or even too much! I may change the format again as I am still not happy with it but I welcome any advice/comment. You will notice the post for the next few days will be of the old way that's because I posted those before this one lol! Last minute decision to put an Autumn card in first, that's me!!! So sorry for any confusion there may be with tomorrows post and next few days!

Thank you for looking, Jacquie xxx

Monday, 11 November 2013

Remembrance Day


                                                               REMEMBRANCE DAY

Sorry no card today  thought I would just post this beautiful image I got off the Internet, not sure who it is by unfortunately, to mark Remembrance Day. I think its a fitting image to mark a day we should NEVER forget.

More cards from tomorrow I promise.

Hope this finds you all well.

LEST WE FORGET...


Thank you for looking, Jacquie xxx

Sunday, 10 November 2013

Snowmans Adventures

Morning Crafters, back to Christmas cards lol!

May I give a very warm welcome  to my new follower Shirley Terreta, welcome to my blog its great to have you on board.

Another Snowman card, well I still have lots of these little circle images to us up!!!

I started with my usual 8x8 White card, with a sheet of Creative Expressions Foundation card-Blush I scored lines onto the card using Crafters Companion Top Score Multiboard, placed some Pink Ribbon (Own stash) round the center then matted it onto my base card.


I cut some Crafters Companion Centura Pearl Gold card into four squares then ran each individual square through Couture Creations Embossing Folder-Damask, I rounded the corners then attached them to my card as seen. I chose four of the Snowman Circles from Crafters Companion The Snowman and the Snowdog CD  Rom, these had all been layered onto Create and Craft Pink Pearlescent card die cut with Spellbinders Nestabilities Decorative Elements-Splendid Circles and Spellbinders Nestabilities Decorative Elements-Delightful Circles then attached to the card each one within one of the squares.
I made a bow out of more Pink Ribbon, stamped my sentiment from Crafty Impression Clear Stamps onto some C.E. Blush card using Tim Holtz Distress Ink-Black Soot, die cut with Spellbinders Shapeabilities Back to Basics Tags and placed the bow and sentiment in the center of the card on top of the strip of ribbon.


There you have the finished card.

Thank you for looking, Jacquie xxx