Pages

Sunday, 30 March 2014

Happy Mother's Day


Morning my crafting friends and a HAPPY MOTHER'S DAY to you if you're a Mom.

I made this card yesterday for my Mother -in-Law, late I know but I got there, had no idea what to do so just played and seen what went together, I had the embossed oval frame from Justrite Lace Oval Frame Background Stamp already done so I went from there and matched things up. I decided to put it onto White card so I embossed that with Couture Creations Embossing Folder Walrus & Carpenter, this was extended, inked the edge with Tim Holtz Distress Ink Tumbled Glass then made a band out of Tattered Lace paper from their magazine. I attached this over the White card covering the join and matted it onto the base card which was a sheet of Creative Expressions Foundation Card-Blue.

I attached the oval frame that had been stamped with Versamark Pad and heat embossed with Papermania Embossing Powder Seafoam White in the center of my card.  In my stash I found some Spellbinders Shapeabilities Die-lites Floral Corner One that I had cut out of White card so I placed these in opposite corners on the card and in the center of each flower I added a Hobby House Embellishment Ocean Aurora.
The card was finally coming together but I needed the sentiment in the center of the oval, I could have written it but decided to print one on the PC using more CE Blue card and again stamped over this with the Justrite Oval stamp as before then cut out the oval in the center. As you can see I didn't quite get my sentiment in the middle! I felt this looked a bit plain as it was so I put it through my E Bosser embossing it with Clarity Tangle Stencil, I actually think this makes it look more like an Easter Egg now Lol!!! I glued this on top of the previous Oval then added a Green bow, this ribbon were the ties you sometimes get in tops to hang them up on, I cut them out and use the ribbon! In the middle of this I added another Hobby House gem and my card was complete. The Photograph does not do it justice as you cannot see the embossing, it is all slightly darker, I took it in front of a lamp hence why it is so light!

Thank you for looking, I hope you all have a great day, Jacquie xxx

Saturday, 29 March 2014

Thank You for being a Friend


Morning crafters, hope this finds you all well?

A fairly quicky card for you today, I first cut a piece of White card and placed the Clarity Stencil Tangle onto it and inked it with Tim Holtz Distress Inks Crushed Olives, Peacock Feathers and Dried Marmalade. I then mounted this up onto Creative Expressions Foundation Card Custard and some Crafters Companion Centura Card Pastel, I put this to one side then onto more White card I stamped Creative Expressions Singles Stamps Dragonfly with TH Black Soot Ink, I coloured this in by painting on some Creative Expressions Cosmic Shimmer Powders by adding a little water to the Mica powders in the lid of the little pots.

I stamped my sentiment from Creative Expressions Kind Thoughts, heat embossed it with Papermania Clear Embossing Powder, inked round the edge with TH Peacock Feathers, I die cut this out with SB  Captivating Squares.                                        

I coloured four Iridescent gems with Promarkers Amethyst and placed in each of the four corners as seen, there you have the finished card.

Apologies to Craftin Suzie, Wendy and Sue who viewed this earlier, you must have wondered what you was reading, I put it up last night or should I say early hours of this morning (2am) after coming in on a night out with work colleagues so I was falling asleep trying to get it up for today, I have just read what I put and ...well need I say more lol!!! Could not believe what I was reading lol!!!

Thank you for looking, Jacquie xxx


Wednesday, 26 March 2014

Happy Birthday to a Beautiful You

Morning my crafting friends, hope this finds you all safe and well. Its so good of you to spend some of your precious time coming to view my blog, I do appreciate it. I would like to say a very warm welcome to a newcomer Jan Sharp, welcome Jan and THANK YOU  for your lovely comments and I am glad you are going to keep coming back! If you have a blog please let me know so I can return the favour.
I, like many of you, hope to give inspiration to others who may, or may not, find it hard knowing where to start and I would like to say you are welcome to copy any card I put on my blog, some people may not like their cards to be copied but I consider it to be the greatest compliment.

My post today is an old one I have dug out as I am at present in the middle of trying to complete two other cards, don't know where the time goes to! I believe this was one I did my own take on that someone did, see its so long ago I cannot even remember who lol!!! Gosh they say your memory goes when you get over 50 and they're right! Even my son thinks I'm going senile as I keep forgetting things lol! Anyway sorry my friends I will list what I can remember!

  • Basic White card
  • Creative Expressions Foundation Blue card
  • Creative Expressions Delicate Asters Stamps
  • Heartfelt Creations Bold Vintage Floret background Pre cut Set
  • Spellbinders Delicate Asters
  • Spellbinders Venetian Motifs
  • Spellbinders Radiant Rectangles
  • Tim Holtz Distress Ink Tumbled Glass & Black Soot
  • Floral Embossing Folder (sorry cannot remember who by-shame on me)
  • Papermania Embossing Powder Seafoam White
I pierced round the edge of some White card and matted it onto the base card, I stamped the floral stamp from the set onto the Blue card and heat embossed it with White embossing powder then ran it through the embossing folder, once embossed it was matted onto the White card.

I stamped the sentiment on White card and die cut with the Radiant Rectangles, I inked this with Tumbled Glass round the edge and attached it as seen. I stamped the Delicate Asters then die cut them with the matching dies, I die cut a few of the Venetian Motifs and placed the flowers, leaves and swirls onto the card as seen. In the center of each flower I added some glue and glitter and left to completely dry.

There you have the finished card.

I cannot believe how bad my memory is getting, gosh I need a holiday lol!!! I am sure one of you out there will be able to tell me who designed the embossing folders...Please?

I hope to see you all on Friday, thank you for looking, Jacquie xxx (At least I remembered my name lol!)
 

Monday, 24 March 2014

Just for You...


Morning my crafting friends, hope this finds you all safe and well? I thank you for coming back to visit me, I do appreciate it and its great to view your comments.

I wanted to do a simple and quick card, as I don't seem to have much time to play lately! As in Fridays post I had one of my new dies arrive, Wild Rose Studio Specialty Die Set Oval Frame, I thought I would try it out. I folded a sheet of Crafters Companion Centura Pearl Card Ivory in half to form a 5 X 7 inch landscape card. I matted and layered this with some White centura followed by more of the Ivory.
I die cut a piece of Centura White card with SB Grand Decorative Ovals, embossed it with Crafters Companion Regency Swirls Embossilious Embossing Folder and inked the embossed part with Tim Holtz Distress Ink Antique Linen, I was quite pleased how the colour of the ink matched the card as I was in two minds what colour to use to start with. I attached this to the center of my card then die cut some Centura White Card with the Wild Rose Studio Specialty Die Set Oval Frame, I used the smaller die in the center of the bigger one to cut it out, with the smaller die cut  I stamped my sentiment from Justrite Large Fancy Sentiments in the center with TH Vintage Photo and inked round the edge with TH Antique Linen. I attached the larger die in the center of the Grand Oval and attached the smaller die back in the center but raised up a bit.

I added some Habico Self Adhesive Pearls onto the corners of the card as seen and there you have the completed card. I don't think it turned out to bad for a quick card.

Thank you for looking, Jacquie xxx

Saturday, 22 March 2014

May your Lives be filled with Love & Laughter...


Morning crafters, hope this finds you all well? Another weekend is upon us so lets hope we have a bit of sunshine.

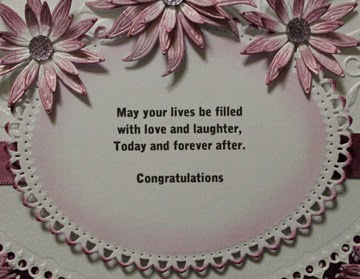
Today's post is one of the wedding cards I have been doing for the girls at work, the recipient of this one is having Dark Purple dresses for the Bridesmaids, she loves Purple so that was an easy colour scheme to do. Sorry about the wonky photo, don't know what came over me!!!

I started with Crafters Companion Centura Pearl card and put two sheets together to form an 8" X 8" card. Using more of the Centura Pearl card I stamped the back with Justrite Elegant Fronds Background Stamp  using Tim Holtz Distress Inks Seedless Preserves, I extended the design then inked around the edge also with TH Seedless Preserves and matted this onto my base card.

Using a sheet of Dark Purple card from Hunkydory Purple Butterfly Collection I die cut the bottom with Spellbinders Curved Boarders Two, cut it to size and matted this onto the card. With another piece of Centura Pearl Card I cut to size and popped it through the center of the second smallest die from SB Grand Decorative Ovals so it would just cut the bottom part of the card, I then ran the top half through the Crafters Companion Regency Swirls 8in X 8in Embossilicious Embossing Folder, this I left White, I cut a piece of pale Lilac Ribbon, enough to fit across the embossed card and inked it up with Seedless Preserve so it would be a dark Purple, placed it across the card at the bottom of the embossing and stuck it on the back, I then matted it onto the Purple card as seen.
 
Using some White card I typed my sentiment on the PC, printed it off and die cut with the smallest SB Grand Decorative Ovals die, inked round the edge in the die with Seedless Preserve then inked the very edge of the oval once out of the die, I attached it to the card over the ribbon.

Using Centura Pearl Card and SB Shapeabilities Die-lite Blooms Four die I cut out several of the flowers, inked the edges with Seedless Preserve and arranged them together as seen. In the center of each flower I added a Kaisercraft Sparklet Gem Princess. I arranged these onto the card and once happy where they were going I stuck them down.

I decided to cover part of the inside with some paper from Hunkydory Purple Butterfly Collection for the background and printed a verse on the PC which, after I cut to size, die cut the top and bottom with SB Curved Boarders Two and attached this on top of the backing paper. I had a little boarder left from the stamped Elegant Fronds card so I trimmed this and attached it to the edge of the card to match the front.

There you have the finished card. I now have another wedding card to make with the colour theme of Royal Blue and Silver that is the colour of the Brides dress! Intriguing I know but the design she showed me (her own) is gorgeous.
Luckily I have not told anyone at work about my blog so the Brides to be will not see their cards.

Thank you for looking, Jacquie xxx


Thursday, 20 March 2014

Koi


Morning my crafting friends, good of you to visit me again, its much appreciated. I have finally got round to deciding what goodies to buy with my birthday money, firstly my boots fell apart so that meant most of it had to go on a pair of shoes for work! I then set about making a list, not that I didn't already have a long list, I just narrowed it down lol! I decided on Tonic Emily Deco Frame, SB Feathers Dies, Wild Rose Specialty Die Oval Frame, Clarity Stamps Tangle Stencil and some Kraft Card. All ordered just waiting on my goodies to arrive so roll on Easter hols when I can play lol!

I am at present having a go at two wedding cards I have been asked to make from the girls I work with for two others we work with who are both getting married soon. So I have been questioning them about their plans, colour schemes etc to get some ideas, hopefully I shall finish the first one to get it on here soon, have not had much time to do anything lately!

Now, todays card is another Sheena Douglass, I used SD Oriental Koi and Waterlilies Stamp. I started by making an 8" X 8" card out of Gold card, sorry cannot remember where I got this from, it may have been Create and Craft, I matted this up with Lidls Red card then more of the Gold card. Using the back of Crafters Companion Centura Card I inked all over with Tim Holtz Distress Inks Bundled Sage and Tumbled Glass and blended together to try and make it look like water! On top of this I stamped the Koi, Waterlilies and Ripples as seen with TH Black Soot. It was only after I went and stamped that I feel the ripples should possibly be the other way round, horizontally instead of vertical? Was not sure but hey, too late now! For the Koi I painted on TH Ink Squeezed Lemonade followed by Dried Marigold and Fired Brick, the Waterlilies I painted with TH Ink Bundled Sage and Crushed Olives and added a little Tumbled Glass onto the ripples.  I dried these off and added three coats of Pinflare Glaze over the Koi and Waterlilies, letting each coat completely dry before adding another one.

There you have the finished card, I have left the sentiment off as I may give this to my Father-in-Law for Fathers Day, he used to keep Koi up till about 3 years ago, so until I have decided I will keep it blank but the sentiment will go in the space under the smaller Koi.

Thank you for looking, Jacquie xxx

Tuesday, 18 March 2014

Cherry Blossom


Hello my crafting friends, hope today finds you all safe and well? Sorry for not getting round to your posts yesterday will try and look at everyone's today.

Wasn't the weekend lovely, would be so nice to have a long summer. We can but hope!

For todays card I wanted to print the Sheena Douglass Oriental Cherry Blossom Tree stamp to have as a focal point on my card but being as the stamp is such a large one the only die I had to cut it with was the SB Grand Decorative Circles so this meant the card to had to be a large one lol! I stamped the image and verse onto White card, die cut and whilst still in the die using a brayer I applied some Tim Holtz Distress Ink Crushed Olive across the base of the image and over the verse to look like grass, then did the same with TH Tumbled Glass across the top for the sky, I then coloured in the tree with Promarkers. Leaving it still in the die this meant it left the white edge around the image. 

I  embossed with the same die onto a piece of Creative Expressions Foundation Card Blush card and cut round the edge and matted the image on top so the card underneath came through the die cut on top.

I made an 8" X 8" card with Crafters Companion Centura Pearl Card and matted it up with some CE Blush Card. With some Blue Miri Card I stamped SD Oriental Sakura stamp around the edge of the card using my Versamark Ink Pad and left to dry. Once dry I matted and layered this up onto my card and attached the focal circle towards the top of the card. Using more of the Blush and Miri card I die cut with SB Large Circles three circles and matted and layered together as seen with the smallest layer printed with my sentiment from Creative Expressions Treasured Memories Unmounted stamps. I attached this to the bottom right corner of the card.

There you have the finished card.

Thank you for looking, Jacquie xxx


Sunday, 16 March 2014

Painted Blossom


Morning crafters, hope this finds you all well? I do appreciate you coming along and having a look at my blog, if you have a blog of your own then please leave the link and I will return the favour.

Thank you to everyone for the Birthday wishes for my Hubby and myself, we had some good times down the Bowling Alley. i really need to brush up on my skills it has been so long lol!

I returned to my Sheena Douglass Oriental Collection for the next few cards starting with the Sakura stamp and the Sakura Embossing Folder. I stamped the Sakura blossom on a strip of White card twice with Tim Holtz Distress Ink Black Soot then painted it with Acrylic paints using Platinum White, Crimson Red and Light Green, once dry I inked around the edge with TH Victorian Velvet and matted it up onto some Pastel Green Miri Card.

I embossed a piece of White card with the S.D Oriental Sakura Embossing Folder and embossed around the edge with TH Victorian Velvet, I matted this onto the base card, attached the painted strip in the center and placed a sentiment from Hunkydory in the bottom right corner.
There you have the finished card, dimensions are 7" X 5". Sorry for the wonky photo folks.

Thank you for looking, Jacquie xxx

Friday, 14 March 2014

Hubby's Birthday!


Morning crafters, hope this finds you all safe and well, what a glorious week it has been weather wise, hopefully we shall see a lot more.

Now today is my husbands 49th Birthday and this is the card I eventually made for him, I say eventually as this is the third one! The first one I did not like, the second, after completing it I thought would be nice for his 50th next year(!!!) so I finally did this one for him lol! The other two were of Motorbikes as he is a biker so I settled on the car lol I shall show his card for next year at the end of this post, he does not look at my blog so he wont see it! 
Anyhow, I wanted something quick and simple after two attempts already so decide on an easel card, I folded the Crafters Companion Centura Pearl card in half, then the top in half again for the easel and matted some Black card onto the base and the front bit. Then matted and layered some backing paper from Debbie Moore's CD Rom Cards for Men Vintage Transport 4. From the same Cd Rom I printed the Vintage Car, Glasses & Gloves, matted them onto Black card then attached the car to the front of the easel and the Glasses onto the base to form a stopper.

On the PC I typed up my sentiment, die cut with SB Nestabilities Standard Circles Large, inked through the die with Tim Holtz Distress Ink Crushed Olives and matted this onto a piece of Black card that had also been die cut with the same die. I attached this to the base of the card, next to the Glasses to help form the stopper. 

As you will see from the main image I also made the envelope from the CD to match.

Folded flat the dimensions are 5" X 7".  There you have the finished card.

I know it quite similar to the card I did for my brother at the beginning of the week so my apologies for that.

Wednesday, 12 March 2014

Happy Birthday!

Morning crafters, hope you are all safe and well? If not lots of love & hugs sent your way.

I would just like to thank you all for the lovely Birthday comments on Monday, had a wonderful time, got loads of money so some will be spent on crafty stuff, I have a long list lol! I got a new mobile phone and a beautiful bouquet of flowers from my kids and hubby gave me money and bought tickets for us to see Chris Packham (Spring/Autumn Watch)talk about his life, photography and wildlife which we went to see last night, unfortunately the show was cancelled as Chris was stuck in none moving traffic in Chelmsford! They are going to reschedule later in the year. We also went out Monday night bowling which was good fun, so a good birthday was had.

Today's card is one I made for my Nephews birthday last week (6th), I never got round to posting it up then so thought I would show it to you today. It was a very quick and easy card to do.

I used a sheet of Crafters Companion Centura Pearl Pastel Card and folded it in half Portrait. Using a piece of patterned paper from the Tattered Lace Magazine, I ran this through Sheena Douglass Embossing Folder Distress Splatter and matted this onto the base card. Now I wish I had matted it up on White card first, then attached it to the base card as this would have looked better with an extra layer.

Using Debbie Moore's Cd Rom Cards For Men Vintage Transport Volume 4 I printed off the Pyramid Airplane onto Photo paper, cut out and glued each layer together and placed it in the center of my card.

The sentiment came from an old card kit of Hunkydory's, I attached this under the image on the card.

There you have the finished card, I did say it was a quick and easy one.

Next post Friday.

Thank you for looking, Jacquie xxx

Monday, 10 March 2014

Happy Birthday Brother!

Morning crafters, hope this finds you all safe, well and enjoying the sunshine we are having of late, all be it still cold but at least the sun is shining!

Thank you so much for all your lovely comments on my last post, I am still not 100% but here's hoping I will be okay at work lol!

Today is my Twin Brothers Birthday, so Happy Birthday David! This is the card I made for him, an easel/stepper card, I have since put DAV 1 on the number plate lol! I wanted to do something different from the normal portrait/landscape card for him so tried this and I am pleased with the finished product though I can see improvements on it but that's me!

I started with a sheet of Create and Craft Gold card and folded it in half Landscape. With the top half I cut to the fold about two thirds in, with the largest card on the left I folded that diagonally to form the easel card and cut off any excess, the card on the right I folded in half to form the stepper.

Using Debbie Moore's 'Cards For Men' Vintage Transport Volume 4 I printed off the backing paper using copy paper and the classic car image page onto Photo paper, this had various images of the car, glasses and boarder, I chose two images that would fit on my card and matted and layered them up first with Black card (Lidls) then more of the C & C Gold card. Seeing as the base card was Gold I matted the easel and stepper with Black card before attaching my images onto them. I added a boarder down the side of the easel image to fill the space and attached the backing paper to the base of the card as seen.

Using another boarder I matted and layered it up onto Black card followed by Gold card and attached this to the base of the card with Foam pads to raise it up to use as my stopper.

On the PC I typed up my sentiment, inked round the edge with a Gold Pen and inked with Tim Holtz Distress Ink Bundled Sage over the card leaving the words clear, matted this up with Black card and attached it to the base of my card under the boarder stopper.

There you have the finished card, dimensions are 5" X 7" folded. Next post on Wednesday.

Thank you for looking, Jacquie xxx

Saturday, 8 March 2014

A cottage in the country...

Morning crafters, another weekend is upon us and in the third month already!!! I hope this finds you all safe and well?

Thank you so much for all the wonderful comments for my card on Thursday.
I am hoping to return to work on Monday if my stomach plays nice, well got to go either way otherwise I don't get paid! Chest infection cleared but left with really bad stomach upset, I don't remember being so ill for years, my immune system must be low!

Now if you remember about 4 days ago I did the window card and mentioned that I was going to add the window box, well for todays card I have!

I had cut the Spellbinders Shapeabilities Die-lites Window Two out when I did the other card and added a piece of White card behind the filigree at the top. To make this look more like a window I decided to add some acetate behind the windows and make some 'curtains'! I had a little piece of scrap card that I had stamped with Justrite Dotted Fronds Background Stamp and heat embossed with Papermania White Embossing Powder so I scored it at intervals to make a concertina shape then stuck these to ether side of the window, they were level honest lol! Obviously you would not see inside a window so I added a piece of Black card at the back to make it look right, it was whilst sticking this on that the curtains moved out of line and I couldn't put them back, still look more like our windows now where the curtains are never opened right lol!! 

I die cut the SB Shapeabilities Die-lites Window Box, coloured it in with Promarkers, trimmed it to fit and attached it to the front of the window.  Using some Creative Expressions Foundation Card-Spring Green I die cut SB Imperial Gold-Gold Lables Four twice, onto one I embossed with SB M-Bossibilities Folder Tweets and Twigs then matted the window up on top.

On the PC I typed up a sentiment from 'Just the Right Words' book by Judith Wibberley, printed it off and die cut with a smaller die from SB  Gold Lables Four, inked through the die with TH Tumbled Glass and matted this onto the other Green Lables Four card.

For the base I folded a sheet of Create and Craft Silk Card-Lime Green in half landscape. I found some card that I thought would make good as a 'wall' so I embossed this with Creative Expressions Sue Wilson Embossing Folder Garden Lattice and rubbed over some TH Distress Ink Vintage Photo, I matted this onto the base card and attached the window and sentiment on top as seen.


There you have the finished card. next post Monday.

Thank you for looking, Jacquie xxx


Thursday, 6 March 2014

I've been Thinking of You

Morning crafters, thank you for coming back to view my blog it is very much appreciated, I love reading your comments to see whether you like what I have created or not, criticism is welcome too, not everyone is going to like everything. 

Today's and Saturdays cards are what I did during my second week of illness, I think I only managed about 4 cards during the whole time, still better than none lol!

To start I folded a sheet of Crafters Companion Centura Pearl Card in half and matted it with a sheet of Lidls Blue card. With a piece of CC Centura Pearl Pastel card I embossed it with Sheena Douglas Embossing Folder Trailing Ivy, rounded the corners and rubbed Creative Expressions Metallic Gilding Wax Spring Green over the leaves.

Onto the back of some CC Centura Pearl Card I stamped the bird box from Heartfelt Creations Spring Season Pre Cut using Tim Holtz Distress Ink Vintage Photo and die cut with Spellbinders Lables Twenty, whilst still in the die I inked round the edge with TH Tumbled Glass. I coloured the image in using Promarkers.

I stamped my sentiment from Creative Expression Kind Thoughts with TH Vintage Photo, inked in the die with Tumbled Glass again and die cut with a smaller die from Lables Twenty. With more of the Blue Lidls card I embossed using the same Lables Twenty dies, now even though I only embossed these, with the E-Bosser it did cut through so I had to tape up the back before cutting round the embossed bit and mounting up the sentiment and image.

I decided where I was going to place these on the card then added a piece of Ribbon from www.beadsforcraft .co.uk  I wrapped some just below the middle then put another piece underneath and made a knot.

To finish off the card I added some Habico Self Adhesive Pearls in each of the corners.

Finished dimensions 5" X 7".  Next post Saturday.

Thank you for looking, Jacquie xxx

Tuesday, 4 March 2014

Garden View

Morning my crafting friends, hope this finds you all safe and well. What lovely weather we have had of late, its like Spring has come early!

For today's card I decided to play with the little window seeing as I have had this a while and not used it yet!! Shame on me! I did intend to put a flower box at the bottom but they hid the image so decided against it! Maybe next time.

I started with my 6" X 6" base card and matted this up with a piece of paper I had left from a sheet out of the Heartfelt Creations Delicate Asters Collection.

I die cut a sheet from the Hideaway Premium Paper Pad with Spellbinders Nestabilities Scalloped Lables One. Using the SB Shapeabilities Die-lites Gilded Gate Two I die cut four of them out using Crafters Companion Centura Pearl Card Silver and trimmed off the fancy arch at the top of each one, carefully so I could still use the gates and attached each one to the side of the Scalloped Lables One to add a fancy edge.

I die cut the SB Shapeabilities Die-lites Window Two again using CC Centura Pearl card Silver and put to one side. On the back of some CC Centura card I stamped the image from Heartfelt Creations Spring Season Pre Cut Set  with Tim Holtz Distress Ink Vintage Photo and coloured it in with Promarkers. I placed the window on top and drew round it and cut the image out to fit behind the window. I felt it did not look right with some of the image showing through the decorative frame at the top of the window so I attached a small piece of Cream card behind then glued the window in place over the image and attached both to the center of the card.

I have not added a sentiment as this could do for various occasions of which I could write on the top of the card at the bottom of the window, or add a small sentiment on top.

I am entering this in the http://promarkerchallenge.blogspot.co.uk/2014/03/week-237-theme.html

There you have the finished card. Next post Thursday.

Thank you for looking, Jacquie xxx

Sunday, 2 March 2014

Happy Blossom Birthday!

Morning crafters hope this finds you all safe and well.

I have been a naughty girl again and done my take on a Sue Wilson card, I loved the card she did on the Tool Shed the other week so thought I would have a go myself, although I have not used the same inks or stamps the idea was the same and seeing as I liked the finished product I thought I would show it to you.

My base card is 6" X 6" White card, matted up with some Create and Craft Pink Pearlescent card.

Using a sheet of cheap White card I dabbed various colours of Tim Holtz Distress Ink- Crushed Olives, Peacock Feathers, Victorian Velvet and Dried Marmalade,  I did not blend the colours just dabbed them on with the TH Distress Ink Tool.

I chose my stamp-Sheena Douglass Little Bit Oriental Sakura and inked it up with my Versamark. I stamped it three times and heat embossed with Papermania White Embossing Powder, inked up the stamp again with my versamark and stamped another three times in between the previous stamps but used Papermania Clear Embossing Powder on these.

I placed some TH Victorian Velvet on my glass mat and painted in the center of the White embossed flowers to add a touch of colour.

Using the Justrite Fancy Sentiment stamps I stamped my sentiment onto White Vellum again using my versamark and heat embossed with the White embossing powder, I cut it down to size as a banner and attached it under a bow I made out of thin Pink Ribbon (Own Stash).

I made several blossom flowers out of SB Cherry Blossom using Crafters Companion Centura Pearl Card and Create and Craft Pearlescent Pink card, inked the centers with TH Victorian Velvet, glued together and placed in the center of the bow as seen.

There you have the finished card, hope you like it?

Next post Tuesday.

Thank you for looking, Jacquie xxx